How To Use Our Emergency Templates
If you want to use any of the provided templates with your own contact data files (i.e. not using the data file templates provided), you will need to follow these instructions to ensure the field references work correctly.
For our emergency templates and instructions on using them, check out this directory.
1. Upload Your Contacts
- In the ClickSend dashboard, go to "Contacts" then click the + sign.
- Name Your List
- Import Your Contact File
- Match Your File Column Names to Our Placeholder Fields
- Once all have been matched, click confirm and your file will be uploaded.
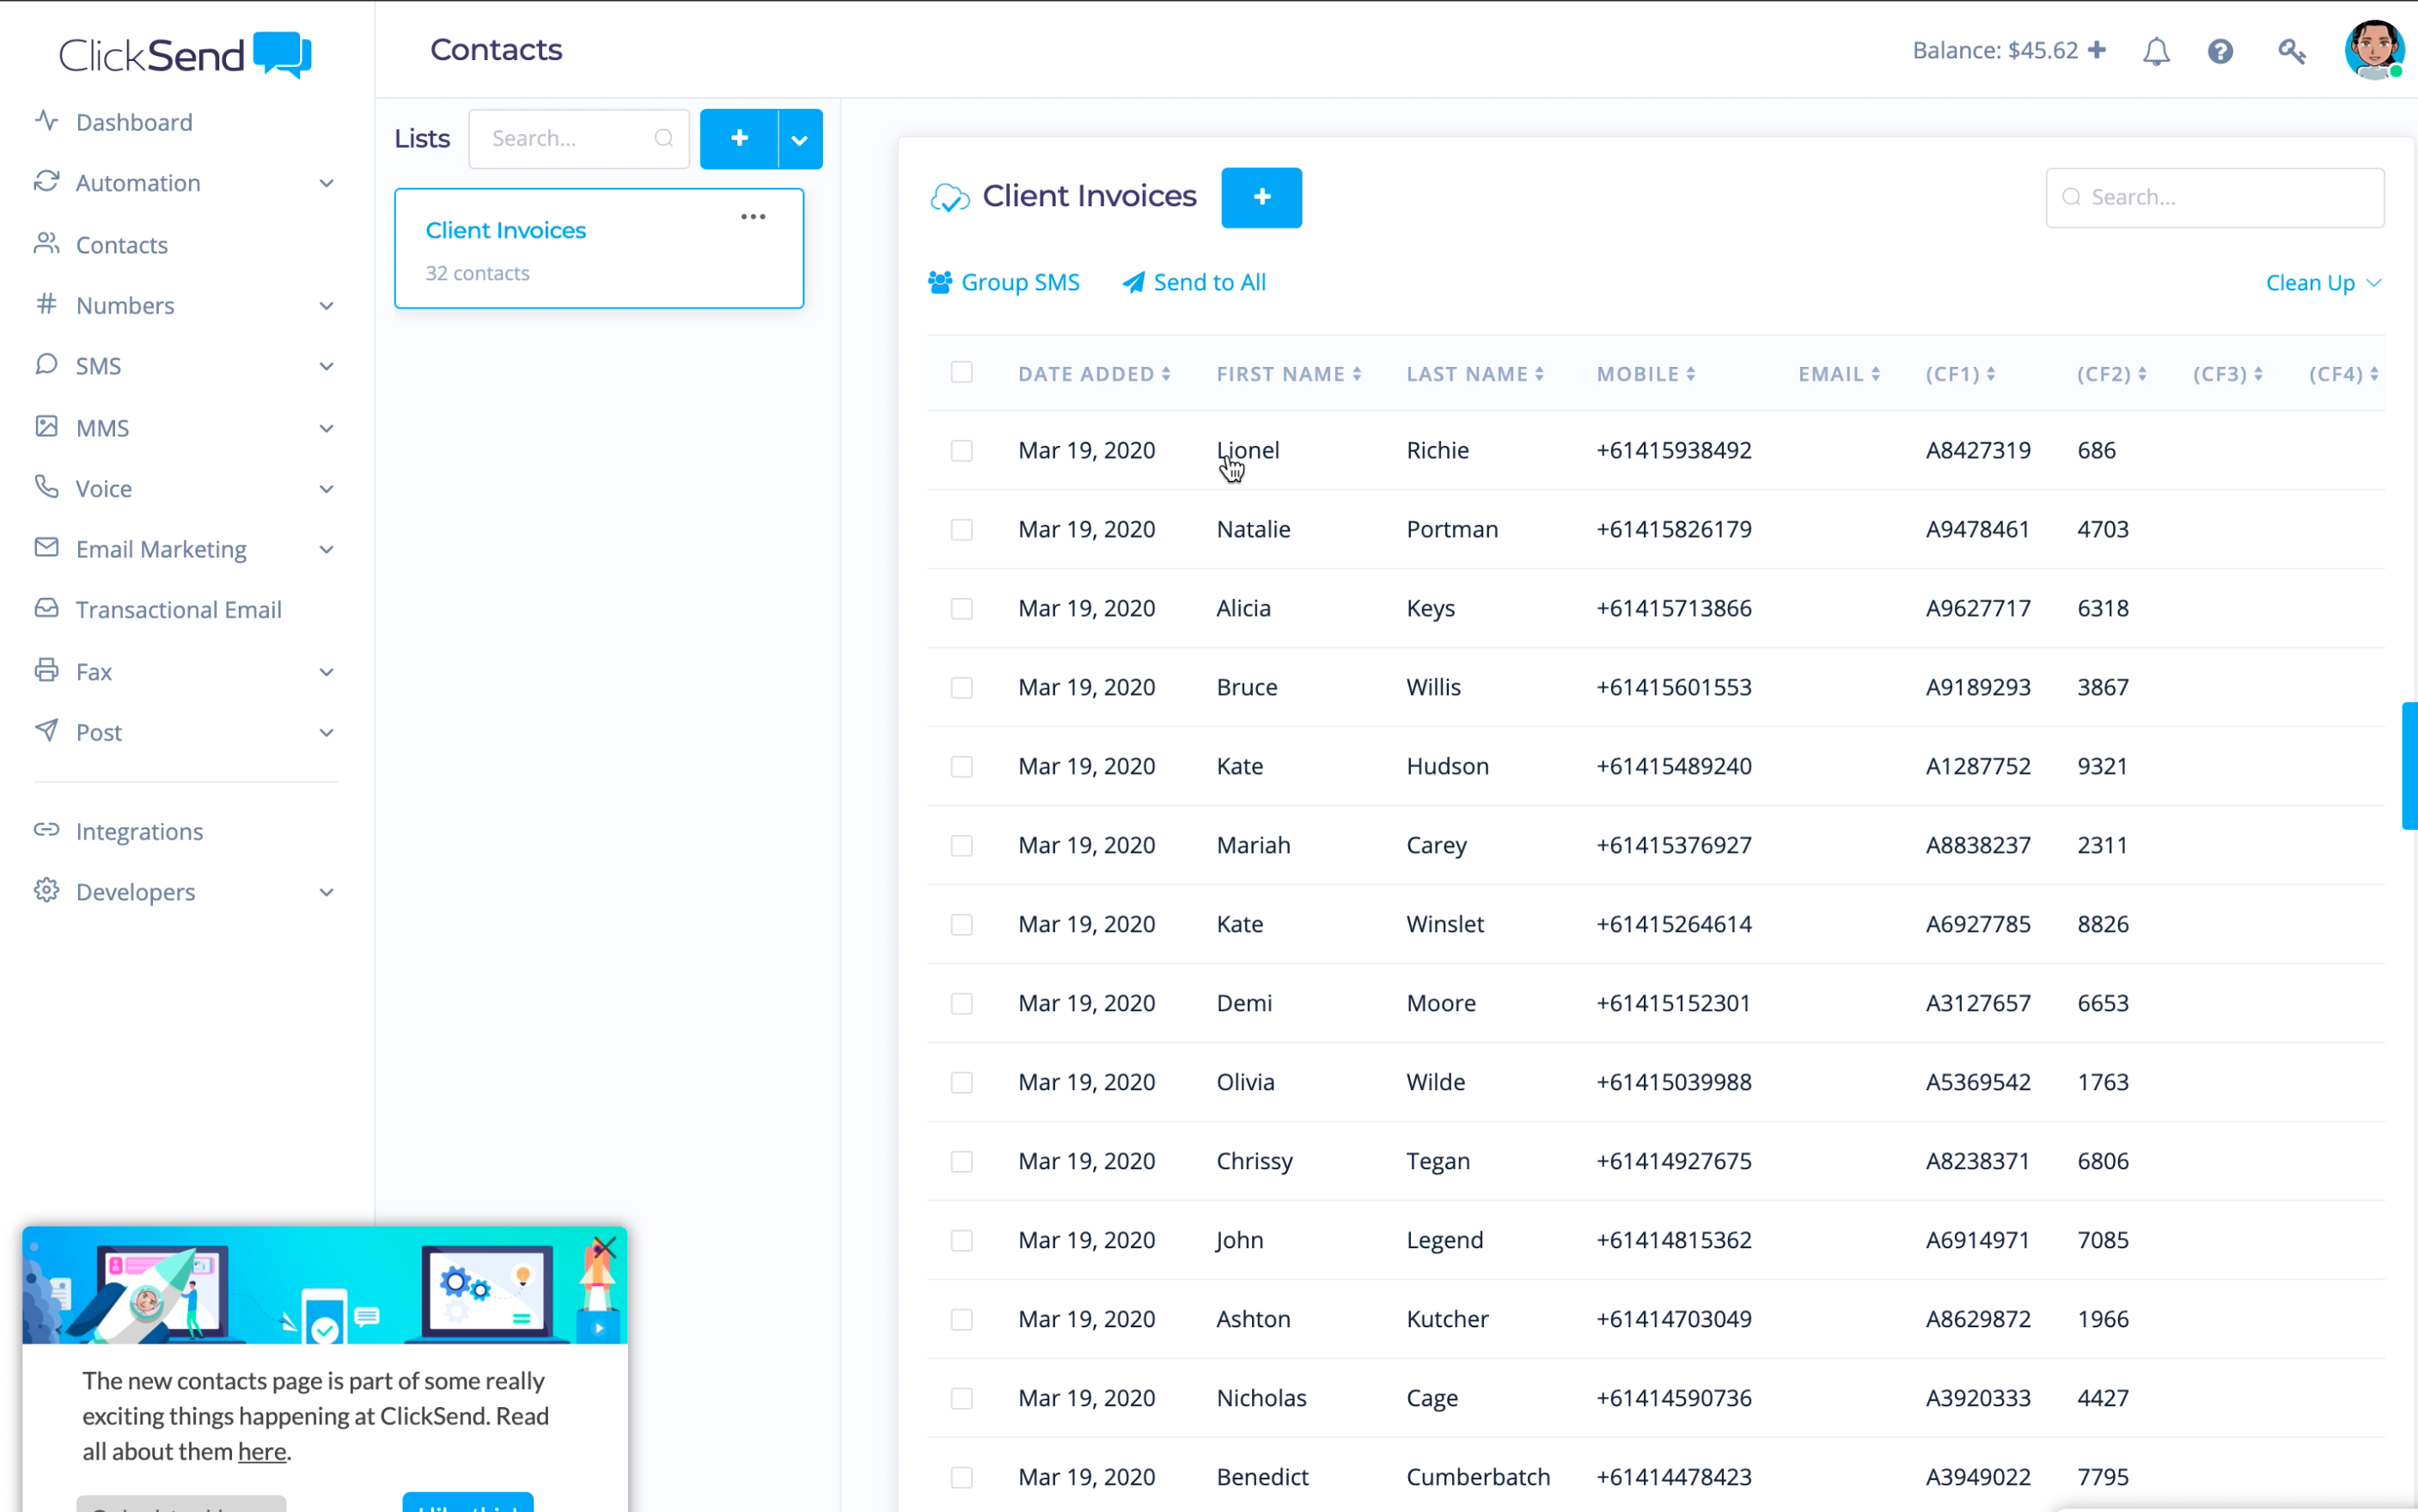
- Once this is done you should see all your contact information, displayed like this:
2. Copy Your Template
Find your chosen template from our Emergency Communications Directory.
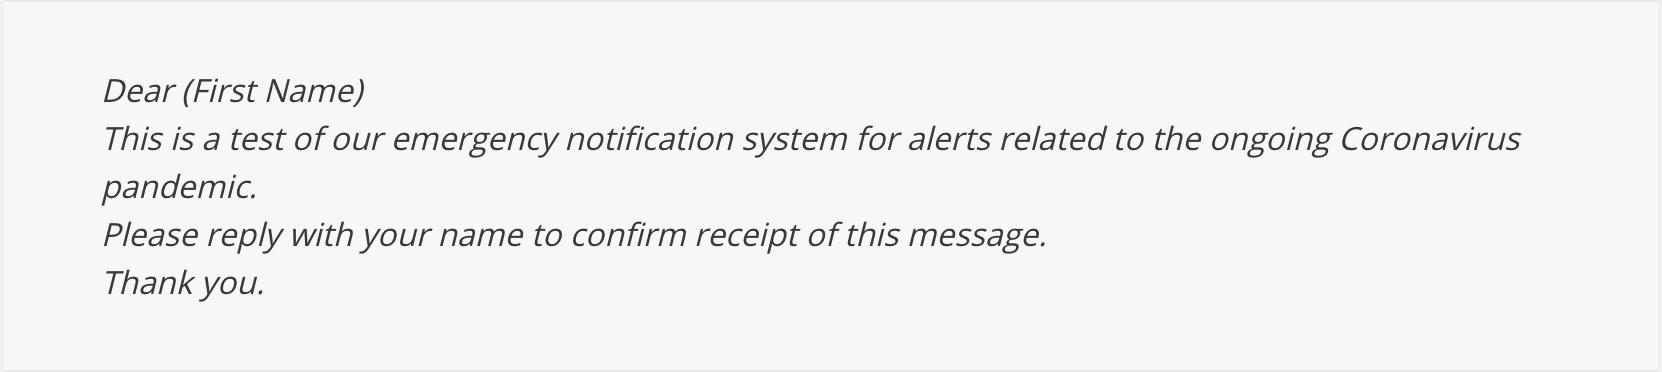
Copy the italicised copy from the template guides. They will look like this:
3. Create Your SMS Campaign
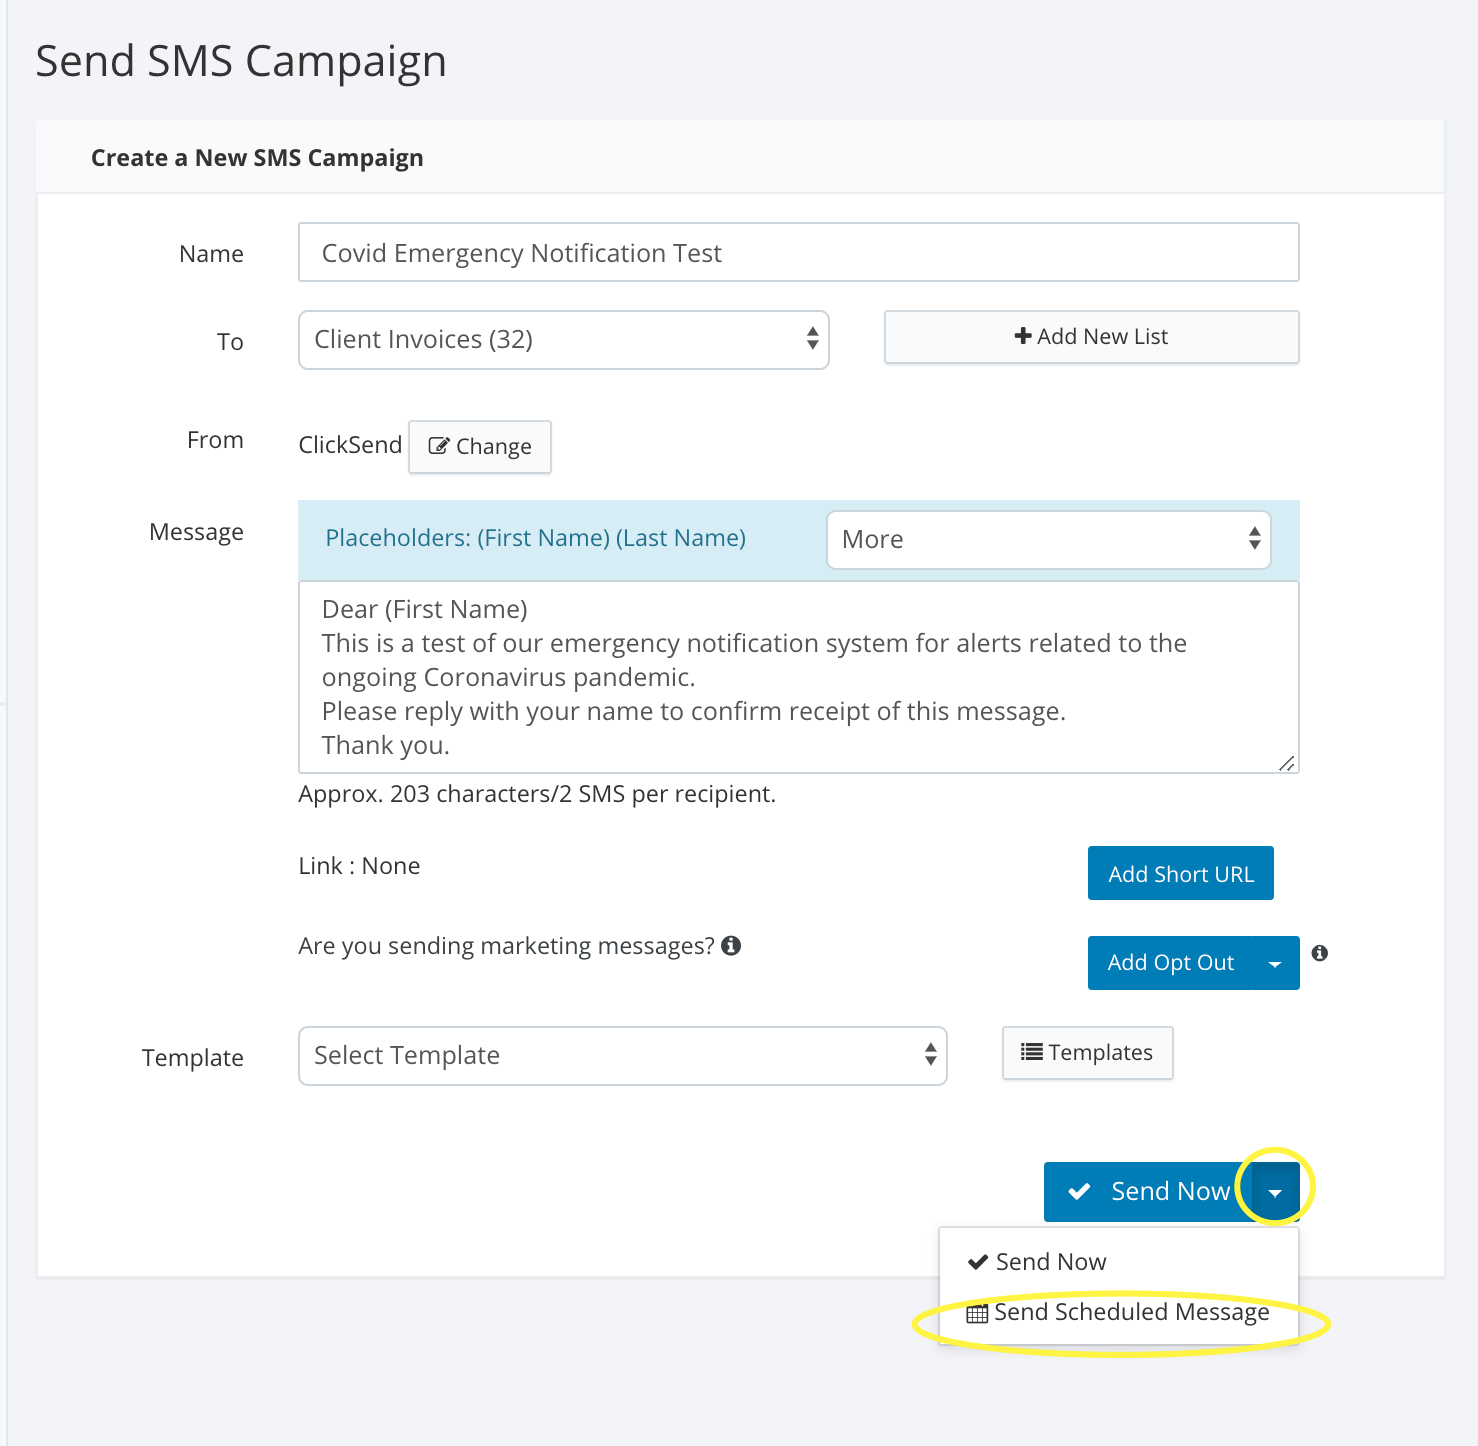
In the dashboard, click SMS in the left hand menu and SMS Campaign. Then click the blue Add Campaign button and copy your template into the message field.
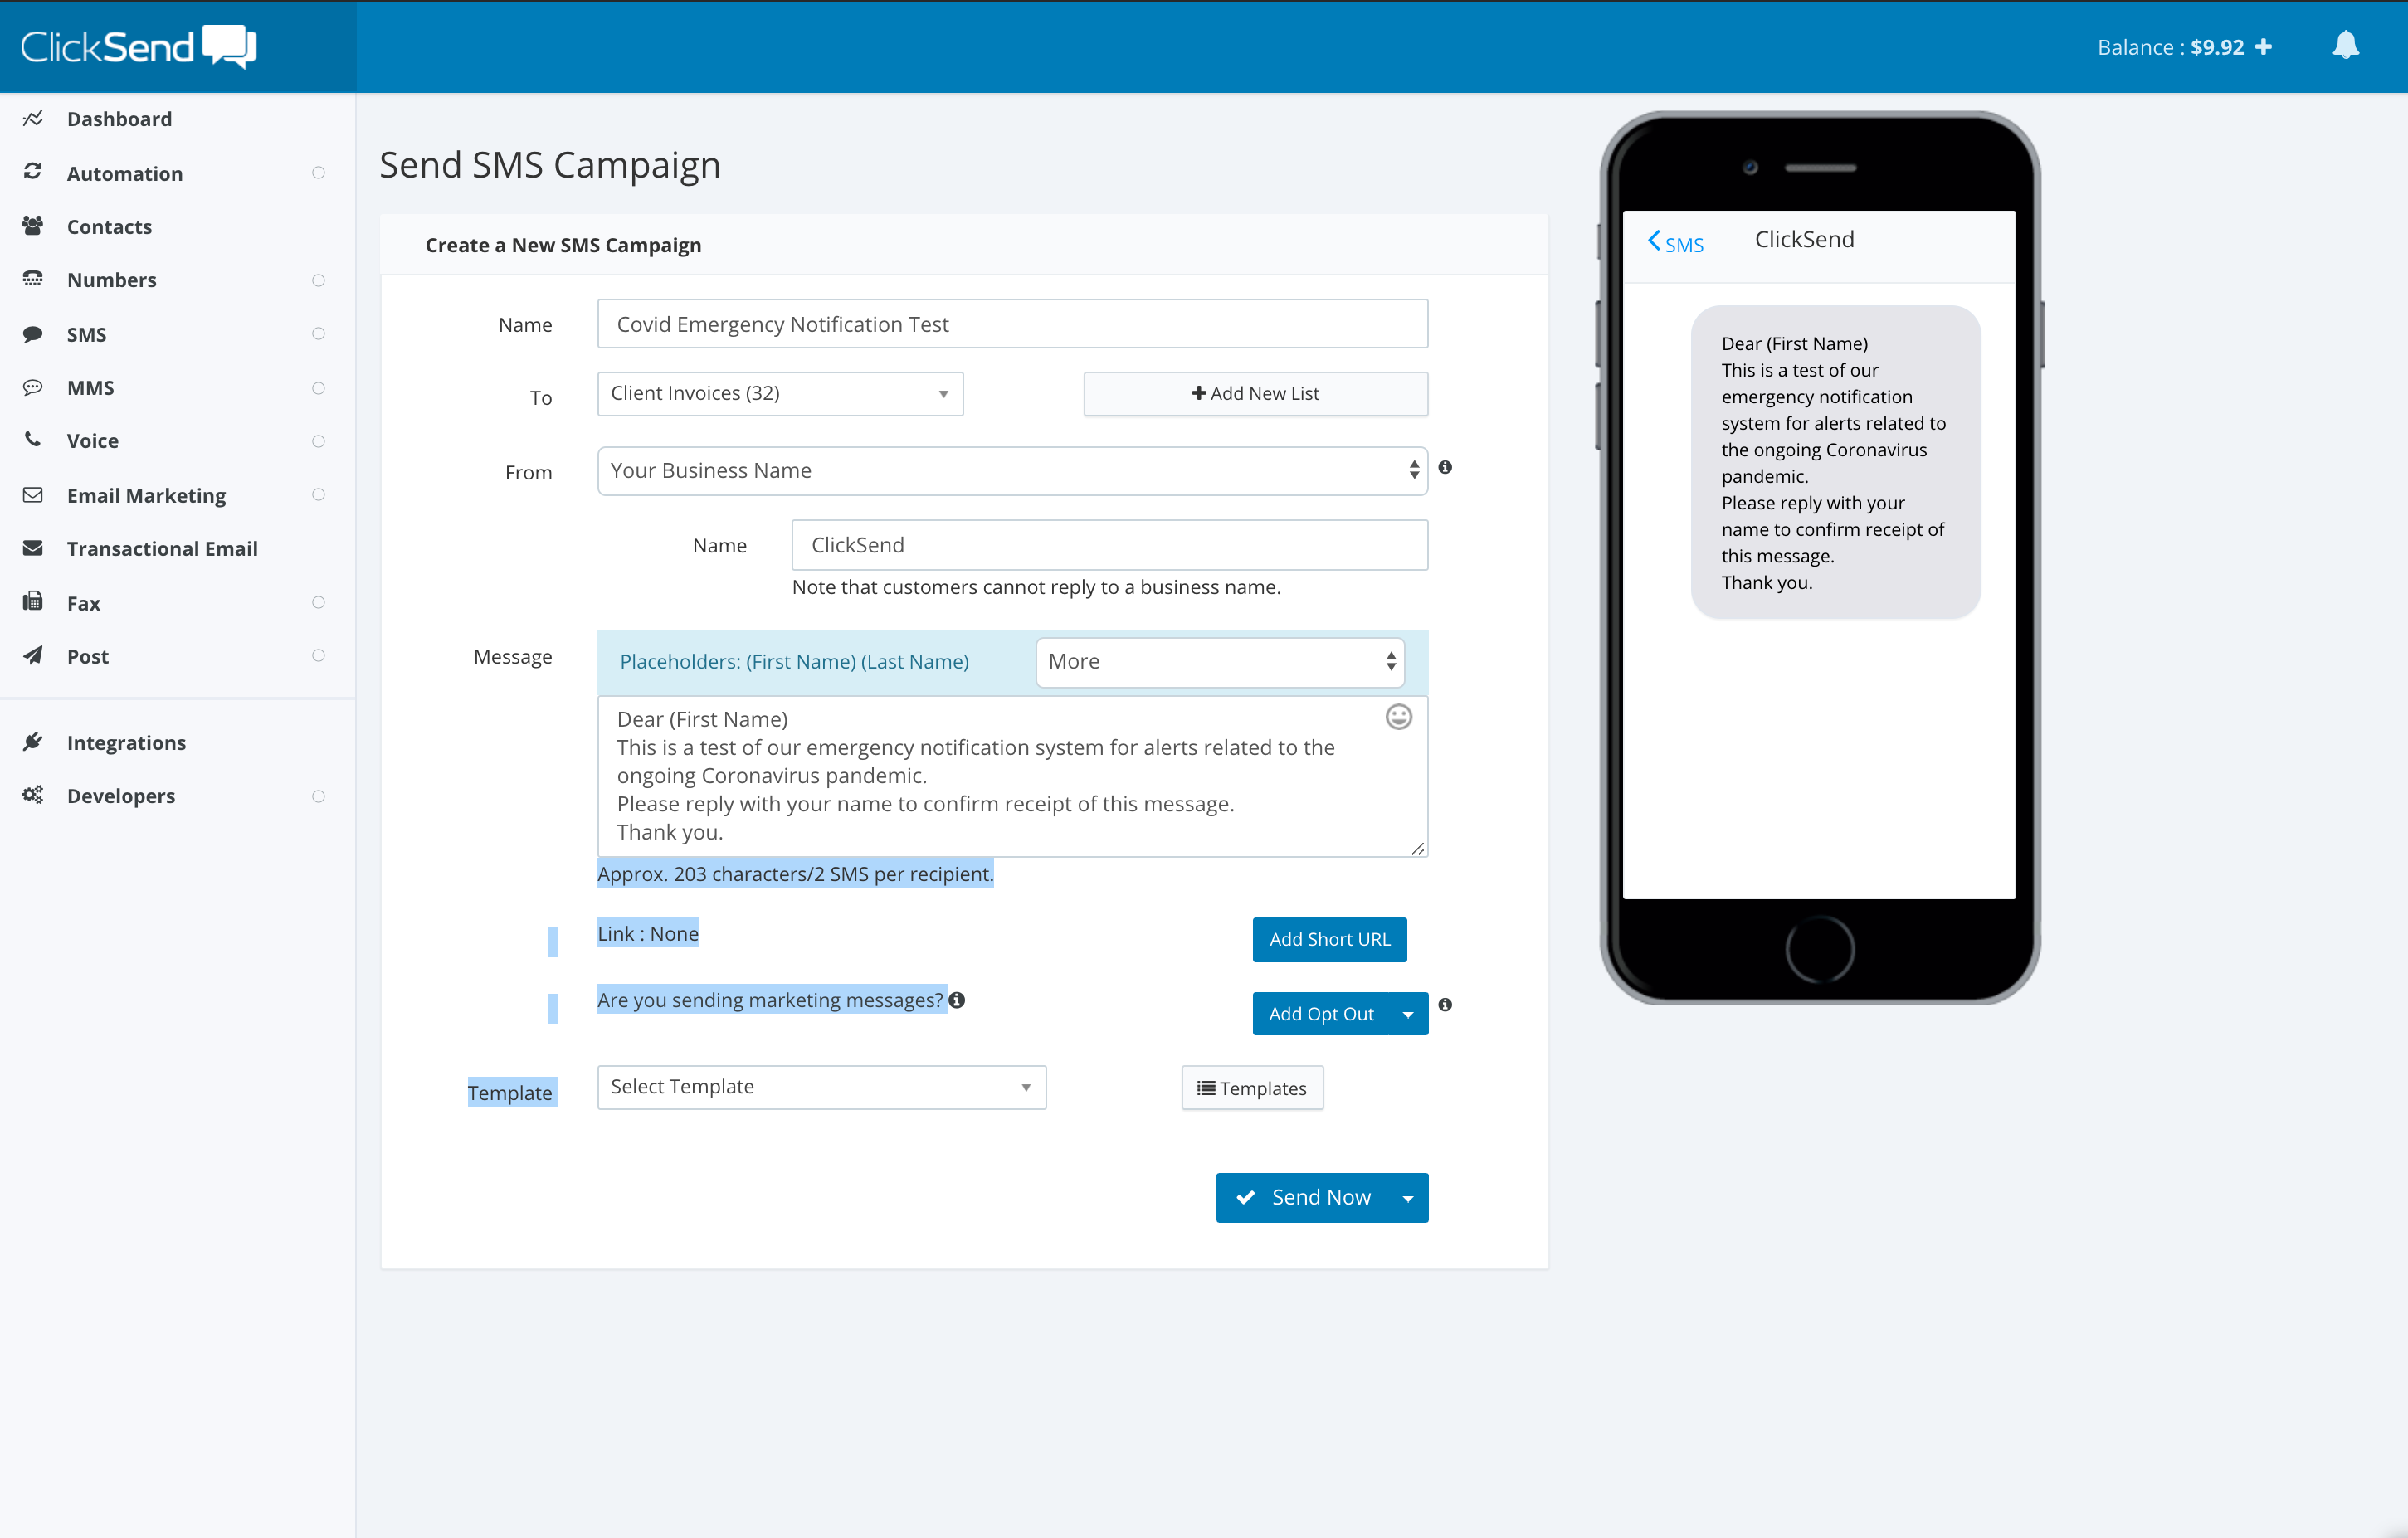
Placeholders can be found at the top of the Message field box.
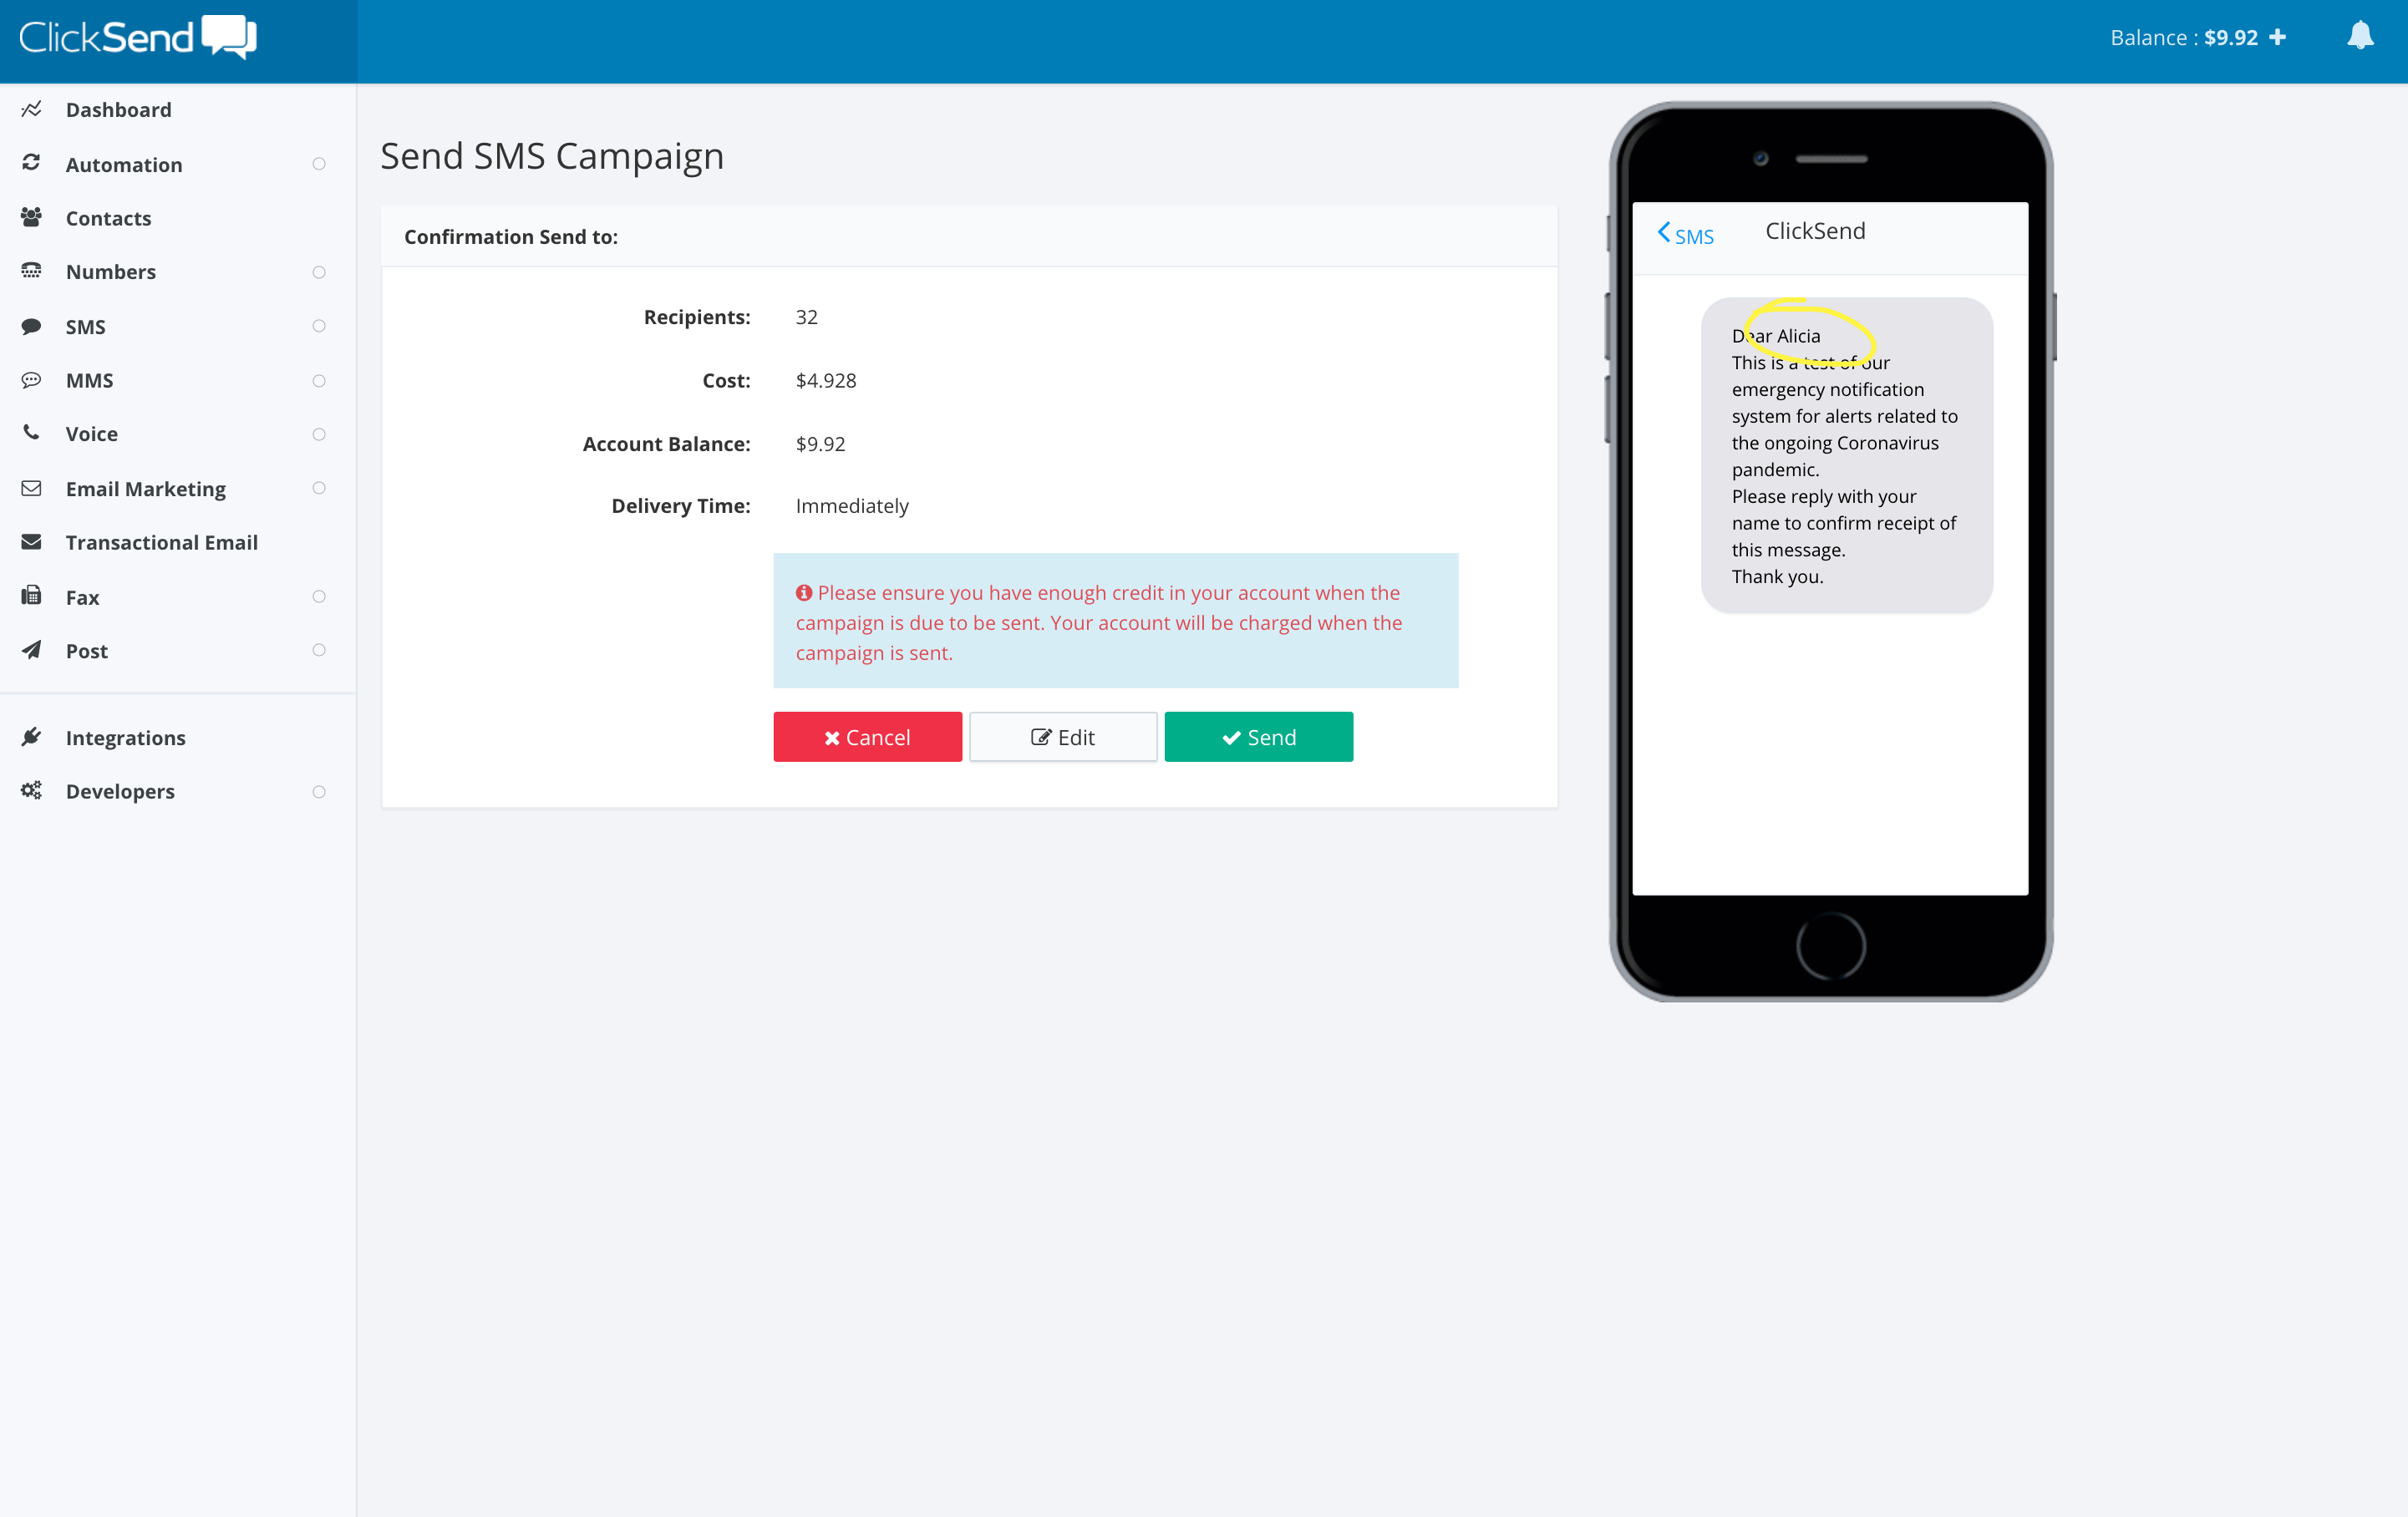
Once you click "Send Now" you'll be taken to a confirmation page, letting you know how much your campaign will cost. Note that the placeholders should populate with details from your chosen recipient list.
You can also opt to schedule your campaign - instead of clicking "Send Now", click the downward arrow next to "Send Now" to toggle "Send Scheduled Message".
For more information on using placeholders, check out this article.
If you get stuck, don't hesitate to reach out to our friendly support team. They are waiting on live chat 24/7 to assist - simply click the face in the bottom left corner of your screen.