Create Google Sheets rows for new incoming ClickSend SMS messages
Prerequisite
You need a Zapier account first. If you don't have an account, click here to create a Zapier account.
Introduction
In this article, we will try integrating both ClickSend and Google Sheets. So, what we want to achieve here is to create rows in Google Sheets for every incoming SMS.
So, let's get started.
- Create a Zap.
- Look for ClickSend SMS App.
- Select 'New Incoming SMS' trigger.
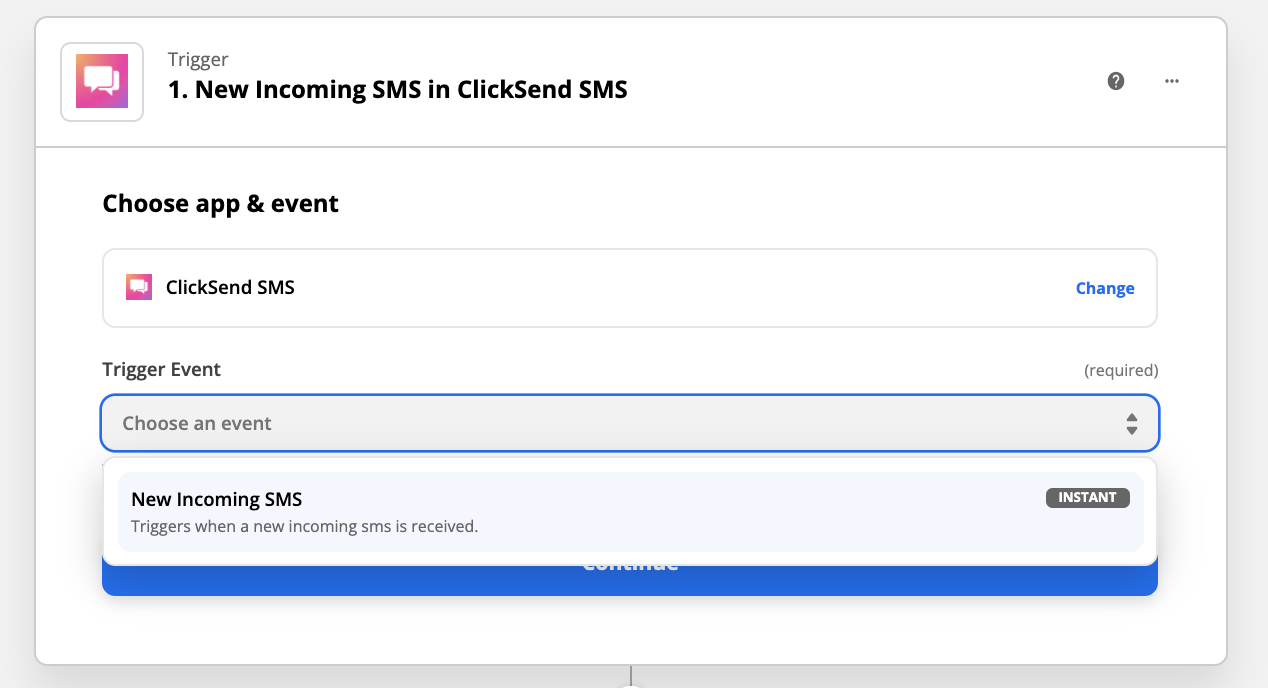
- Connect your ClickSend account and click 'Continue'.
- Click 'Test Trigger'. It will give return values that you can fetch dynamically to the action of your Zap. Then click 'Continue'.

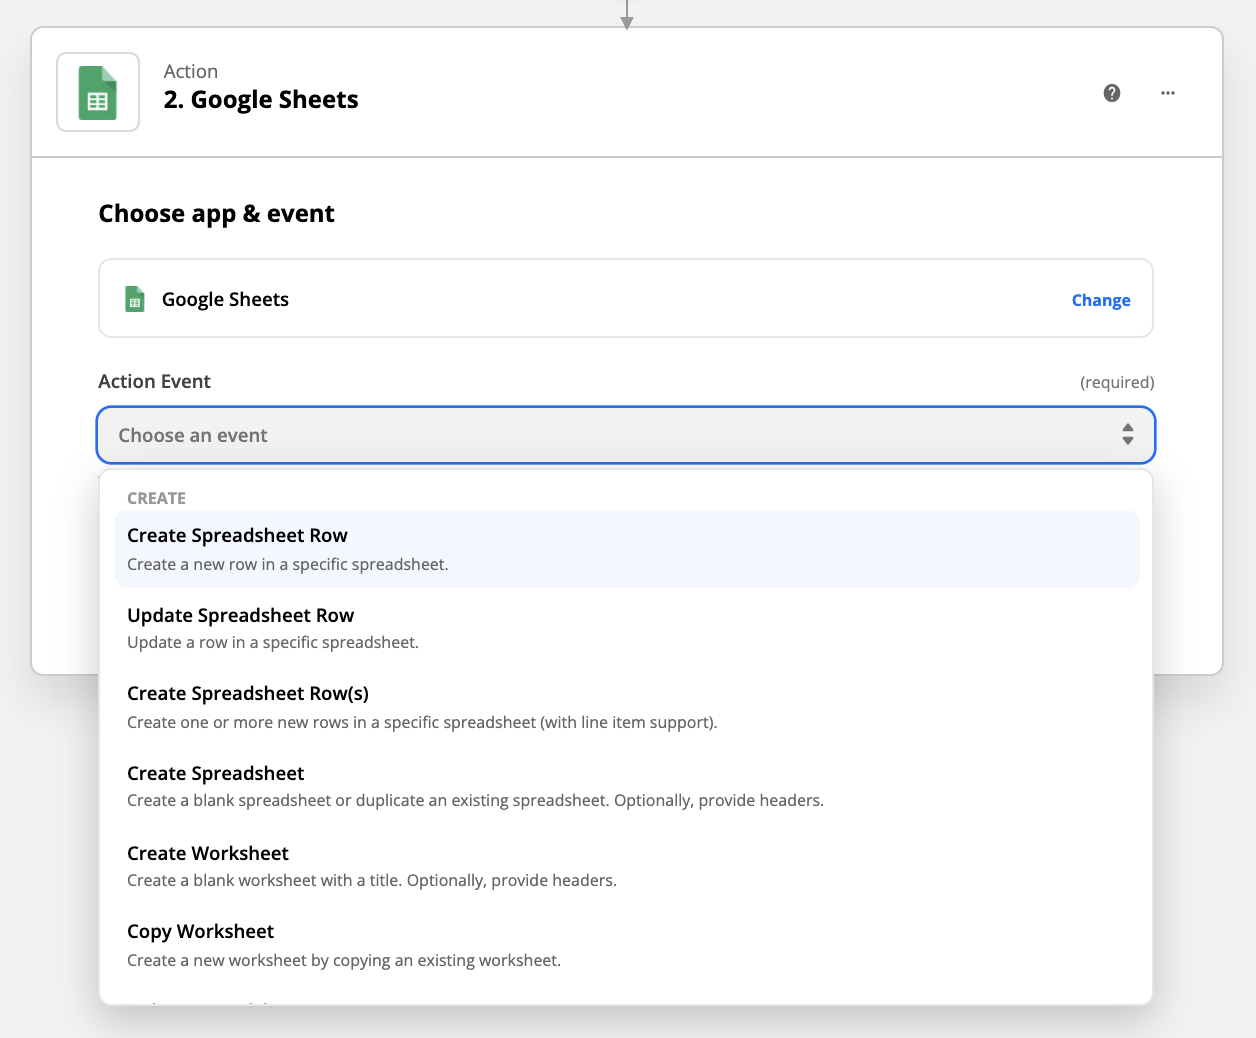
- Add an 'Action' and look for Google Sheets App.
- Add an 'Action Event' and select 'Create Spreadsheet Row' then click 'Continue'.
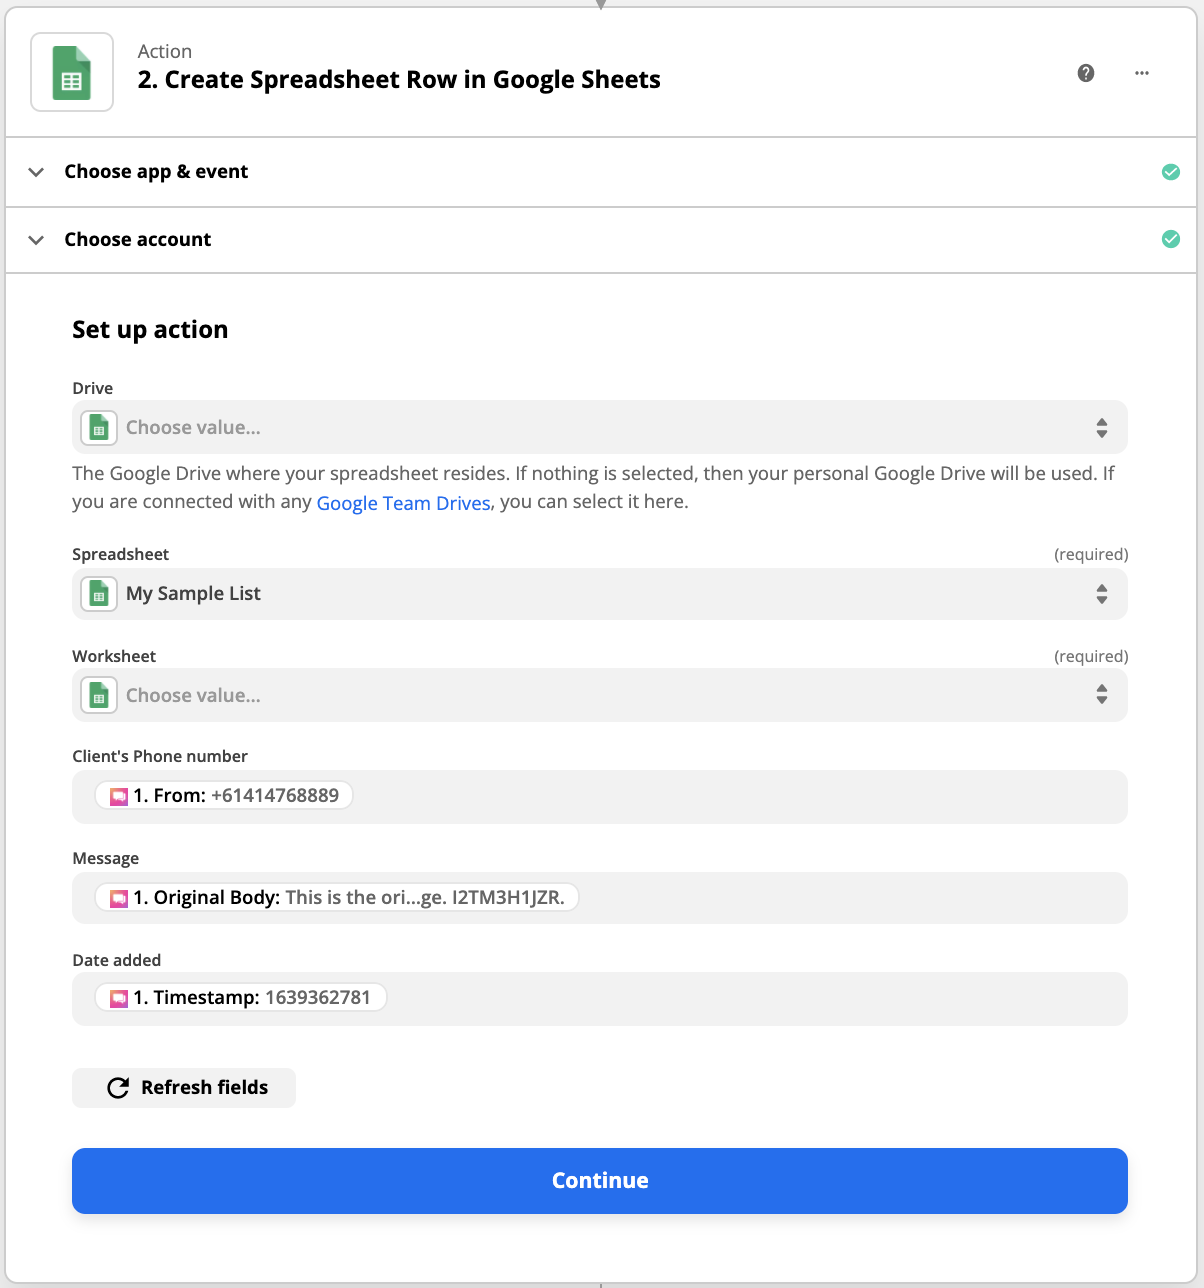
- Connect your Google Sheet account to the Zap.
- Add your Google Drive to the field. Then, select the 'Spreadsheet' and 'Worksheet' that you will use in Zap.
- Once these are selected, another set of fields will generate. Information are pulled from the worksheet you have selected.
- You can map them with dynamic values coming from the Inbound SMS. Then click 'Continue'.
- Click 'Test and continue' to confirm if the Zap is working.
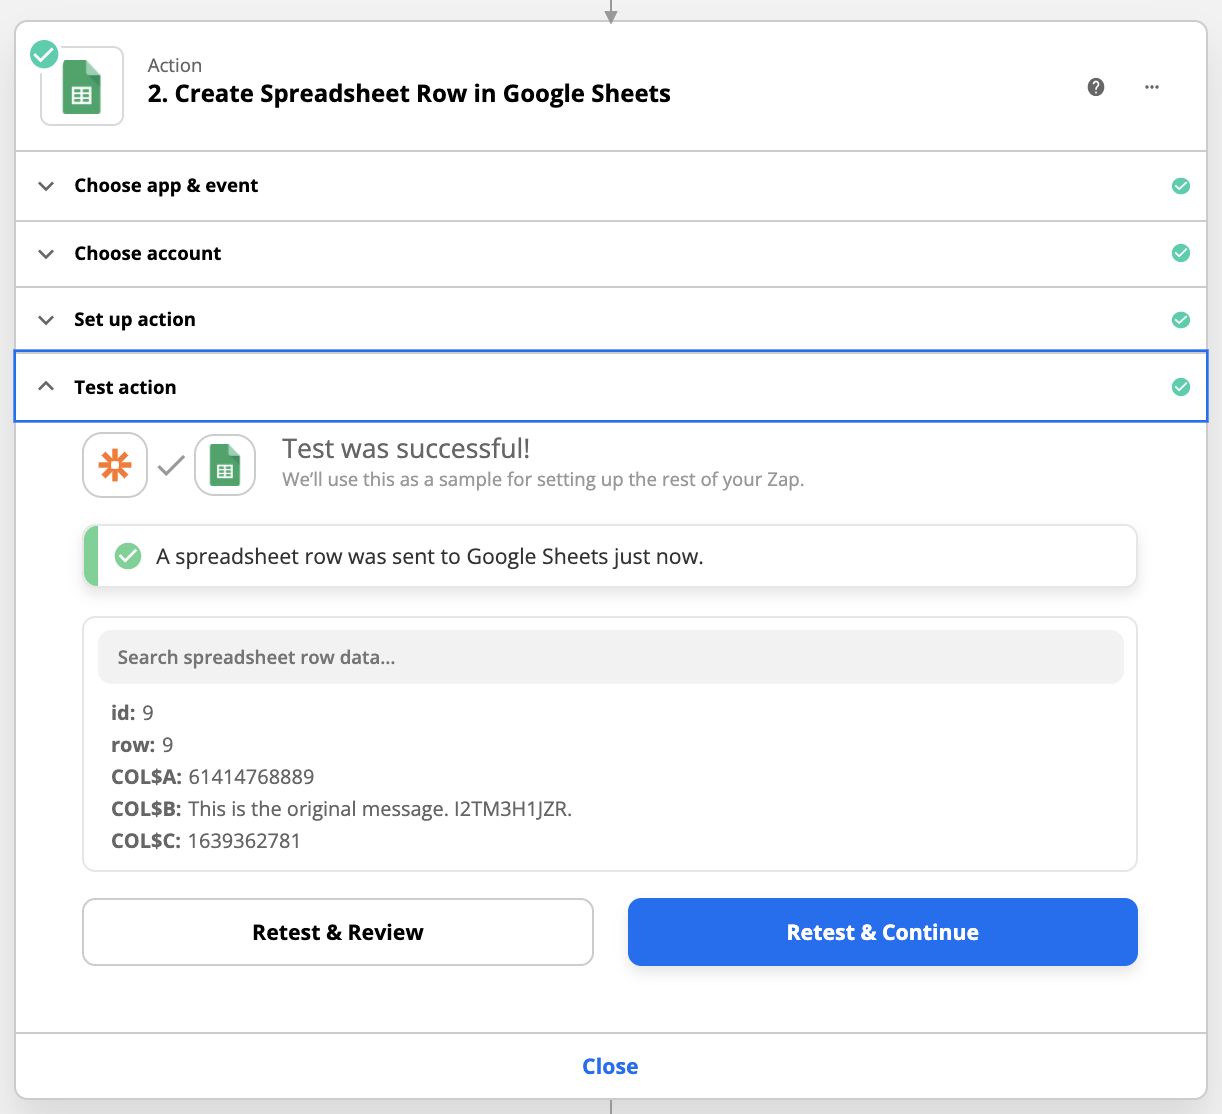
- Once confirmed, you can now enable it by clicking the 'Turn on Zap' option.
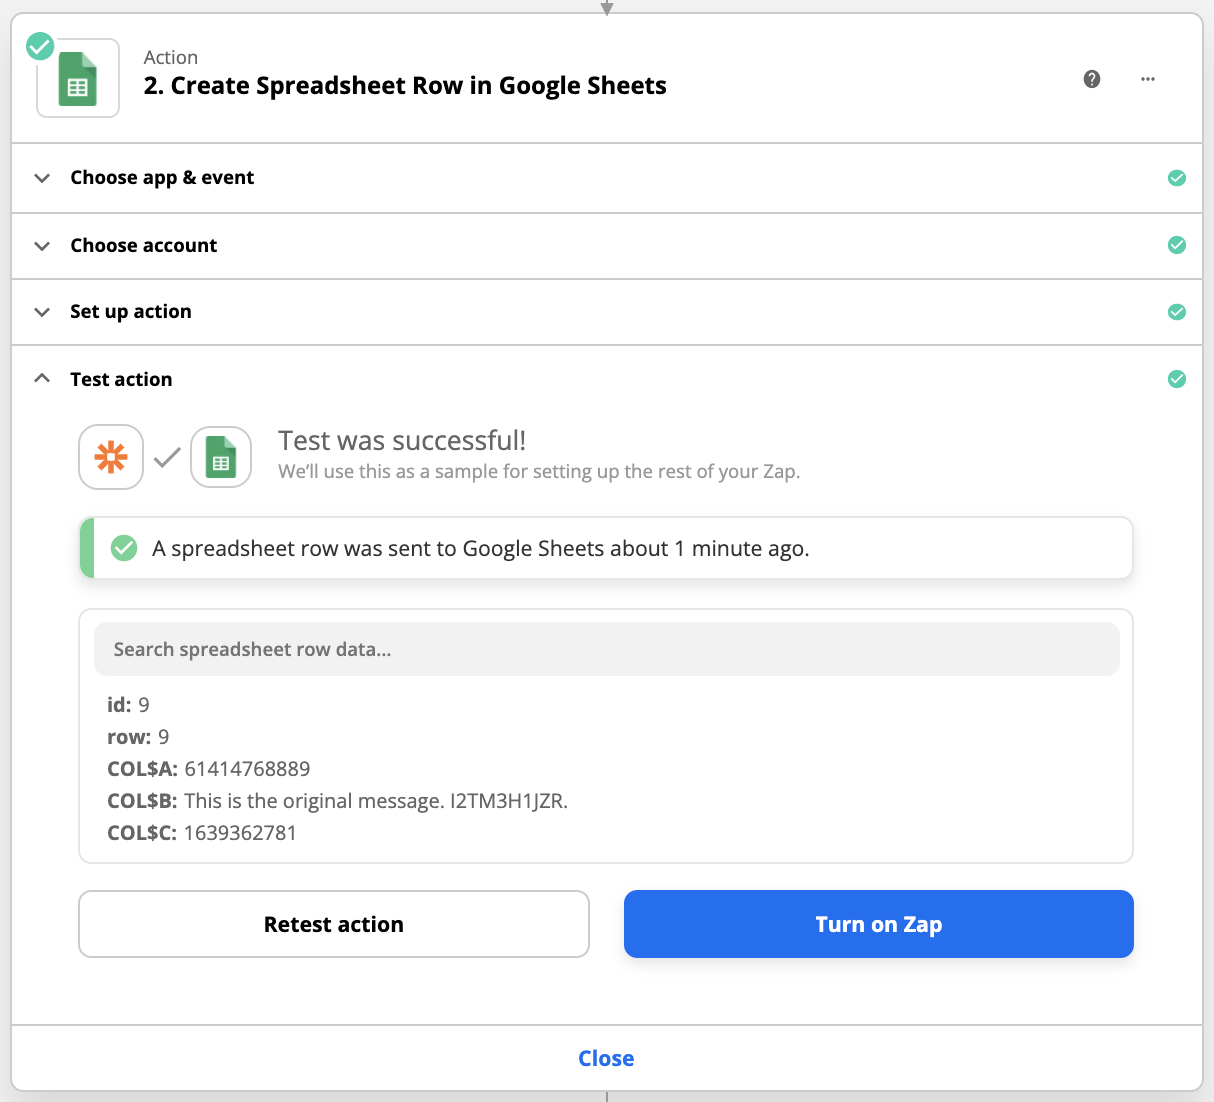
There you go! With that setup, a row is created for every incoming message.