Mailchimp - Send Notifications
In this article, we will use webhook integration to connect ClickSend to MailChimp. So what we want to achieve here is to notify us with an automated SMS to our personal mobile number every time we have a new MailChimp list subscriber.
What you need
- ClickSend API credentials. Get them by creating a ClickSend account here.
- A Mailchimp subscription plan starting at Essentials to access Automations Journeys. See MailChimp pricing here.
Setup
It’s easy to set up the integration. Just use the low code step-by-step guide below.
- Open MailChimp > Automations > All journeys > Build new from scratch
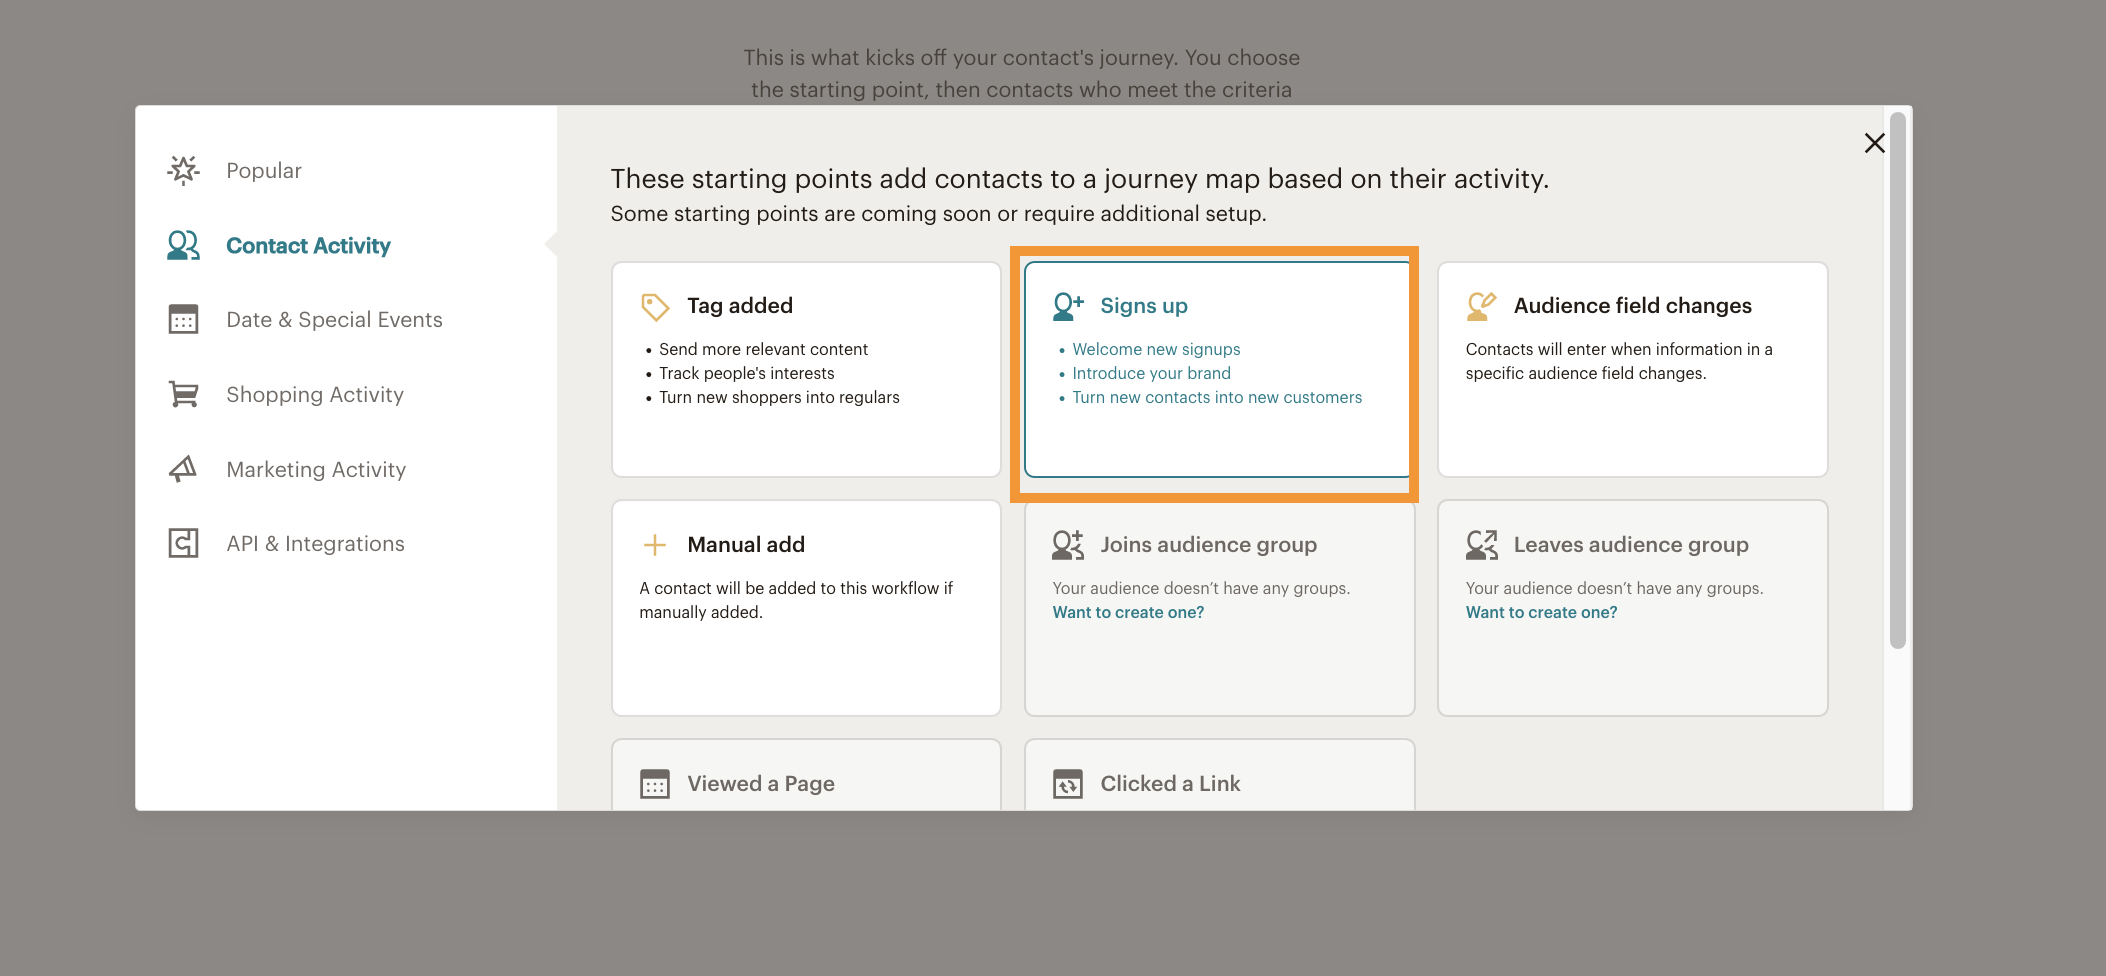
- Name your automation to continue and look for 'Sign up' trigger
- Add a journey point. This will allow you to add an action to your automation journey. Add Webhook.
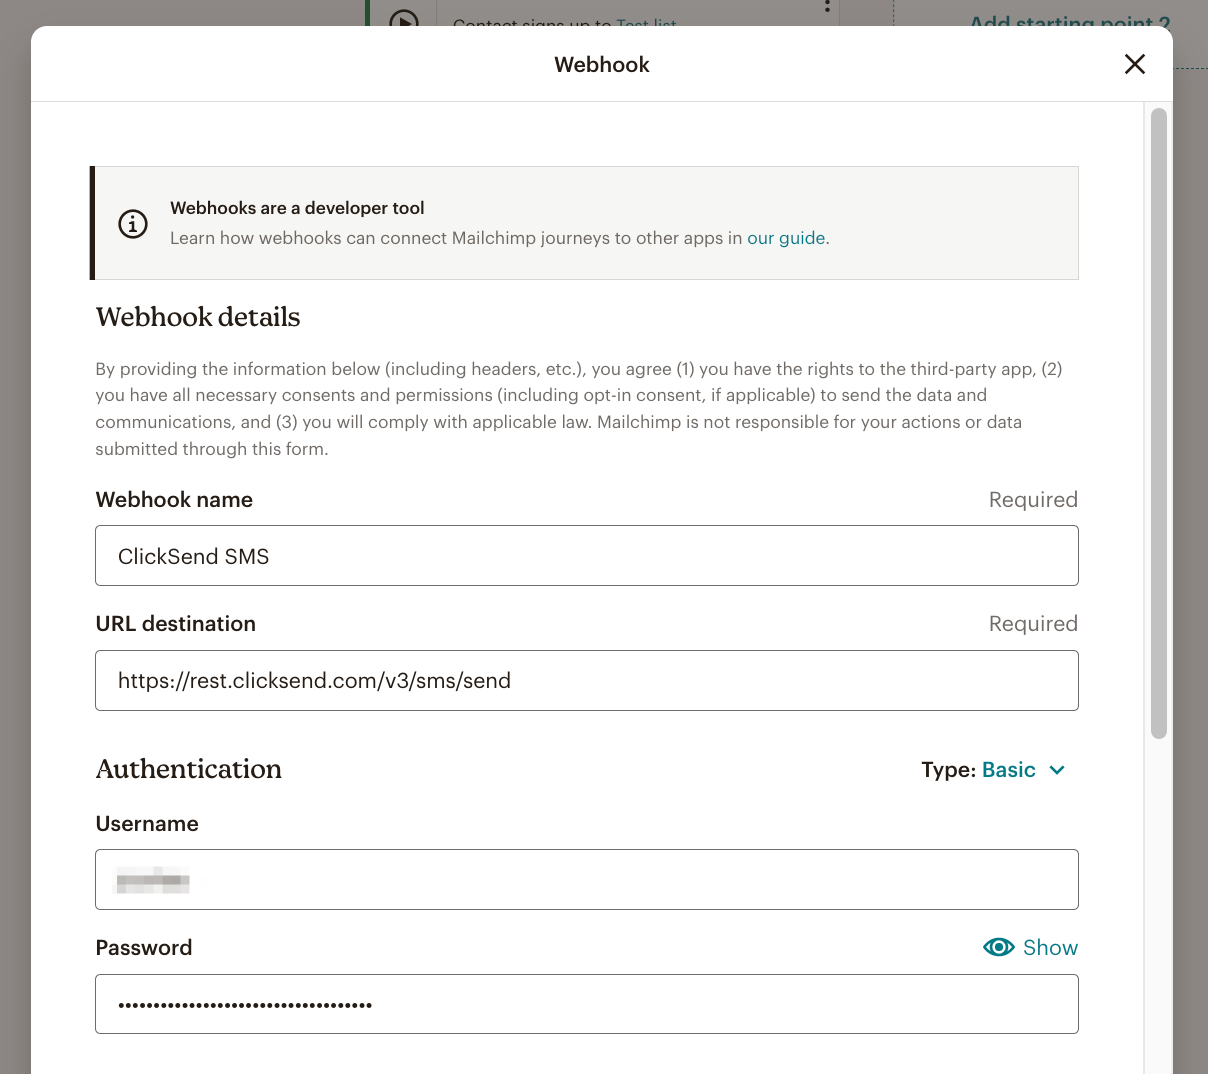
- Name your webhook. Just for your reference.
- Paste the SMS endpoint URL into the URL destination field.SMS endpoint URL: https://rest.clicksend.com/v3/sms/send. See the SMS endpoint documentation here.
- Get your API credentials here. Choose Basic as an authentication type from dropdown menu. Enter your username and your API key into the authentication fields.
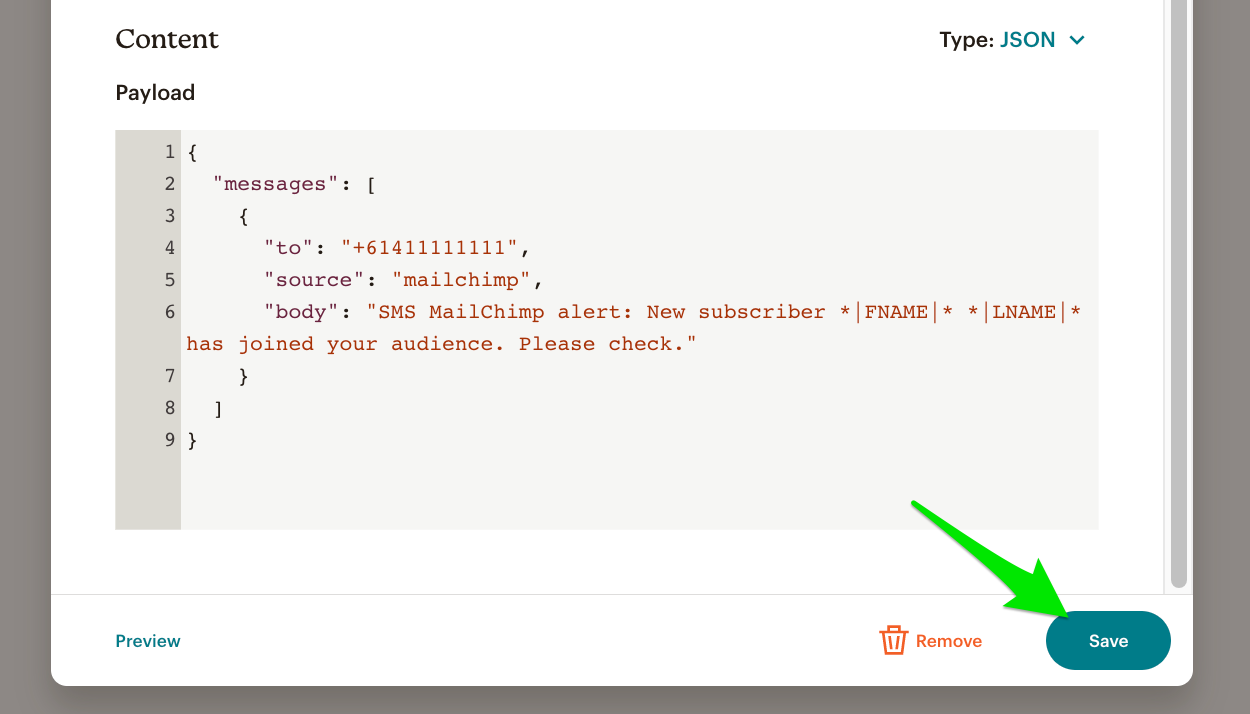
- Scroll down to reach the payload section. Copy-paste the example code below into the payload. You can customise the body of the message using merge tags (see tip below). On the "to" parameter, replace the value with your phone number to get SMS Notifications.
If you want to send SMS notifications to subscriber instead, change the value to "to" parameter to dynamic merge tag "*|PHONE|* " to dynamically map it to the subscriber's phone number.{
"messages": [
{
"to": "your_number",
"source": "mailchimp",
"body": "SMS MailChimp alert: New subscriber *|FNAME|* *|LNAME|* has joined your audience. Please check."
}
]
}
It’s important to keep "source": "mailchimp" parameter on the payload. Just so you can check your SMS history.
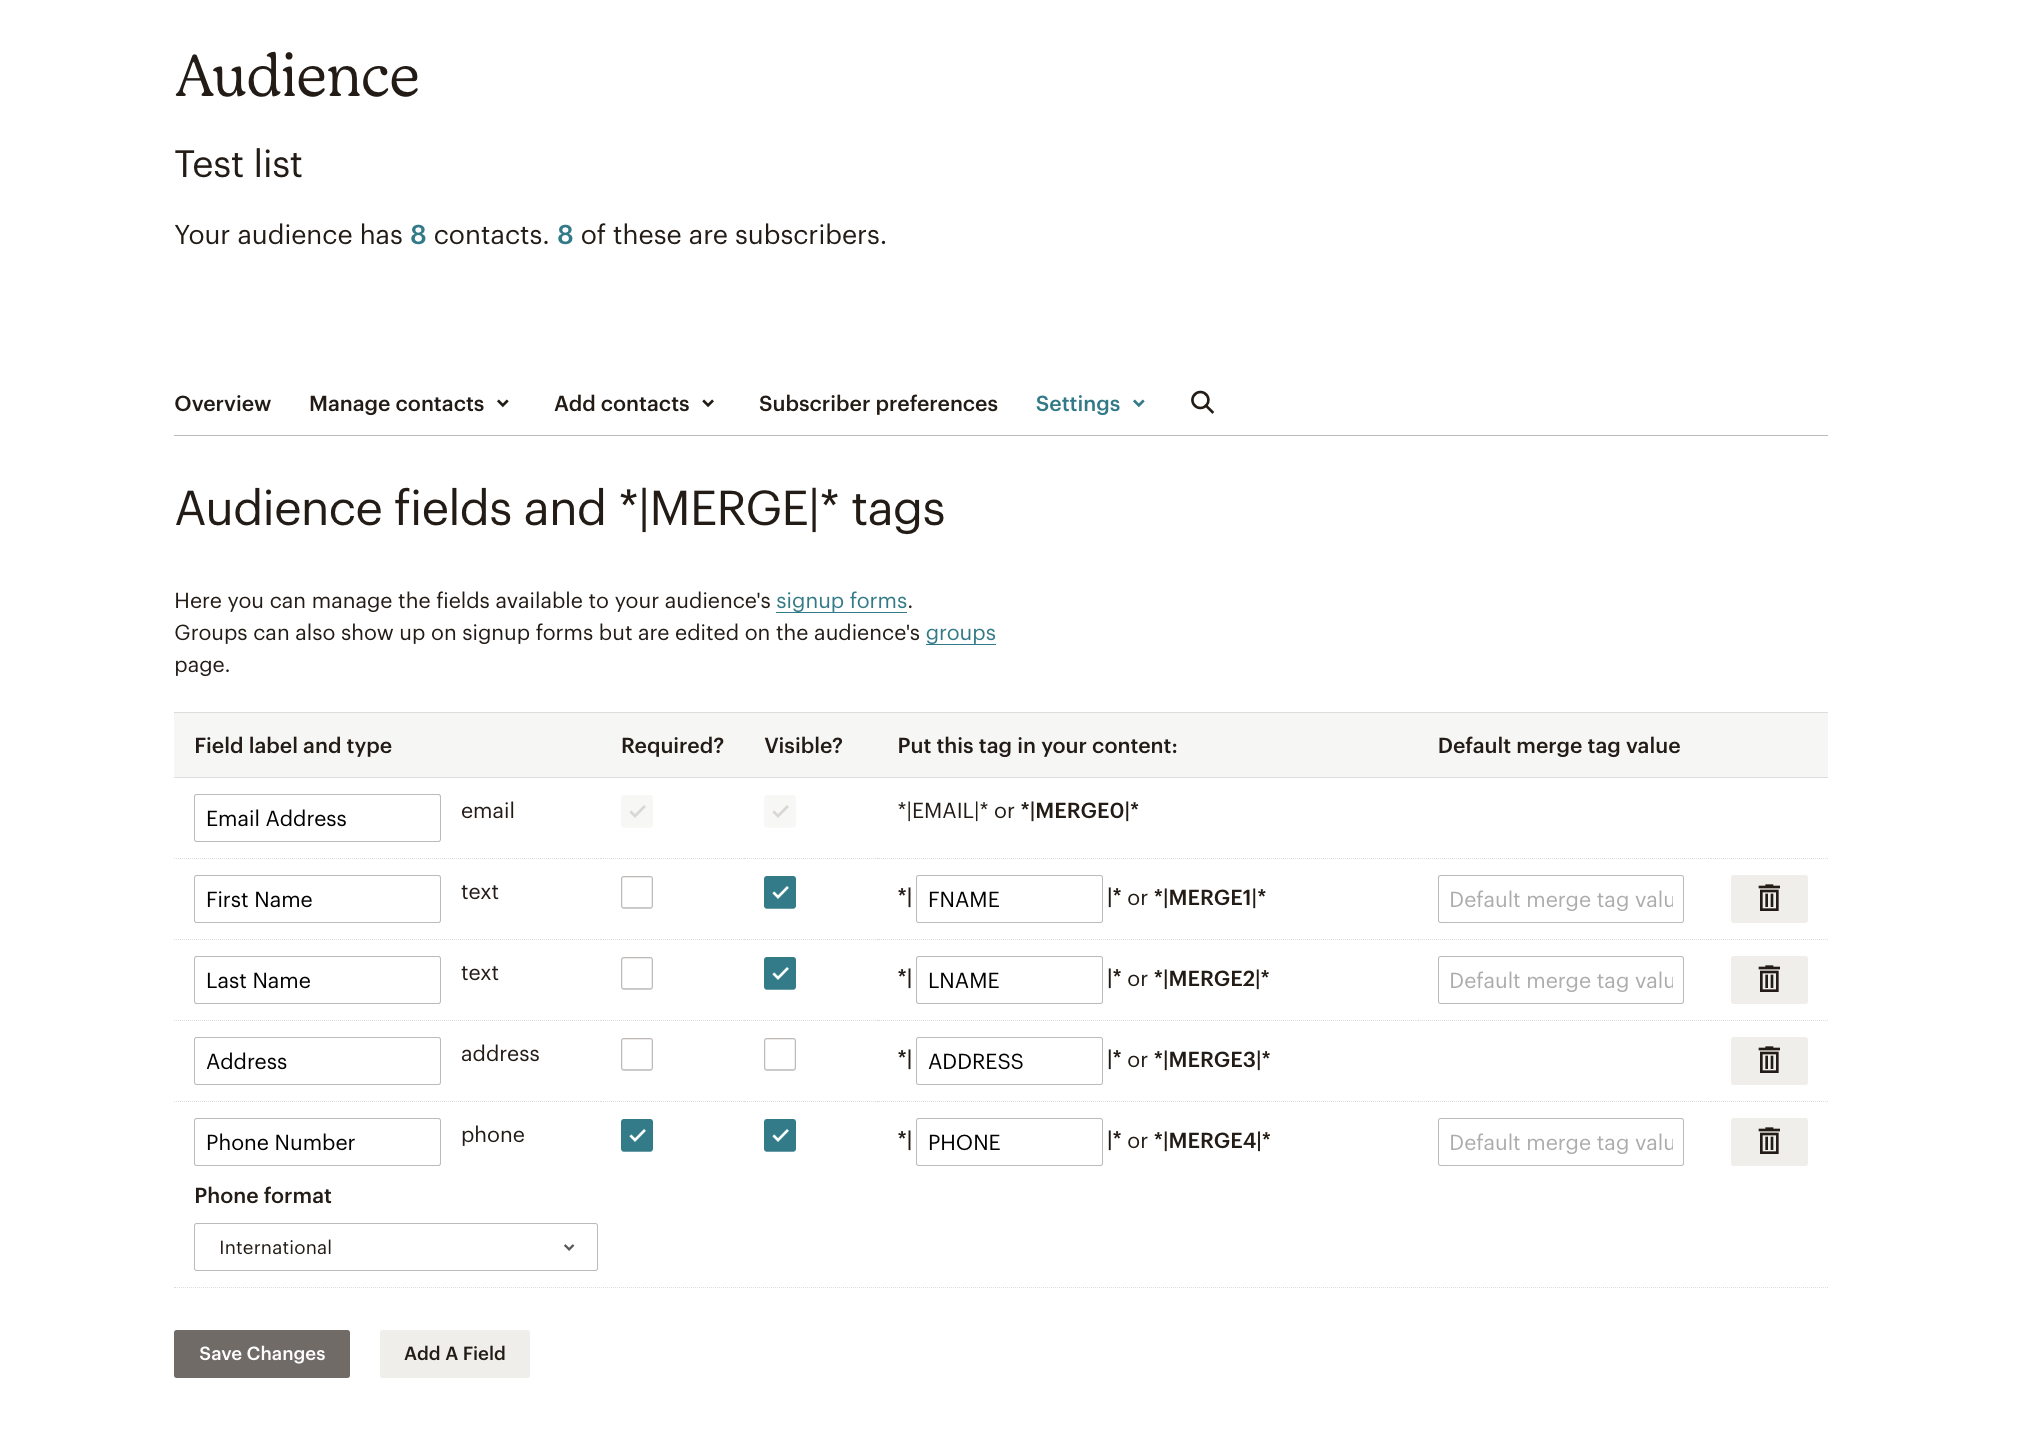
You can manage your merge tags by going to > Audience > All contacts > Settings > Merge tags in the MailChimp dashboard.
- When you've finished composing your message, click Save.
- Continue and turn on your automation journey. With this setup, you'd be sending automated SMS notifications and alerts to yourself or to your subscribers.
Troubleshoot
If you’re having problems, please check the following:
- Check your Authentication. It should be using your ClickSend's username and API key.
- Make sure you have credit in your balance. Check and top up here.
- Fill in all required parameters in the payload. Required fields are
toandbody. - If you are using an Alpha Tag as Sender ID and it's not functioning as expected, please review the following:
- Exceeded characters. Only 11 characters without space is allowed for an Alpha Tag
- Country you are sending to does not support Alpha Tags
- Alpha Tag registration is not yet approved. View Sender IDs page to check status.
- Global sending disabled on the country you are sending to. Please reach out to support for assistance. More info
FAQS
- Can I send messages using Alpha Tag Sender ID?
- Yes, however some countries do not support Alpha Tags. Find out which countries support sending via a business name here.
- Note that your Alpha Tags need to be 11 characters or less, without spaces. - How do I add a Alpha Tag as the sender of my messages?
-You need to add the parameter"from": "MyCompany"in the payload.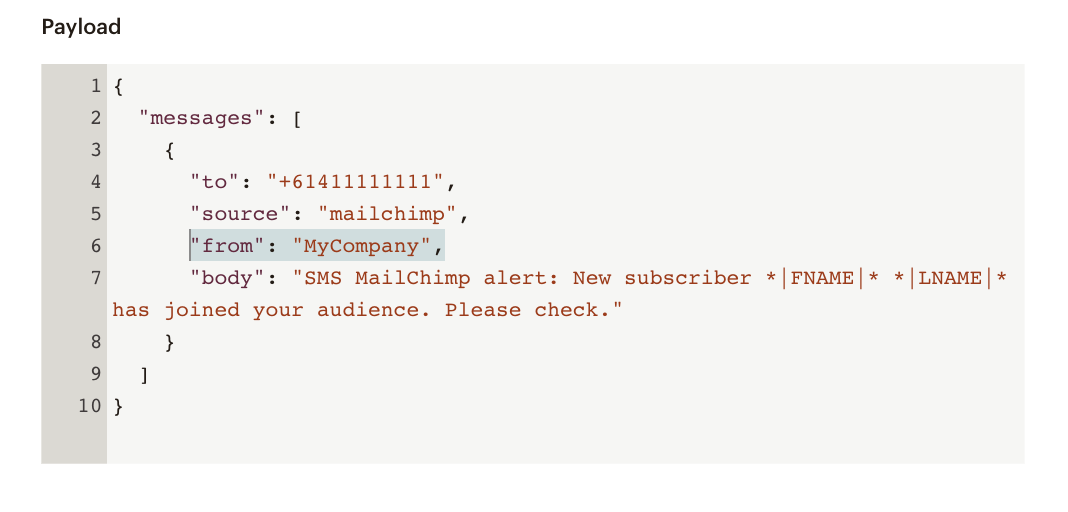
- Where can I get replies on my messages?
-Find your outbound and inbound SMS history here.