Marketo

Outbound “triggered” SMS sends
- These instructions are for OUTBOUND triggered SMS only. Inbound SMS is not supported by Marketo.
- You must have a version of Marketo that includes Webhooks (cannot be used with Marketo Spark)
Step 1: Create a ClickSend account
You need a ClickSend account before starting this process. You can sign up here: Sign Up
Step 2: Find your API credentials
After you've created your ClickSend account, log in and select:
- Accounts
- Add/Edit subaccounts
- Here you'll find your Username and API Key. You'll need to copy these.
Step 3: Create the Post String
This step involves creating a URL that will be entered into Marketo in a later step. You can open a text file and paste in the URL below, replacing the items in square brackets:
https://api-mapper.clicksend.com/http/v2/send.php?method=marketo&username=[CLICKSEND API USERNAME]&key=[CLICKSEND API KEY]&to={{lead.Mobile Phone Number}}&message={{my.SMS}}Where:
- [CLICKSEND API USERNAME] = Your ClickSend API username
- [CLICKSEND SECURE API KEY] = The secure API key from ClickSend
- {{lead.Mobile Phone Number}} = Marketo Mobile Phone Number lead token
- {{my.SMS}} = Program token in your Marketo program (see below)
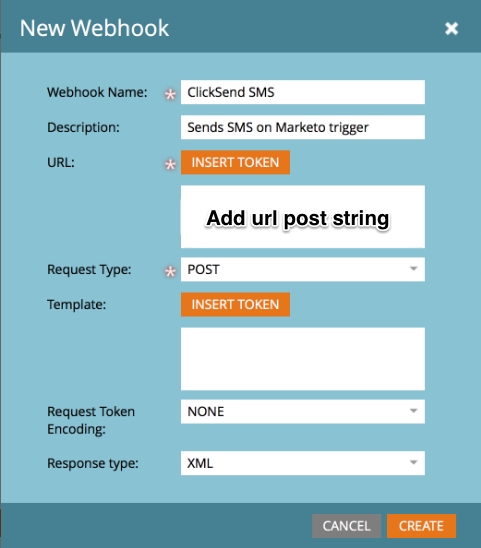
Step 4: Create Marketo Web-hook
- Go to Marketo’s admin section, to Webhooks.
- Click 'New Webhook'
- Fill out the form as shown below. Remember to use the URL created in Step 3
- Click 'Create'
Step 5: Create Marketo Program Token
To create the SMS message you want to send, we need to set up a Program “My” Token so you can customise this message for every program you wish to send SMS from.
- Create the Marketo program you wish to use the SMS send within
- Highlight the new program in the Marketo tree.
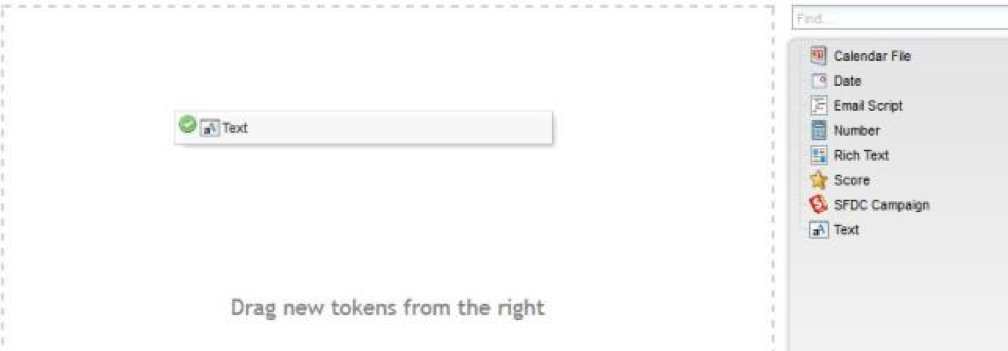
- Click the My Tokens menu option
- Drag the 'text' My Tokens option from the right:
- Type “SMS” in all caps as the Token Name.
- Type in a message for your outbound SMS in the Value field (this can be different for each program):
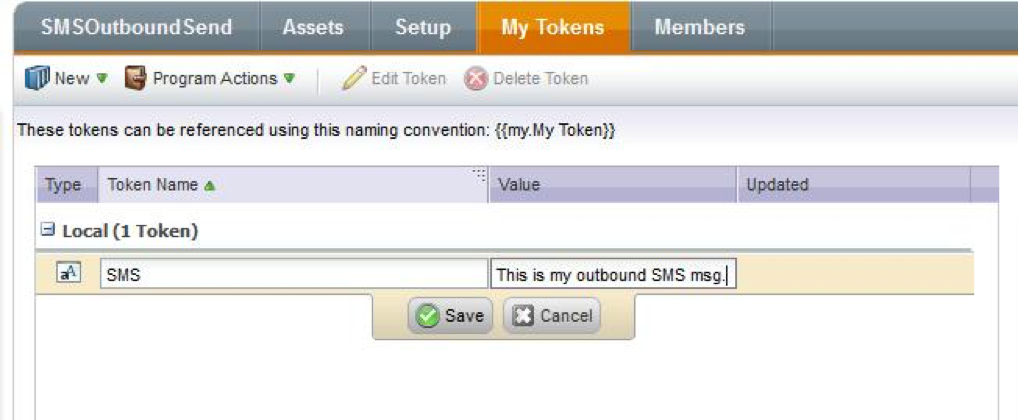
- Click 'Save;. The {{my.SMS}} token used in your webhook now has a value.
Step 6: Use the web-hook in a triggered campaign
- Under the SMS program you created, create a triggered smart campaign to send the SMS.
- For the campaign Smart List, I’ve used a form fillout as my trigger, but it could be any Marketo trigger:

- For the Flow, choose “Call Webhook”, and choose the SMS webhook you created.

All done!
You now have SMS functionality integrated. If it's not working for you, or you found the steps too complicated, please get in touch with us: Contact US
Zapier Integration
Prerequisite
You need a Zapier account first. If you don't have an account, click here to create a Zapier account.
Introduction
In this article, we will try integrating both Marketo and ClickSend. So what we want to achieve here is to add a new contact in ClickSend when a lead is added in Marketo, allowing the user to use ClickSend to communicate with those contacts.
So, let's get started.
Instructions
Step 1:
Login to your Zapier account. And then click Make a Zap! button.
Step 2:
Let's search and select Marketo as our trigger app. Next, check New Lead as our trigger action. Then click Save + Continue button.
Step 3:
Let's link your Marketo account.
Select Choose Account.
Click Connect an Account button.
Connect with your Marketo account.
Then click Save + Continue button.
Step 4:
Let finish up our trigger app setup.
Go back to your Zapier setup page.
Then click Fetch & Continue button.
Lastly the Continue button.
Step 5:
Ok, let's set up our Action app. Let's search and choose ClickSend.
Next select Create Contact as our action.
Then click Save + Continue button.
Step 6:
Next, let's add your ClickSend account. Click Connect an Account button.
There should be a popup saying to add or allow your Zapier and ClickSend account to be linked together.
Type in your ClickSend username and API key.
Click the Test button to check if it was successful.
Then click Save + Continue button.
Step 7:
Let's set up our new contact.
In the Contact List input box, select the contact list that you want the new contacts to be added to (Marketo contacts etc...)
Set First Name , Last Name, Phone Number, Email, Etc... to their corresponding fields from Marketo.
Then click Continue button.
Step 8:
Let's finish up everything.
Click Create & Continue button.
Then the Finish button.
Lastly, name your Zap, and turn it ON