Hubspot custom code SMS integration
This tutorial will shows how to send automated SMS using ClickSend API using the Hubspot CRM. For troubleshooting purposes please contact our support team.
Prequisites
To get started you will need:
- A ClickSend account - Sign-Up
- A Hubspot account - Sign-Up
- A Hubspot CRM Operations Professional Plan or Higher - Plan Pricing
Configuring the trigger/s for the workflow
-
Click on the "Automation" tab from the menu bar and open the "Workflows" in a new tab from the drpdown menu.

-
Click on "Create workflow" button.

-
To keep this guide simple we will select "Contact-based" blank workflow, you can select any trigger you like as long as it contains the phone number field. After selecting the trigger and naming the workflow click on the "Next" button.

-
Click on the "Set up triggers" button and filter on how the contacts enter the workflow.

-
For simplicity purposes we will filter contacts based on if the phone number field does not contain the alphabet 'a', so that we can select every contact. After setting up the filter click on the "Apply filter" button.

-
If you want to cross check the filter setup click on "Test criteria" button. Click on "Save" button to save filter/s after the configuration.

Configuring the action for the workflow:
-
Switch to the previous tab and click on the "Settings" icon.

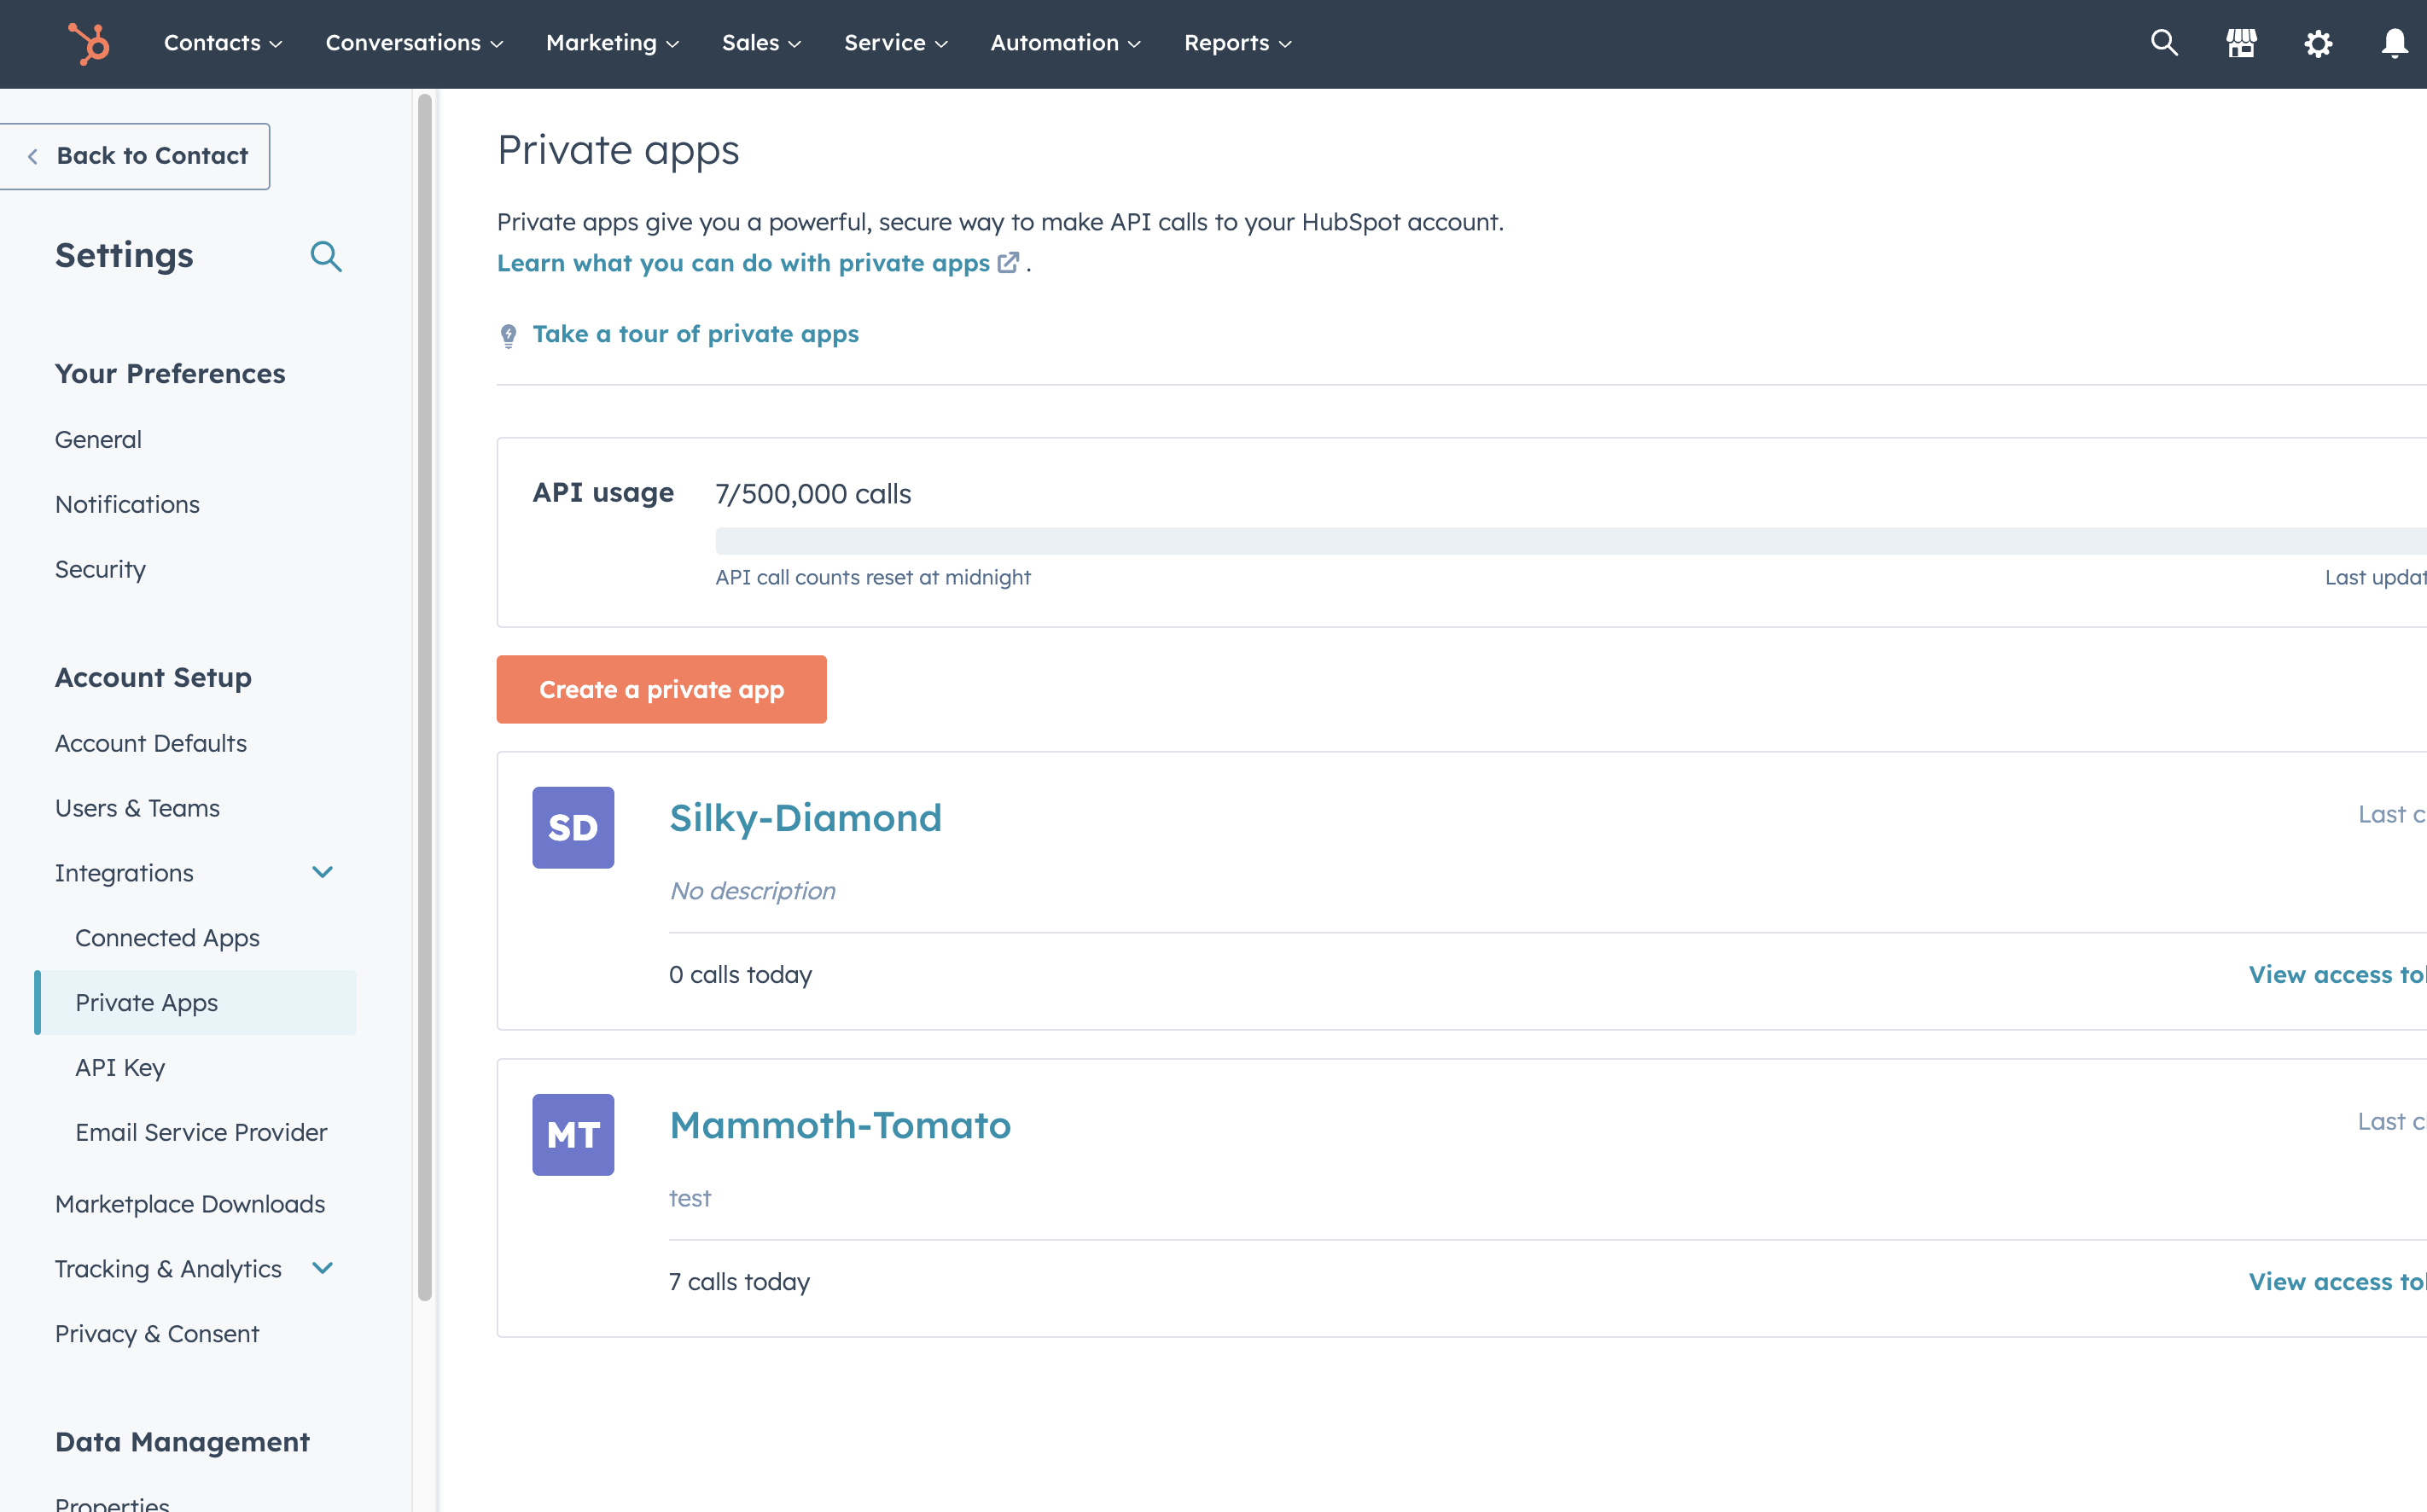
- Click on "Private Apps" from the Settings menu and click on "Create a private app" button.
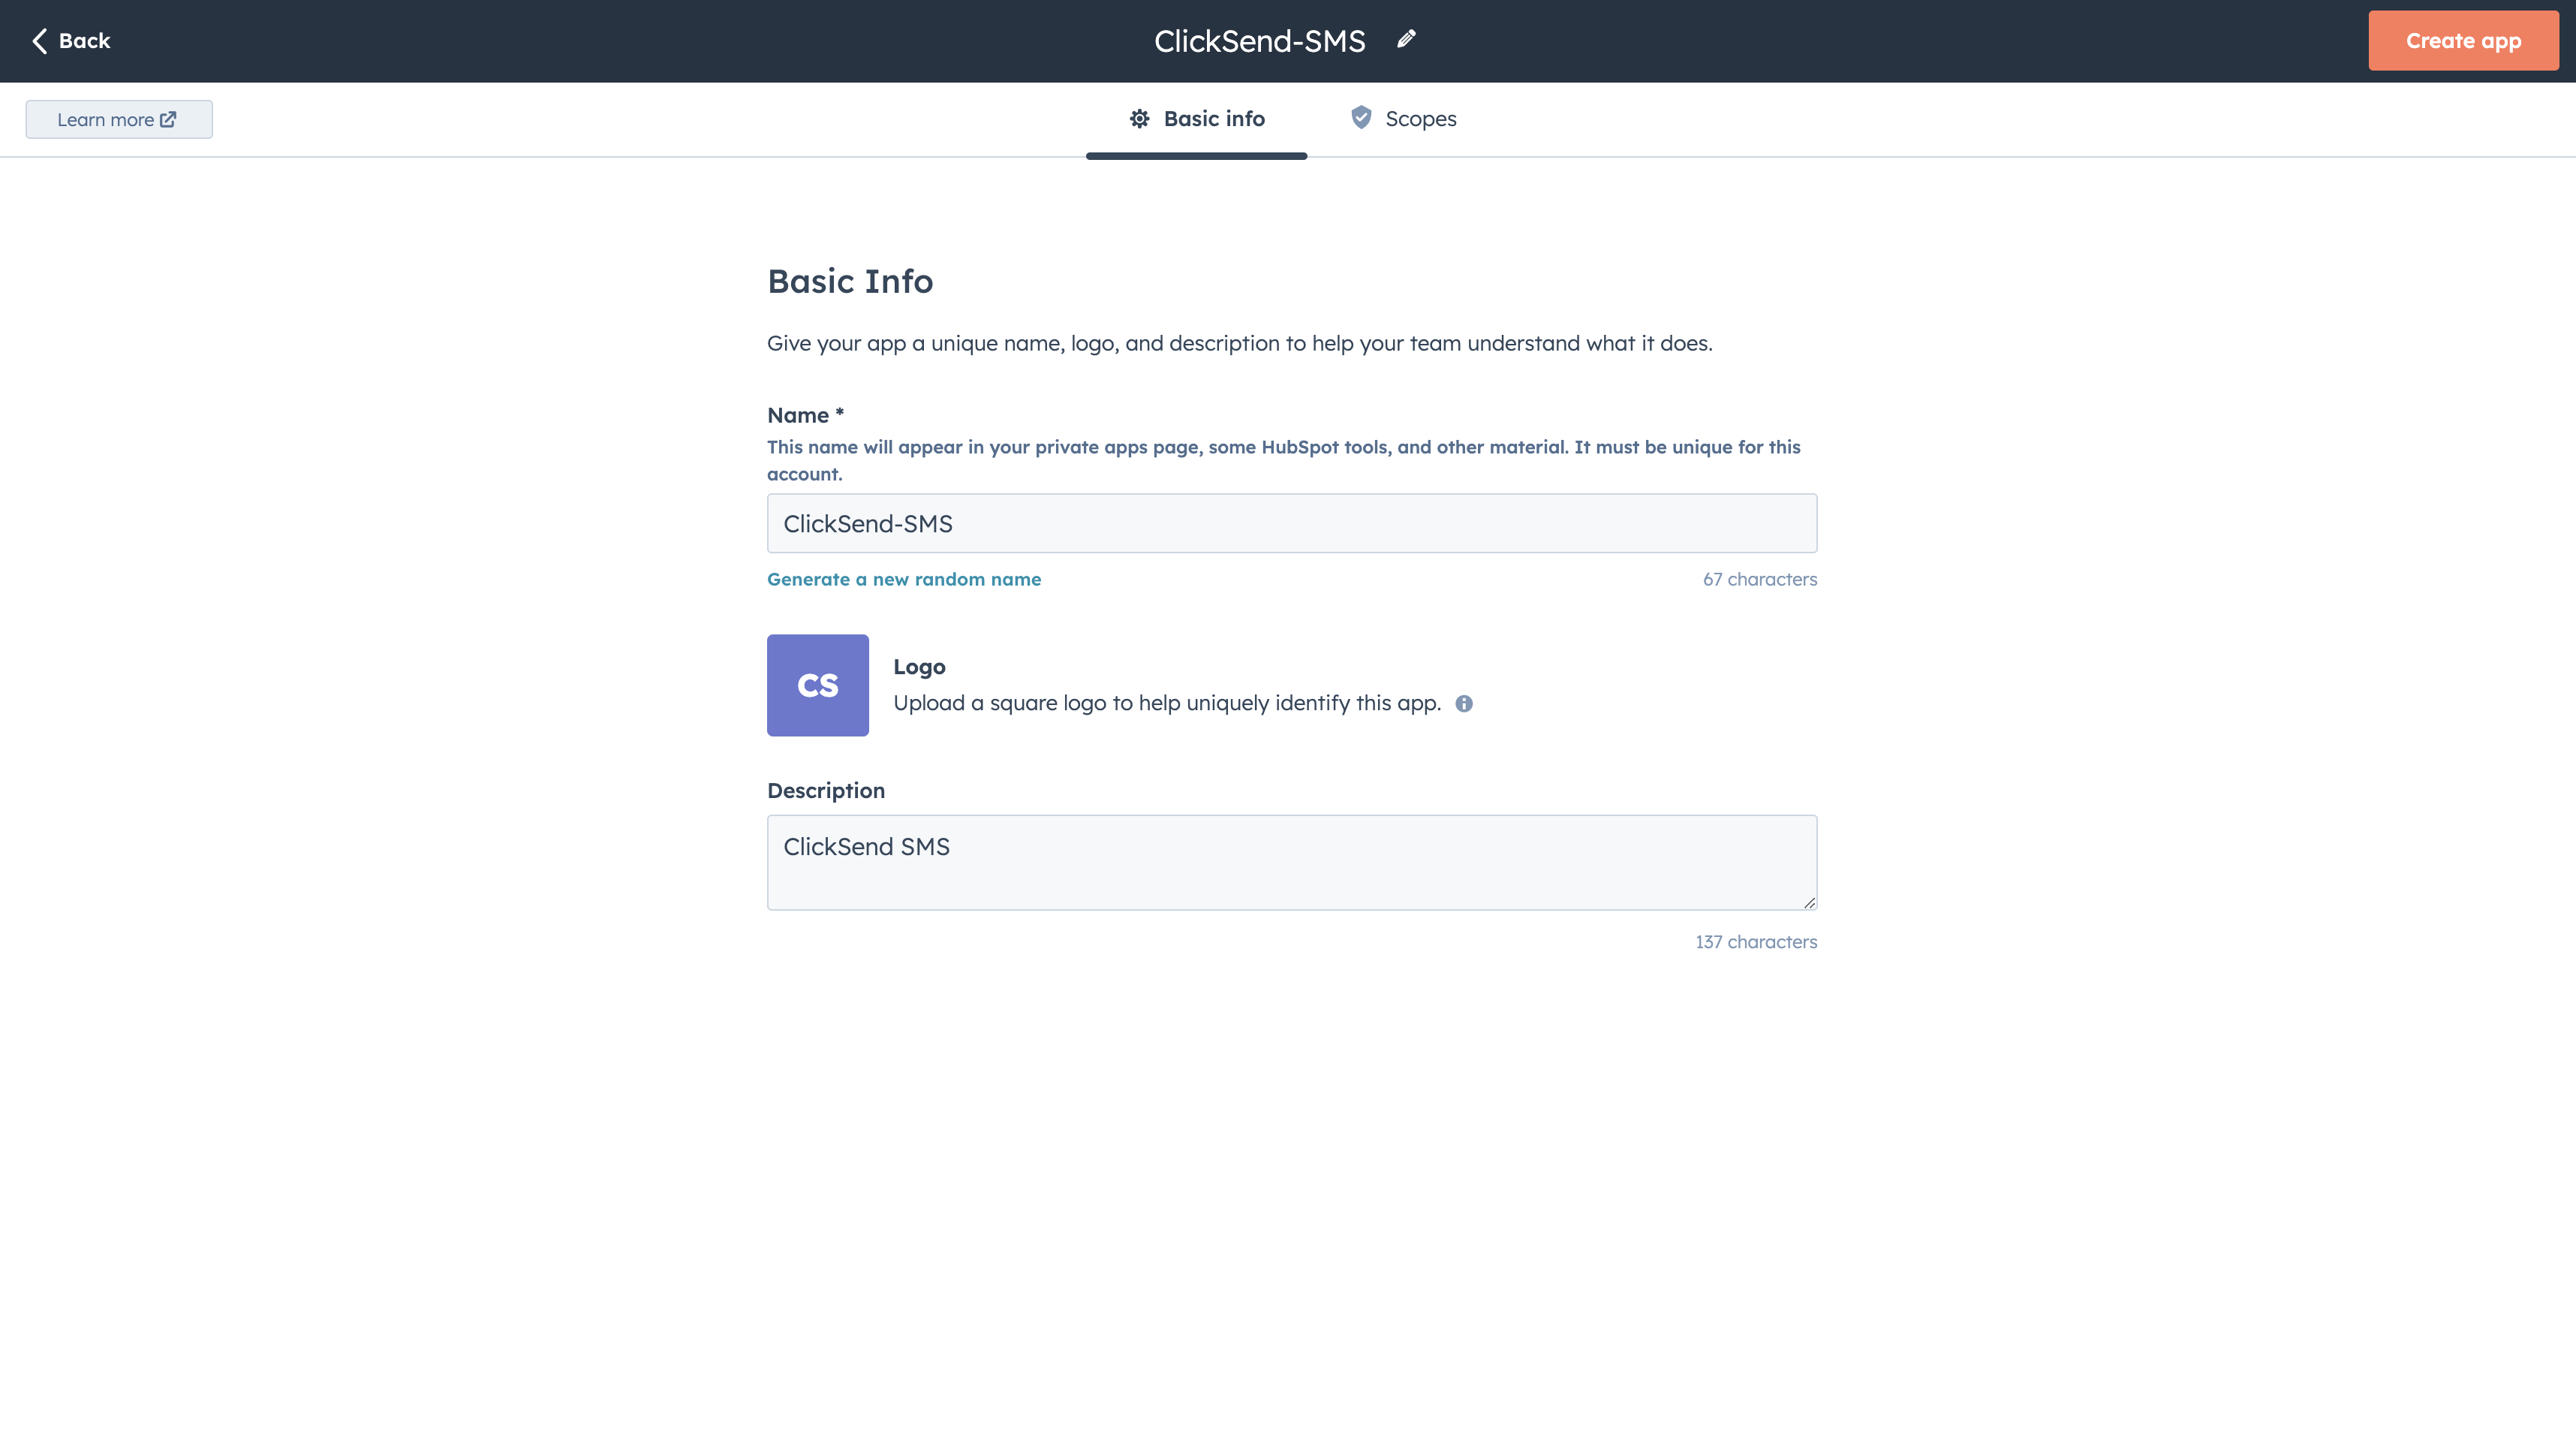
- Add the "Name" and "Description" for the app.
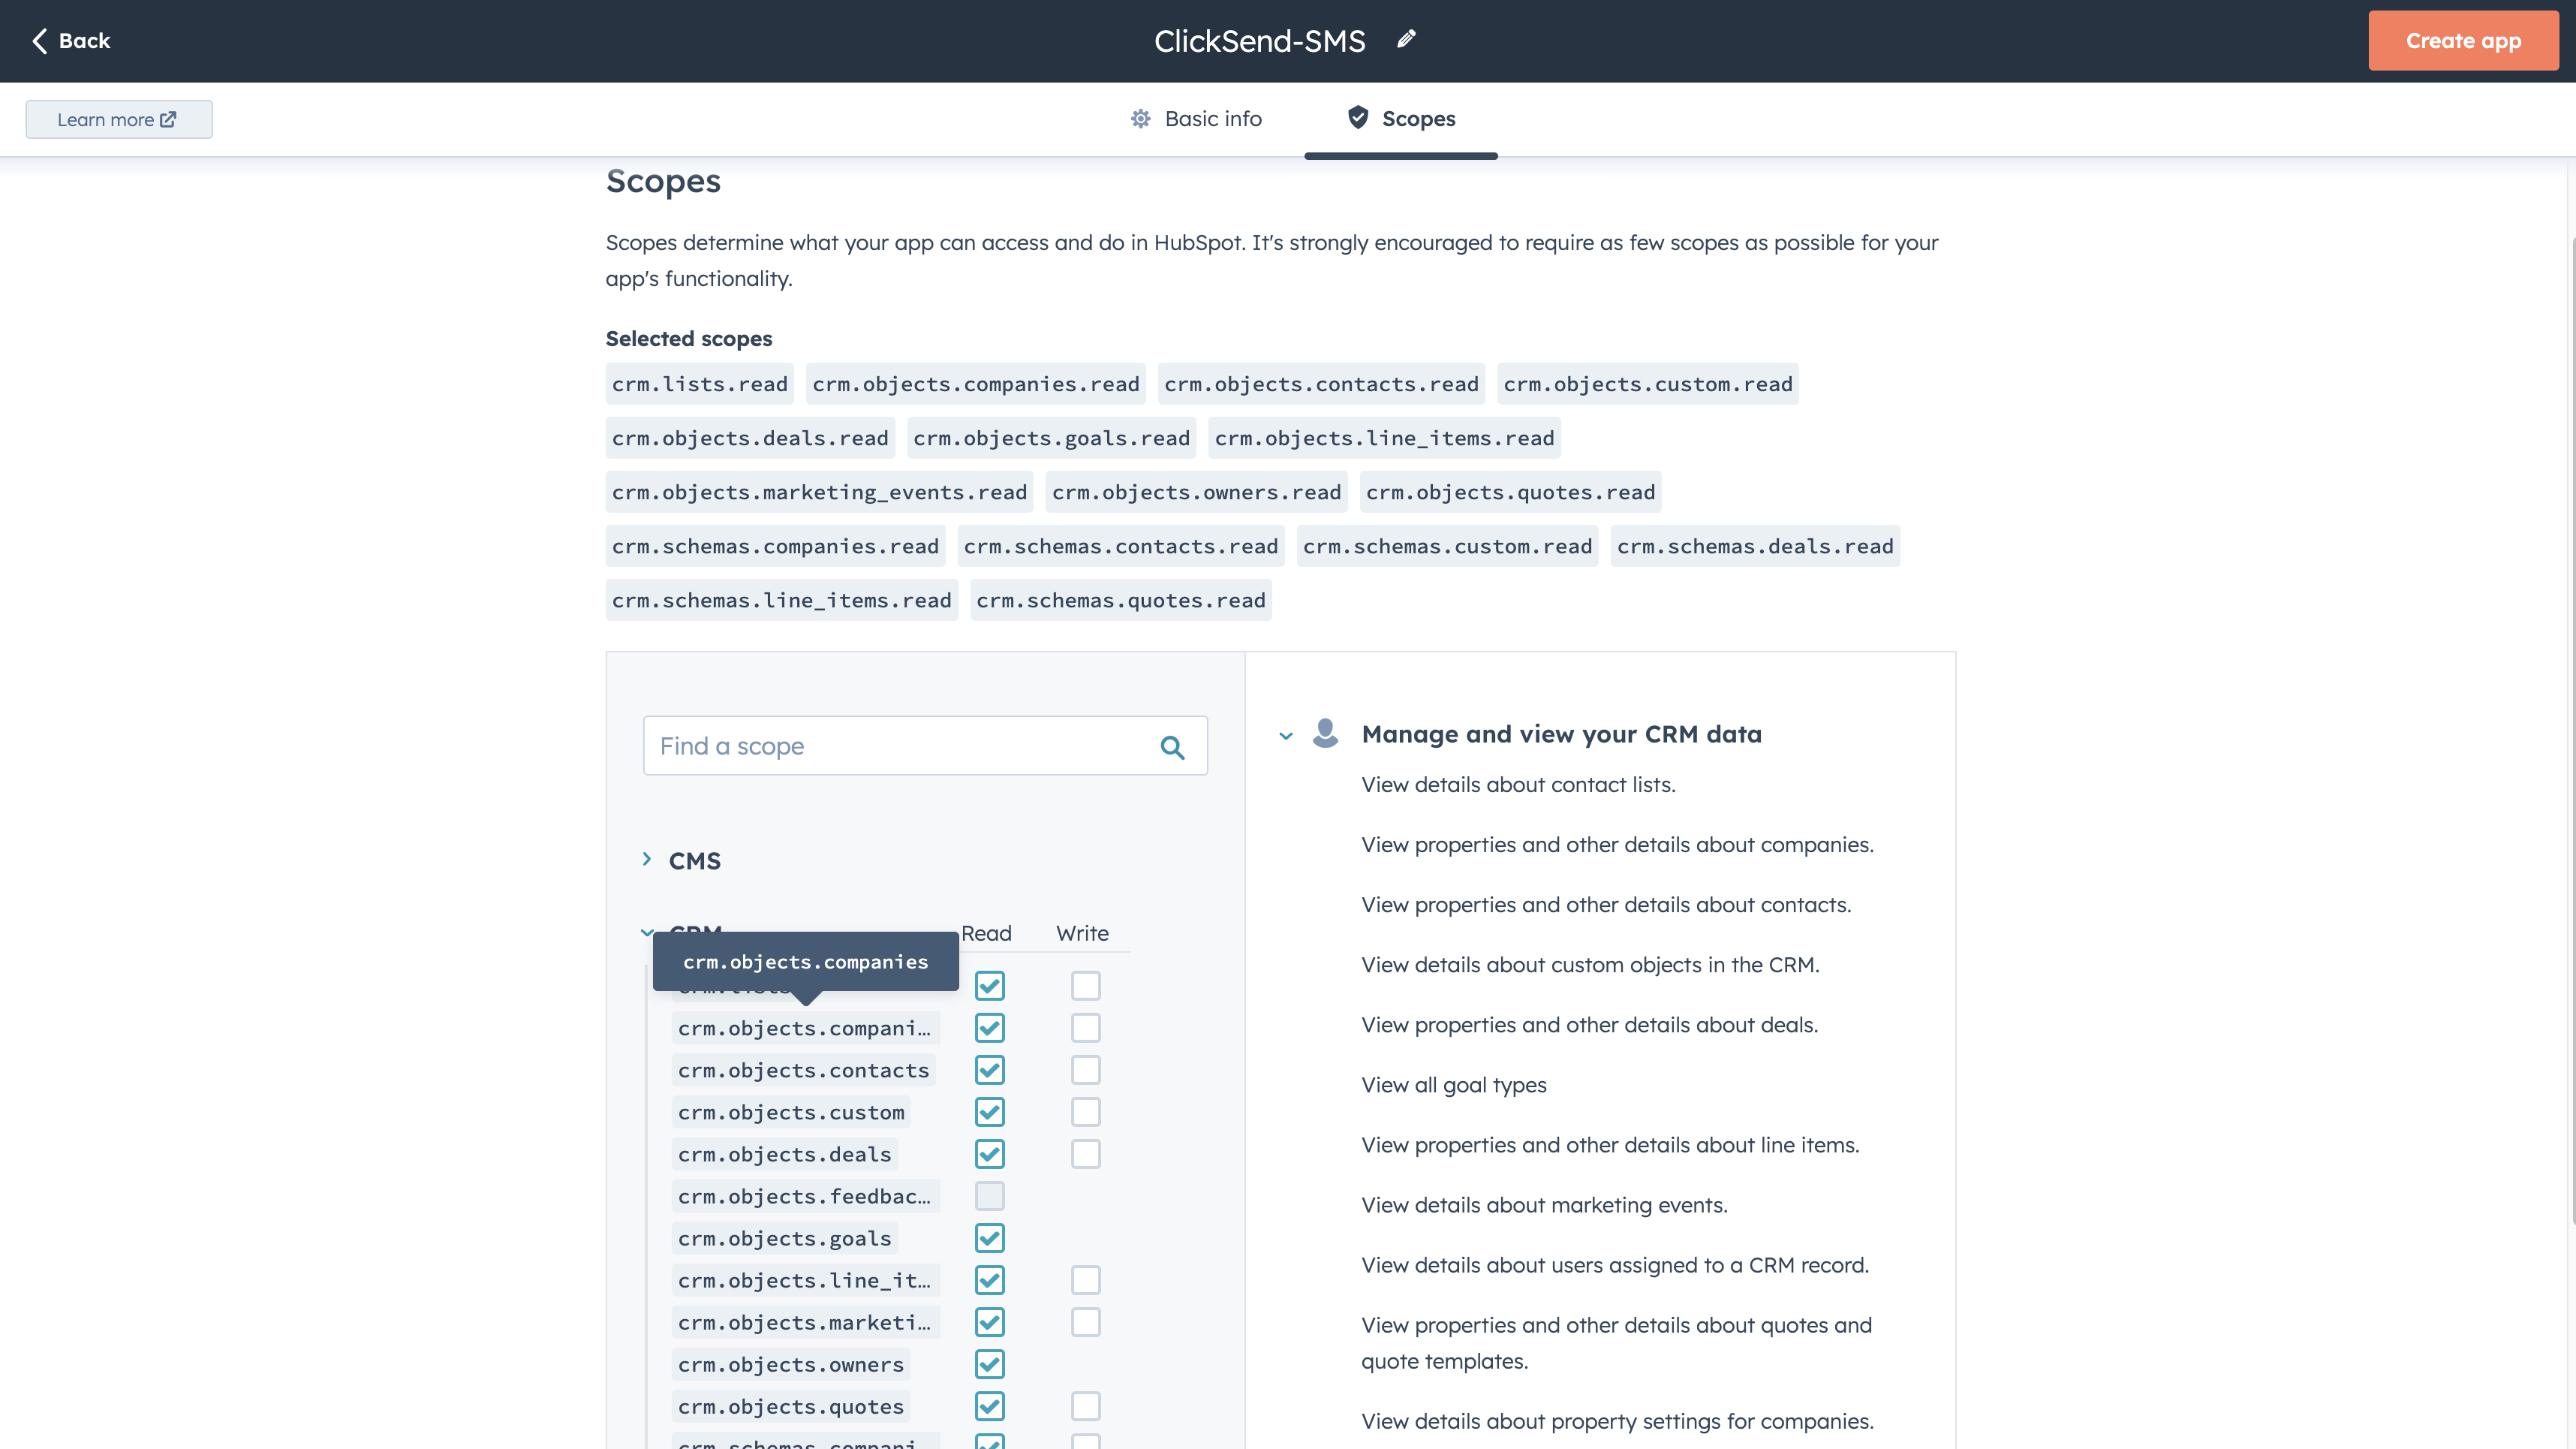
- Select the scopes as shown in the image and click on "Create app" button.
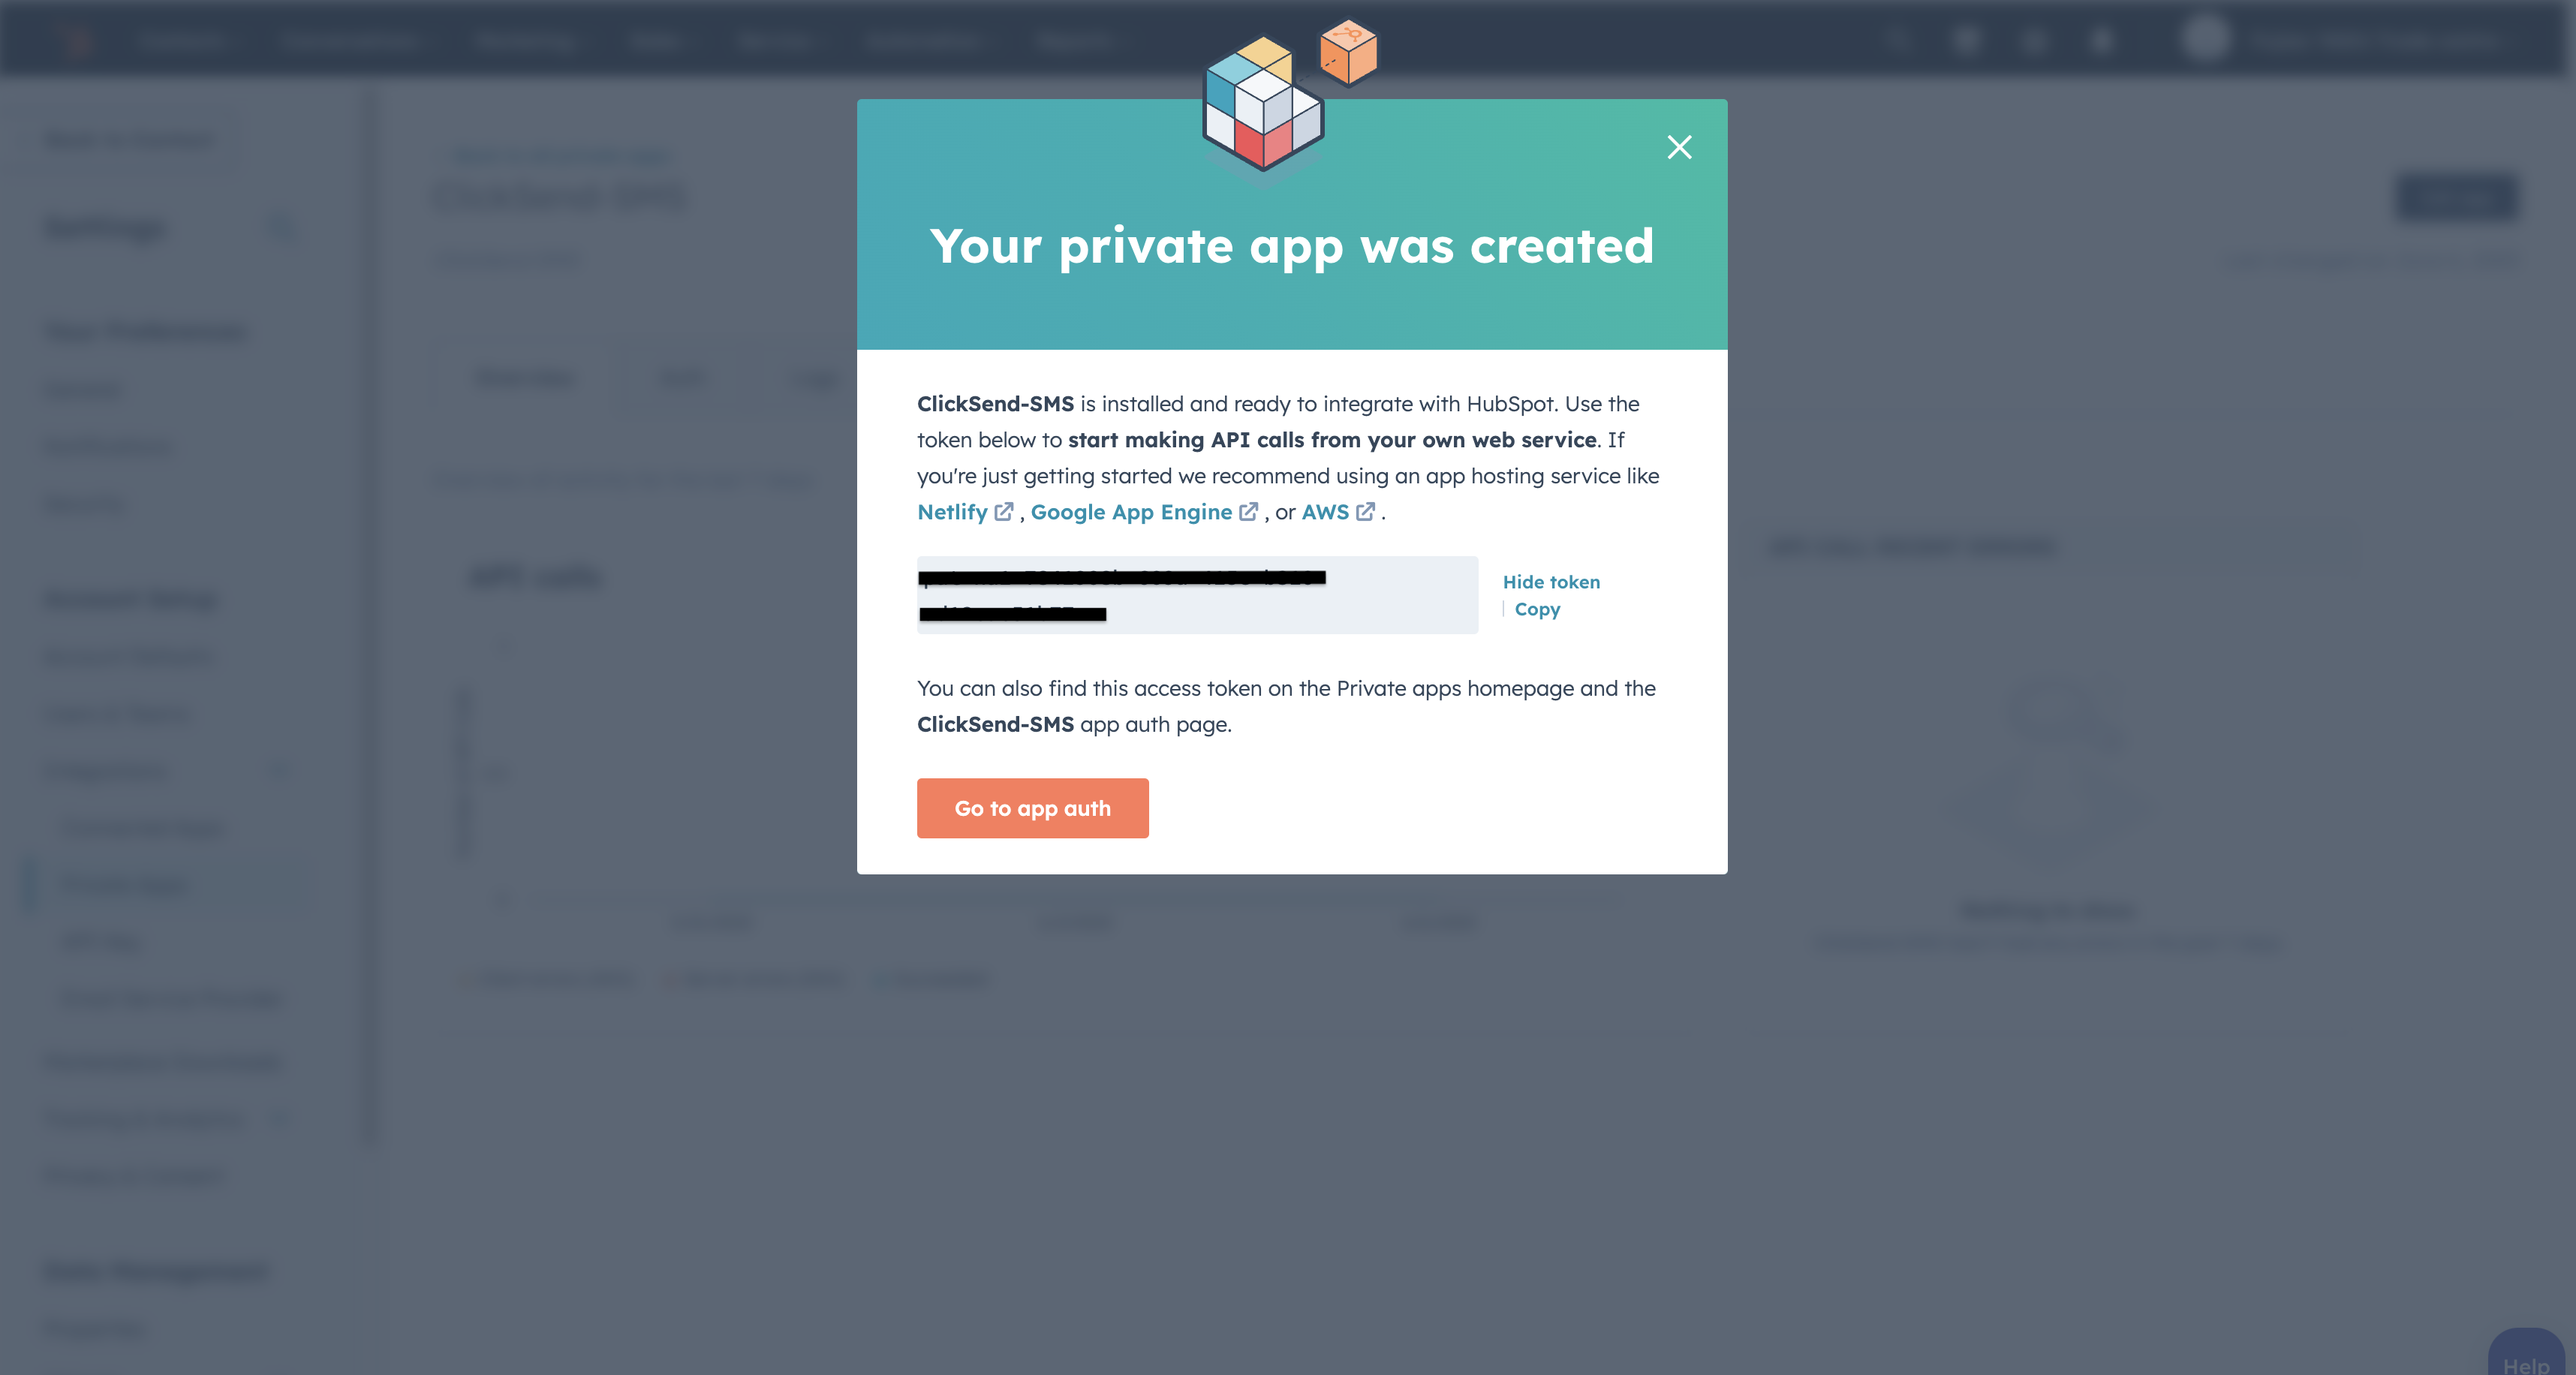
- Click and copy the token.
- Switch to workflows tab and click on the "+" button to add the action.

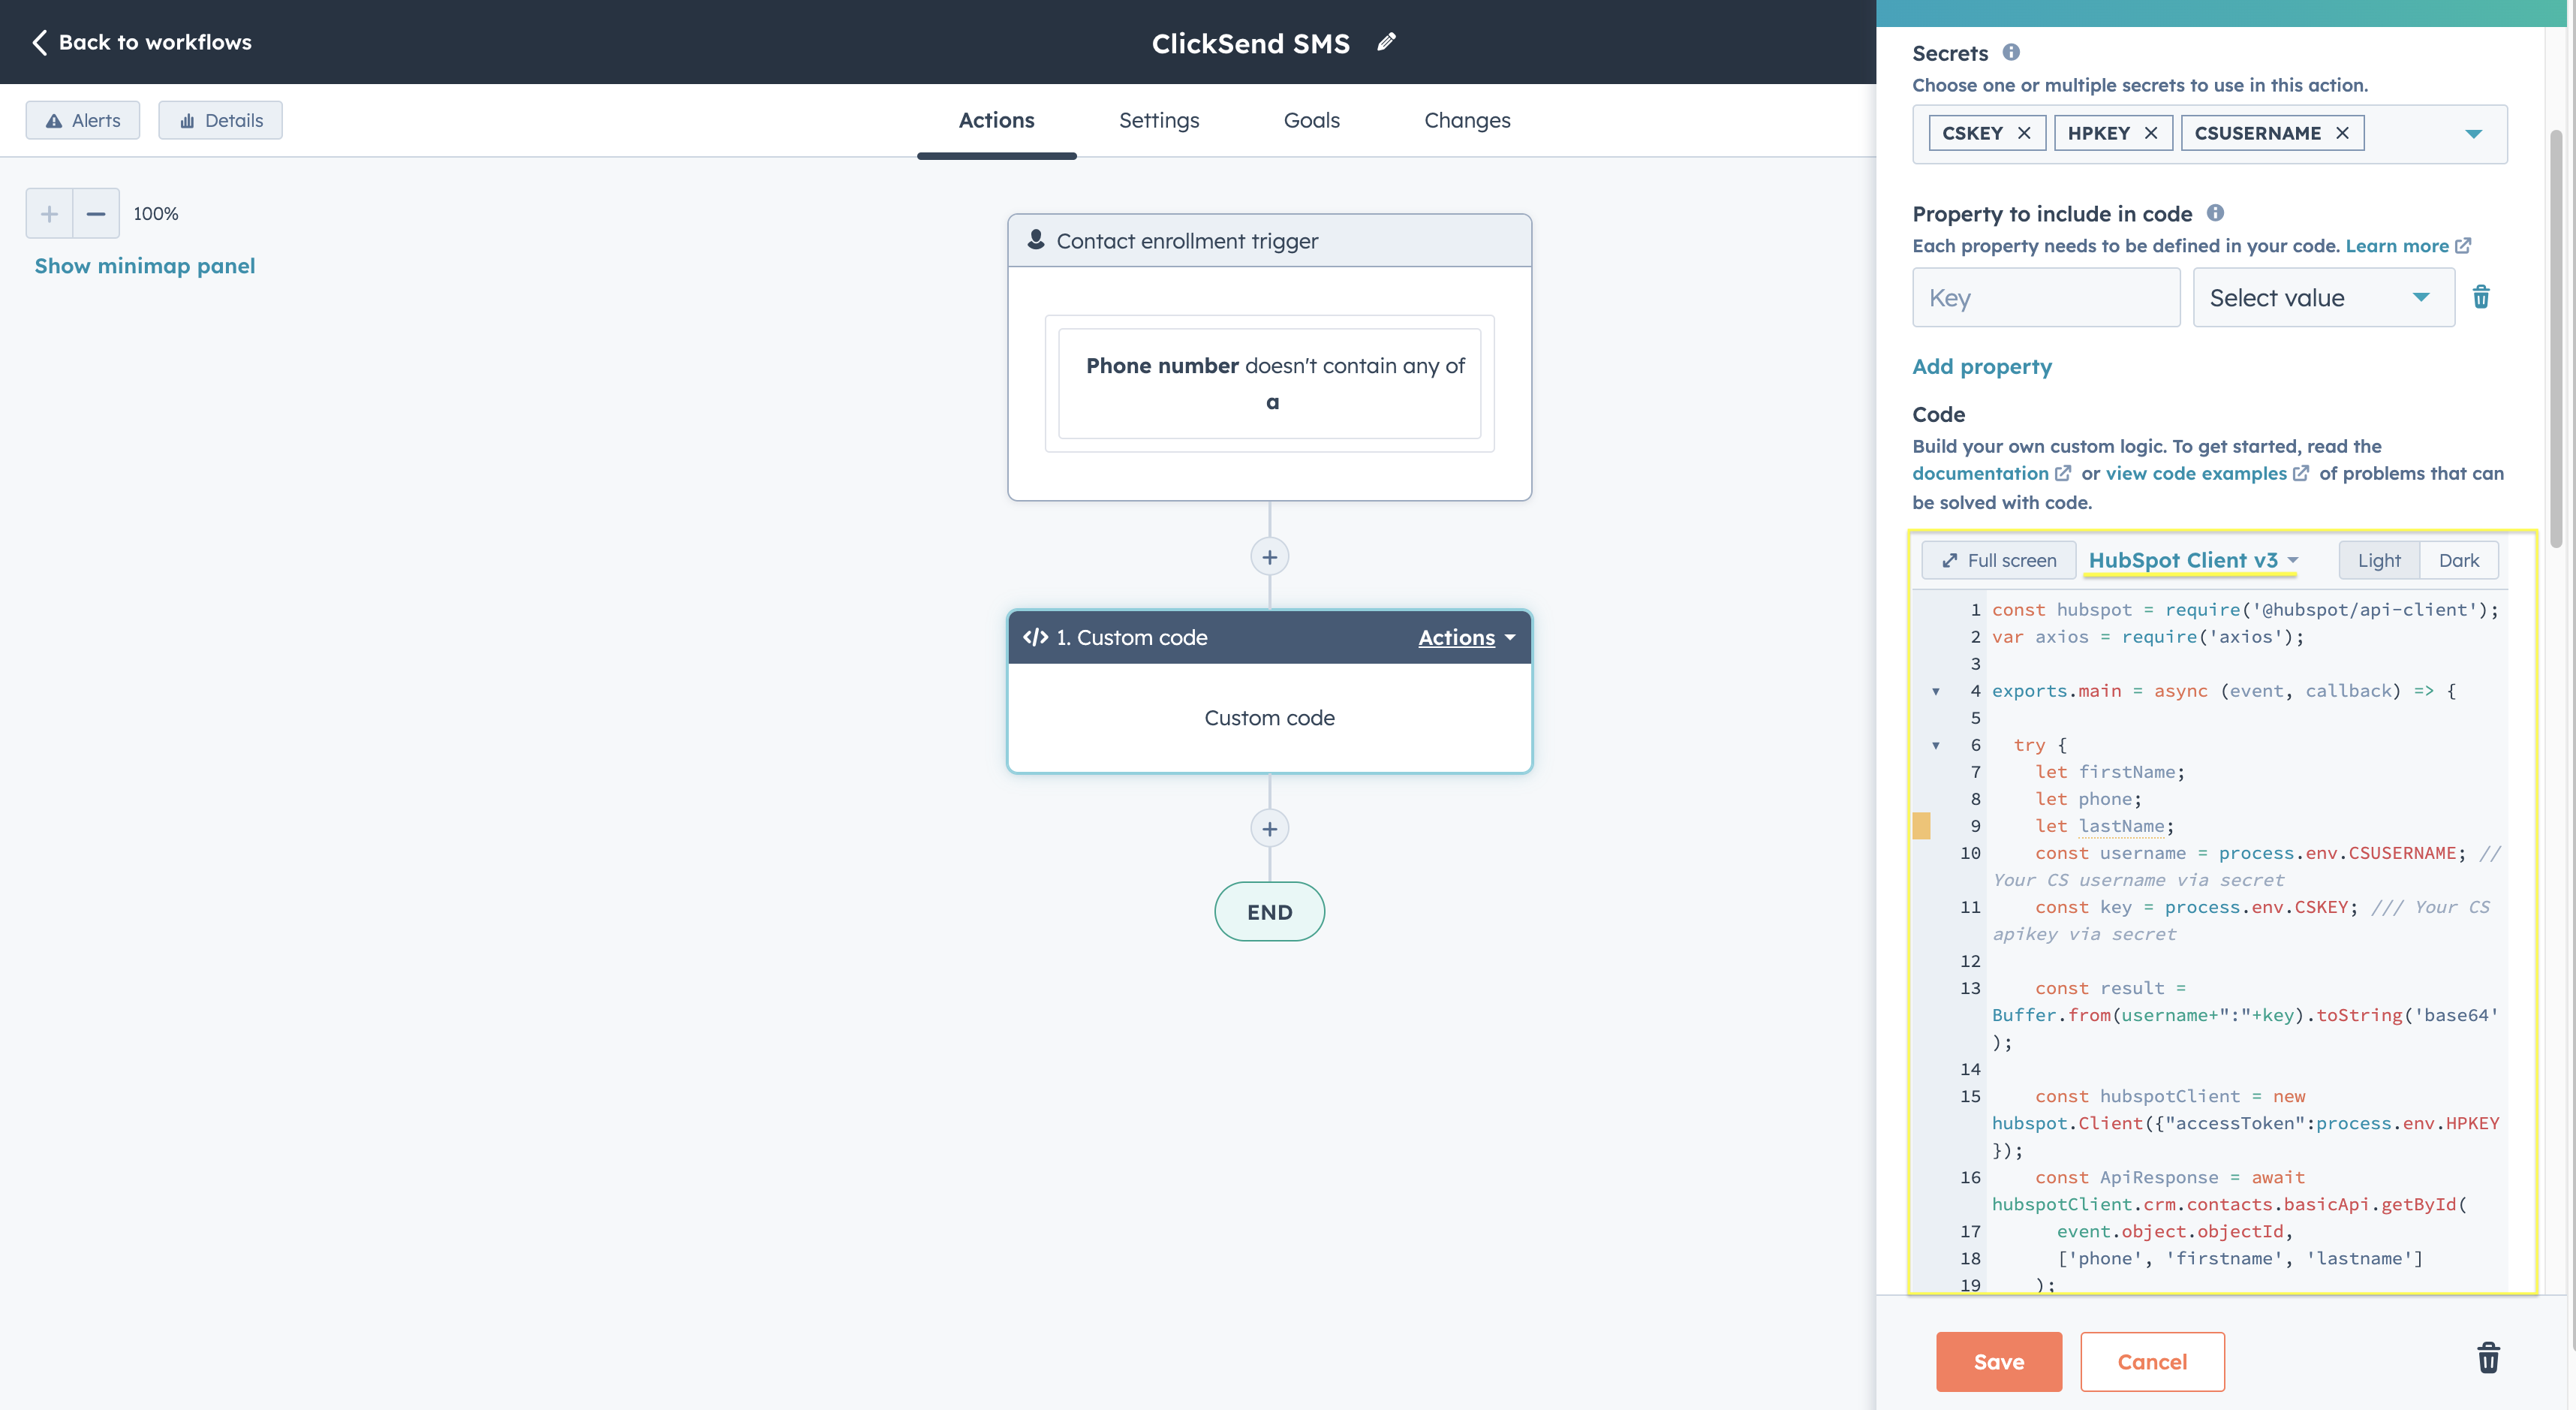
- Click on "Custom code" from the action list.

- Click on "Choose a secret" dropdown menu and select "Add secret" to add your Private app token.

- Type "HPKEY" as "Secret name" and paste the Private app token under the "Secret value". Click on "Save" button.

- We will need your ClickSend credentials to send SMS - ClickSend Credentials.
- Copy your username from the ClickSend dashboard and click on "Add secret".

- Type "CSUSERNAME" as "Secret name" and paste the username under the "Secret value". Click on "Save" button.

- Repeat the steps 8 and 9 to add your ClickSend API Key, use "CSKEY" as "Secret name" and API Key as "Secret value".

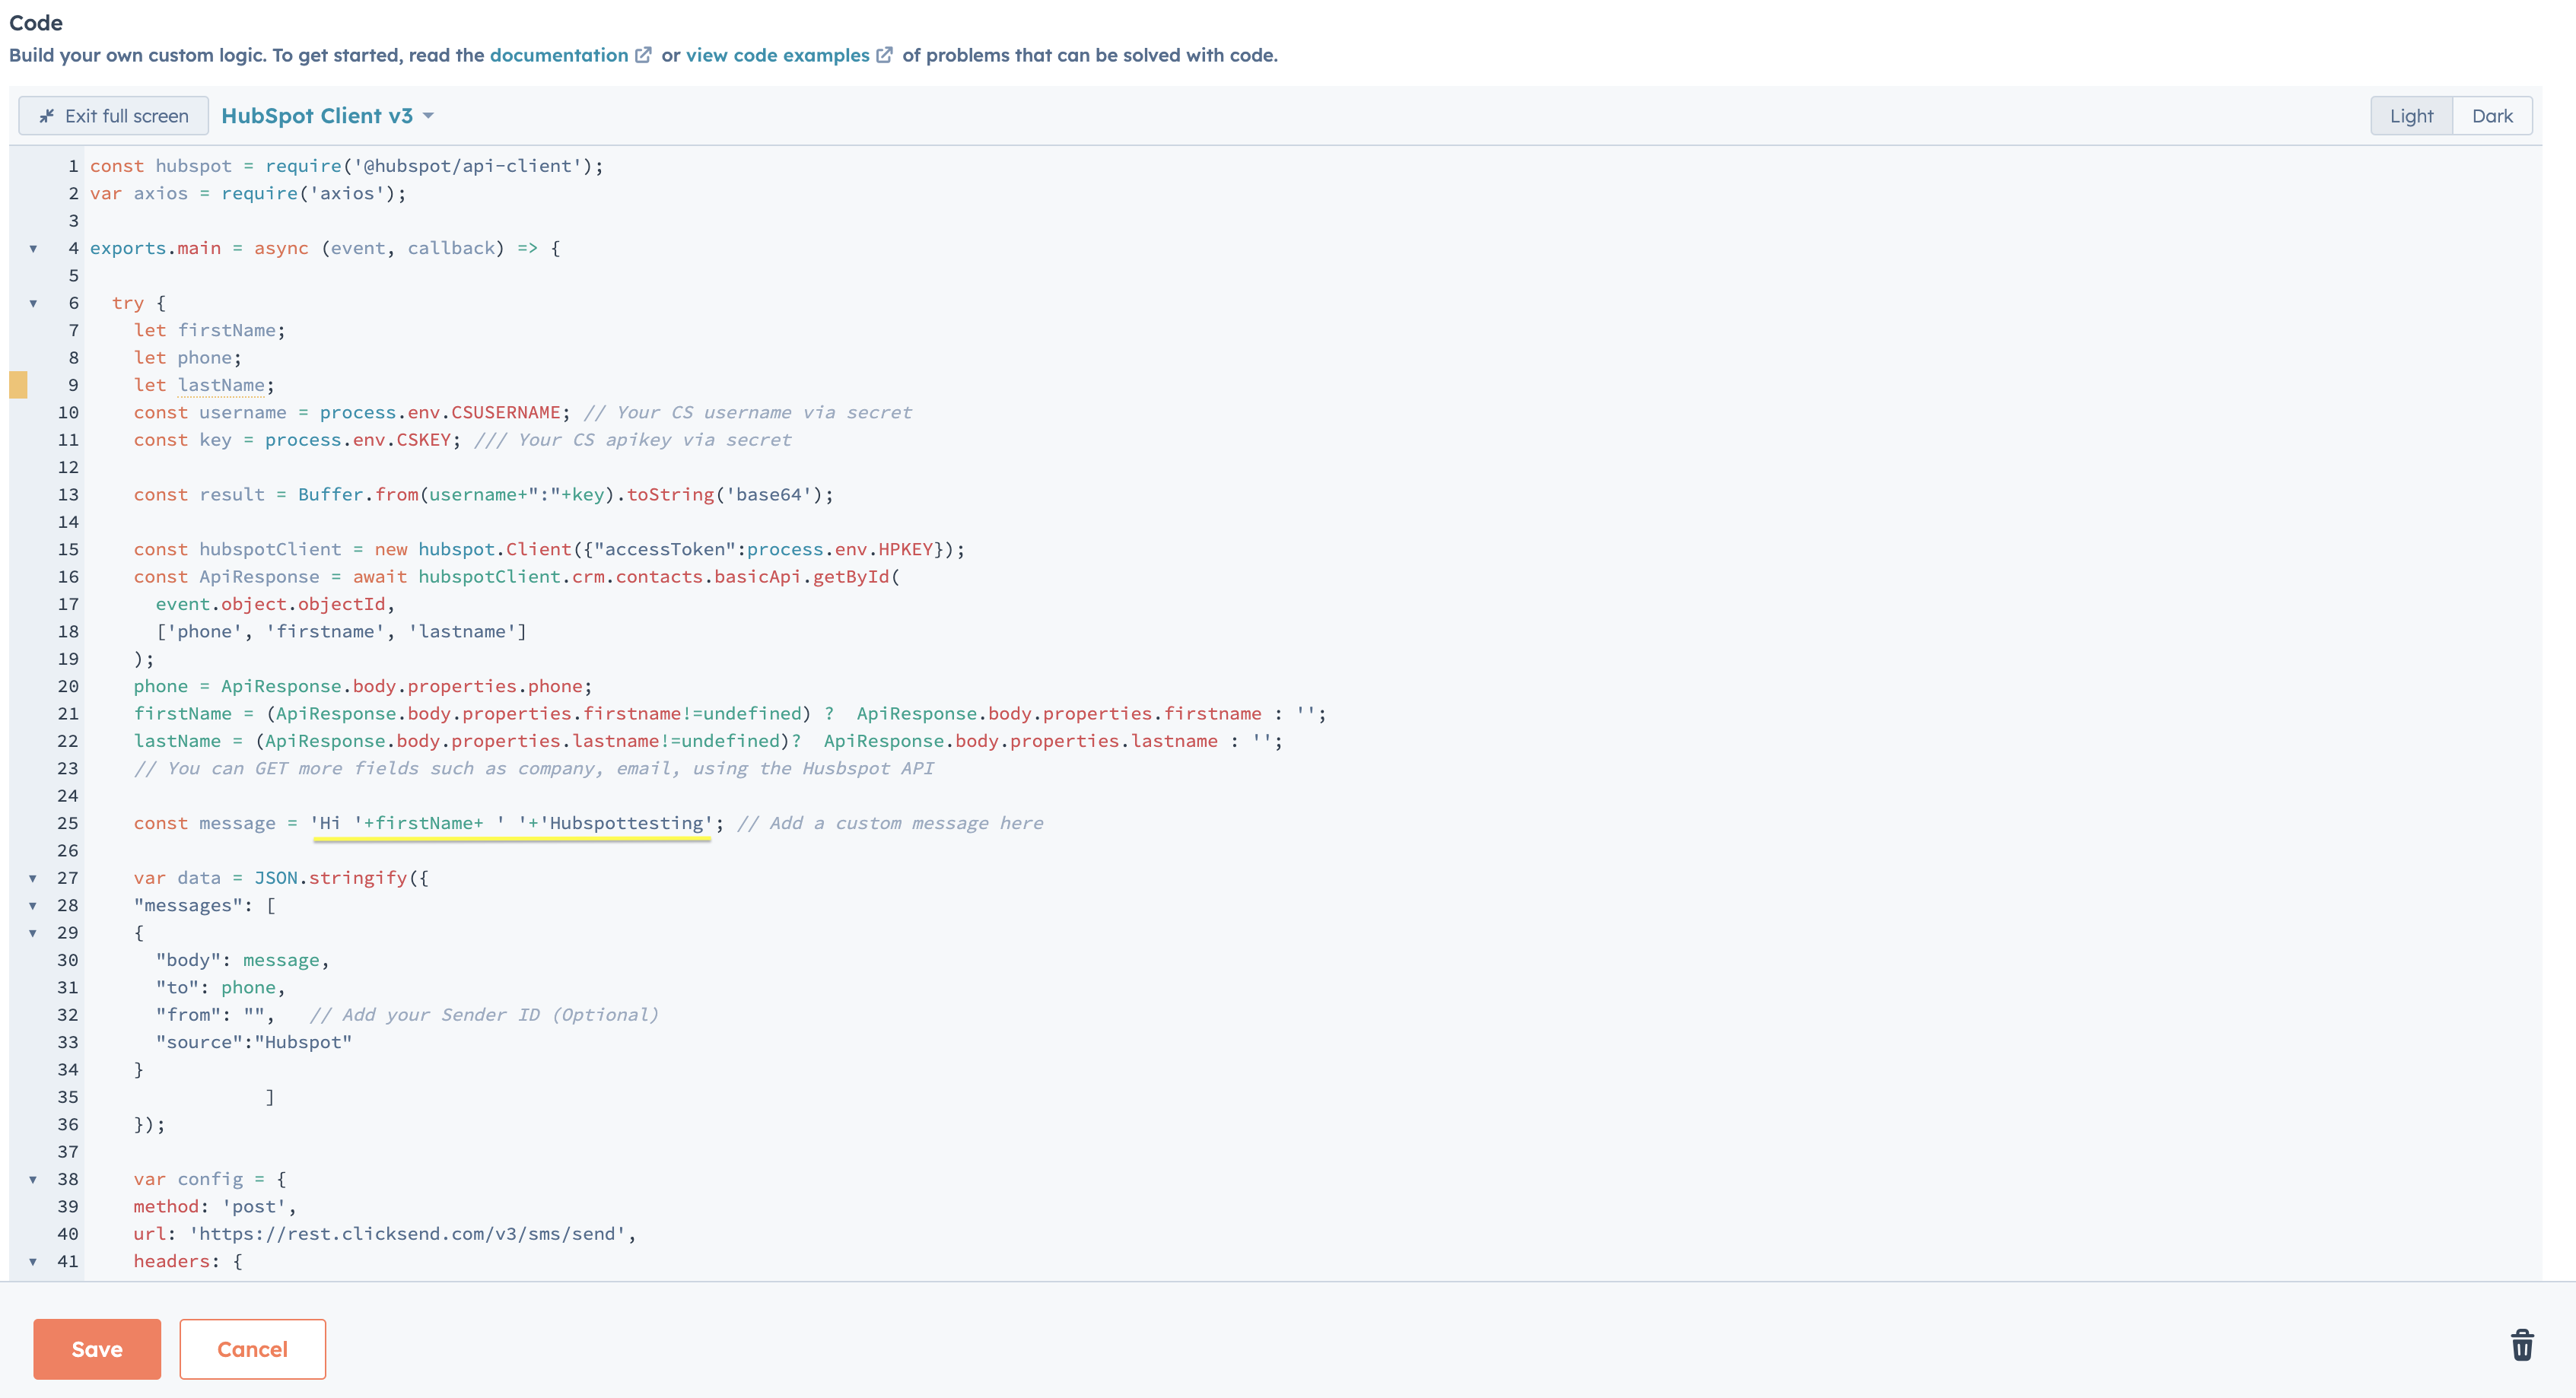
- Remove the existing code, then copy and paste the code from “Hubspot_CustomCode.js” in the “Code” section. Make sure Hubspot Client v3 is selected.
const hubspot = require('@hubspot/api-client');
var axios = require('axios');

exports.main = async (event, callback) => {

  try {
    let firstName;
    let phone;
    let lastName;
    const username = process.env.CSUSERNAME; // Your CS username via secret
    const key = process.env.CSKEY; /// Your CS apikey via secret

	const result = Buffer.from(username+":"+key).toString('base64');

    const hubspotClient = new hubspot.Client({"accessToken":process.env.HPKEY});
    const ApiResponse = await hubspotClient.crm.contacts.basicApi.getById(
      event.object.objectId,
      ['phone', 'firstname', 'lastname']
    );
    phone = ApiResponse.body.properties.phone;
    firstName = (ApiResponse.body.properties.firstname!=undefined) ?  ApiResponse.body.properties.firstname : '';
    lastName = (ApiResponse.body.properties.lastname!=undefined)?  ApiResponse.body.properties.lastname : '';
    // You can GET more fields such as company, email, using the Husbspot API

	const message = 'Hi '+firstName+ ' '+'Hubspottesting'; // Add a custom message here

    var data = JSON.stringify({
    "messages": [
    {
      "body": message,
      "to": phone,
      "from": "",   // Add your Sender ID (Optional)
      "source":"Hubspot"
    }
				]
	});

	var config = {
	method: 'post',
	url: 'https://rest.clicksend.com/v3/sms/send',
	headers: {
		'Content-Type': 'application/json',
		'Authorization': 'Basic '+result
	},
  data : data
};

axios(config)
.then(function (response) {
  console.log(JSON.stringify(response.data));
})
.catch(function (error) {
  console.log(error);
});
  } catch (err) {
    throw err;
  }
  const email = event.inputFields['email'];
  const phone = event.inputFields['phone'];

  callback({
    outputFields: {
      email: email,
      phone: phone,
    },
  });
}; - Change the content of message body as per the need. Click on the “Save” button after making the changes.
Testing (Optional)
-
To test the action select a contact from the drop-down list and click on the "Test" button.

-
The output should have a "SUCCESS" value.

Publishing the Workflow
-
Click on "Review and publish" button.

-
Review the Enrollment, Unenrollment and Timing options. Click on the "Turn on" button.

-
The workflow will now automatically send the SMS whenever a contact triggers the workflow.