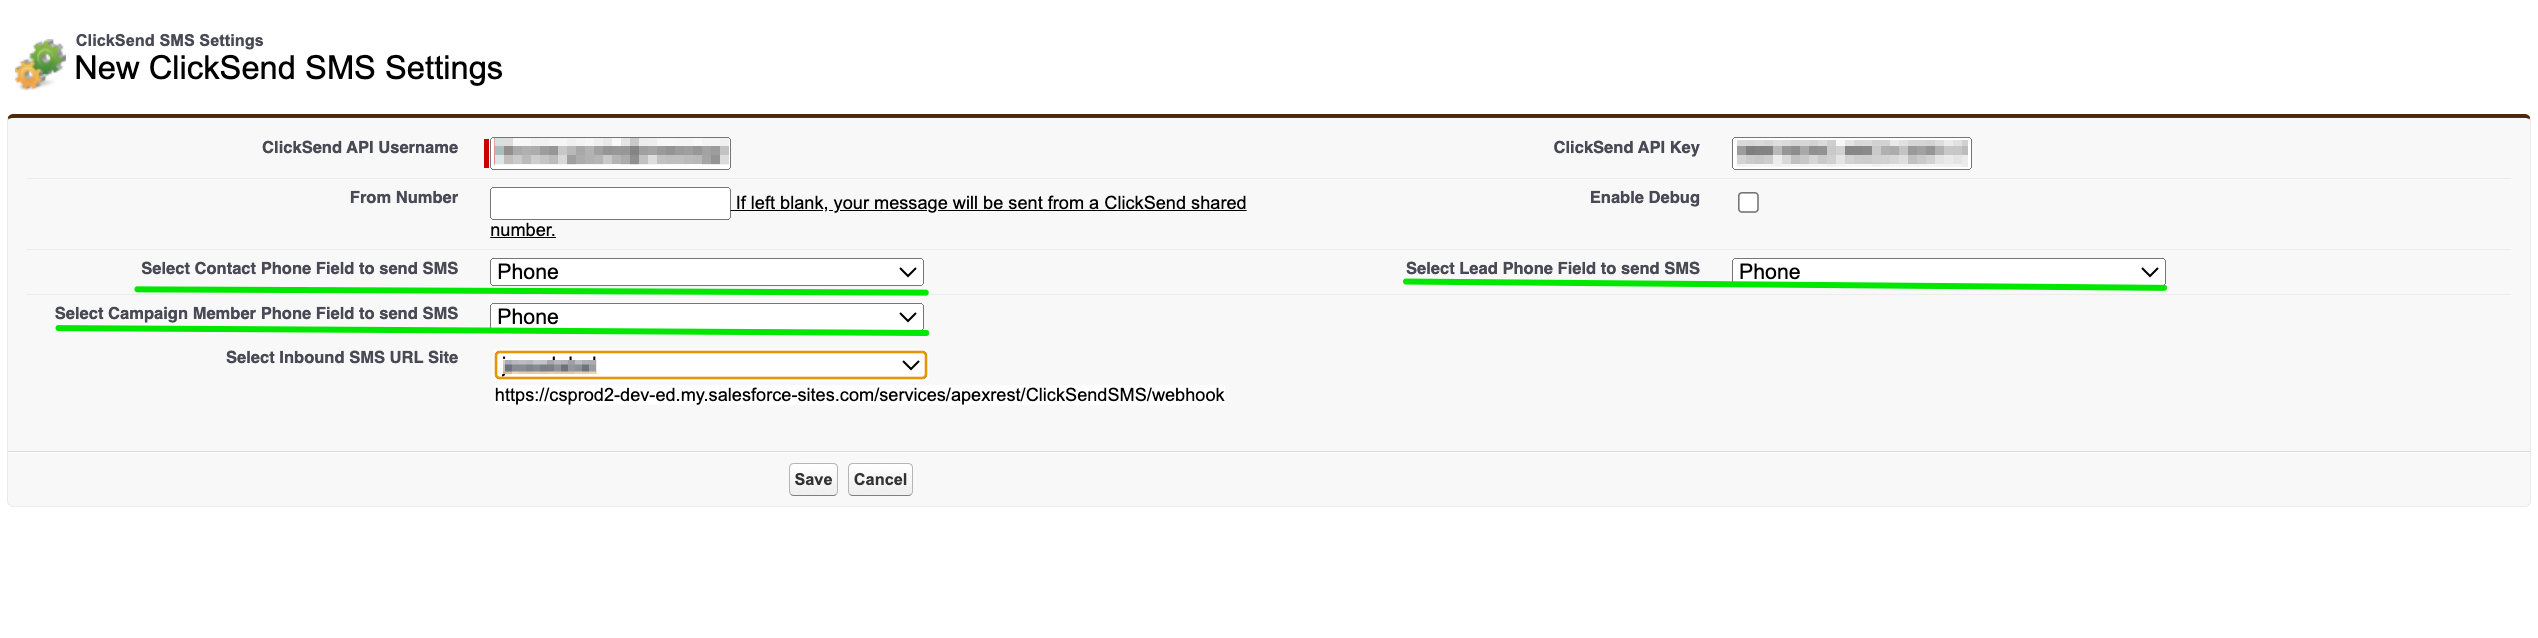
Click the field where the SMS has to be sent for Contact and Lead and then Save.
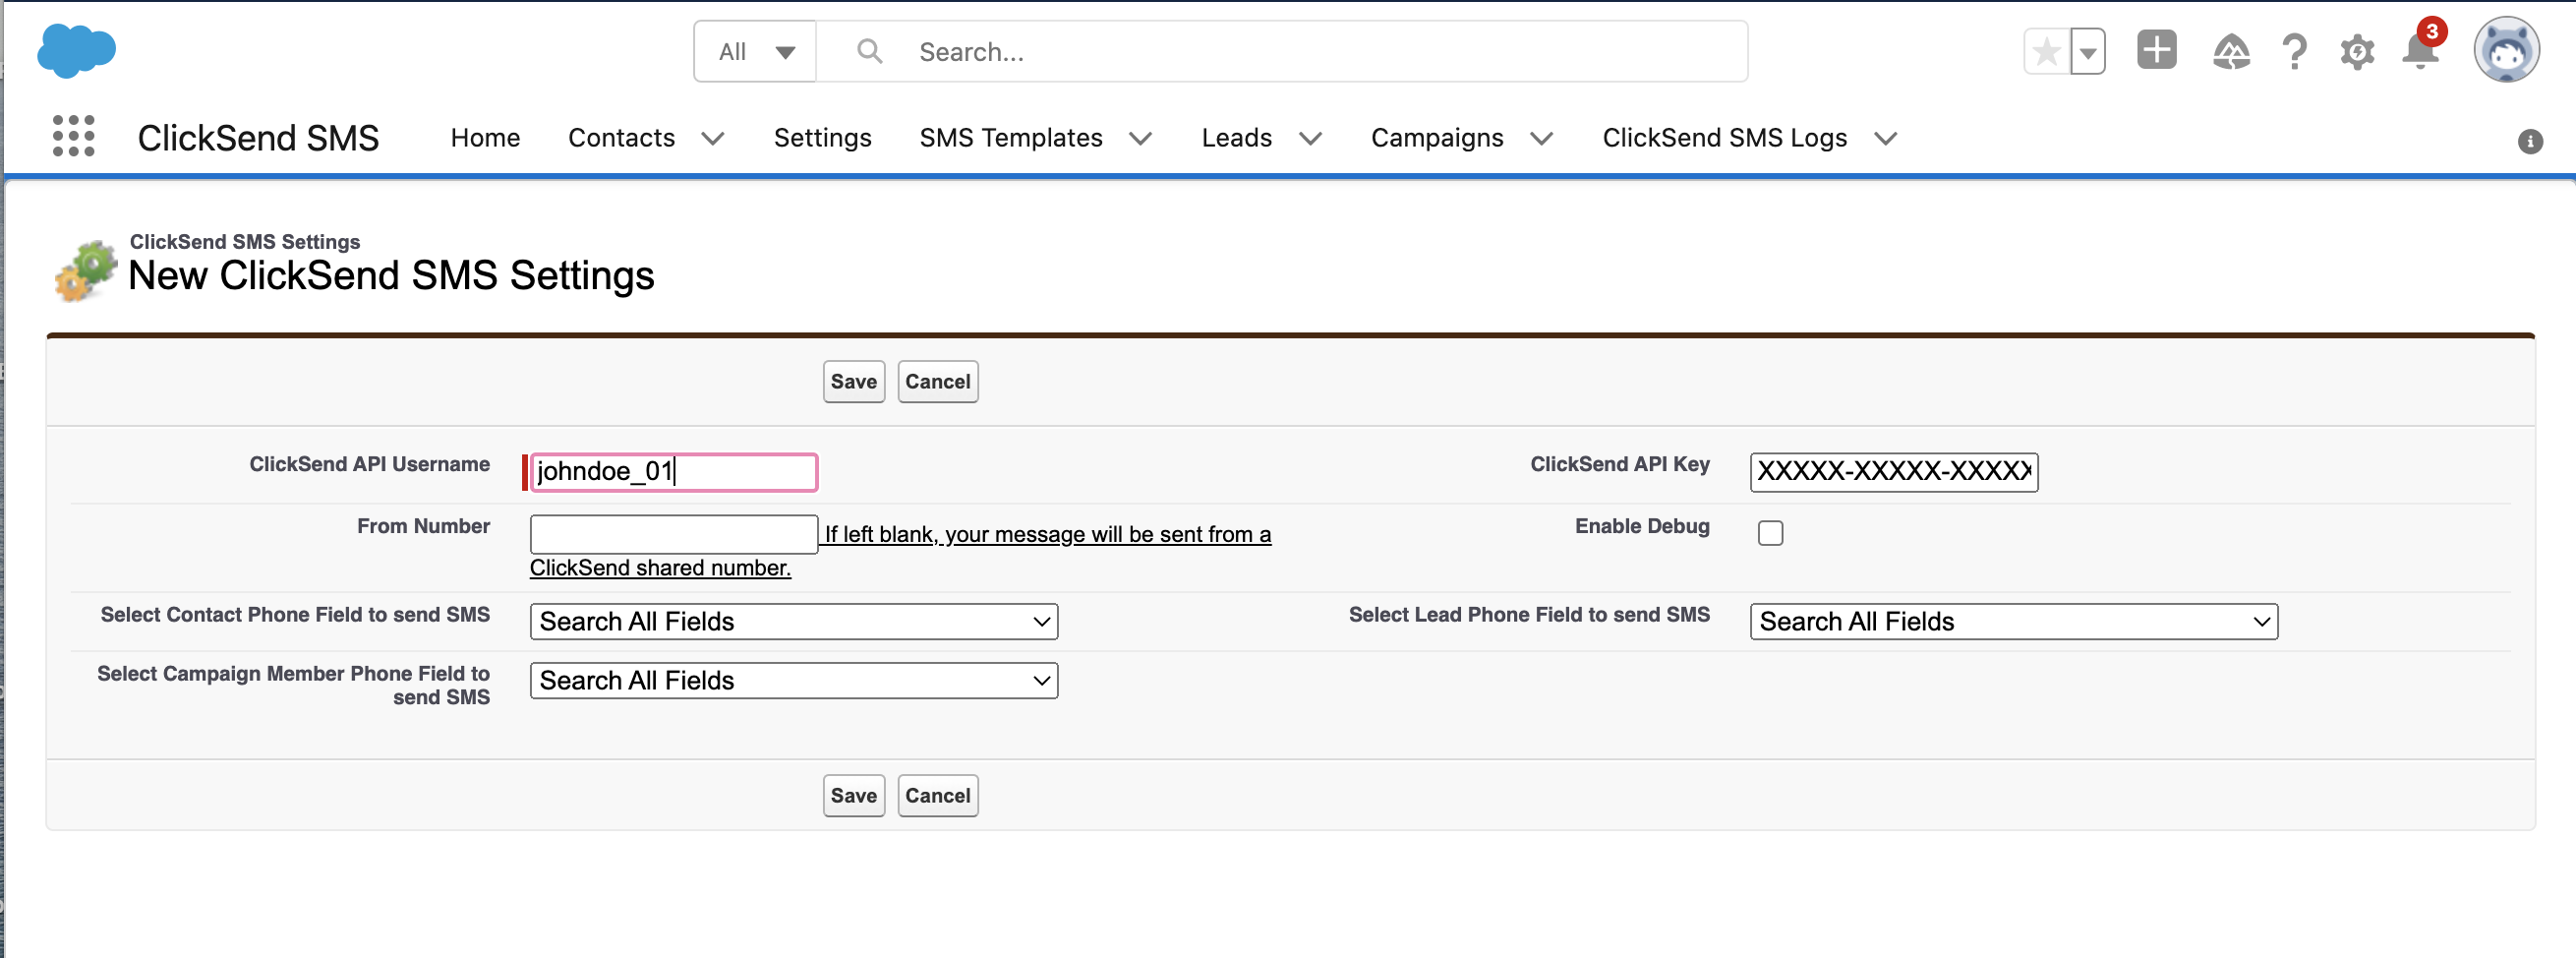
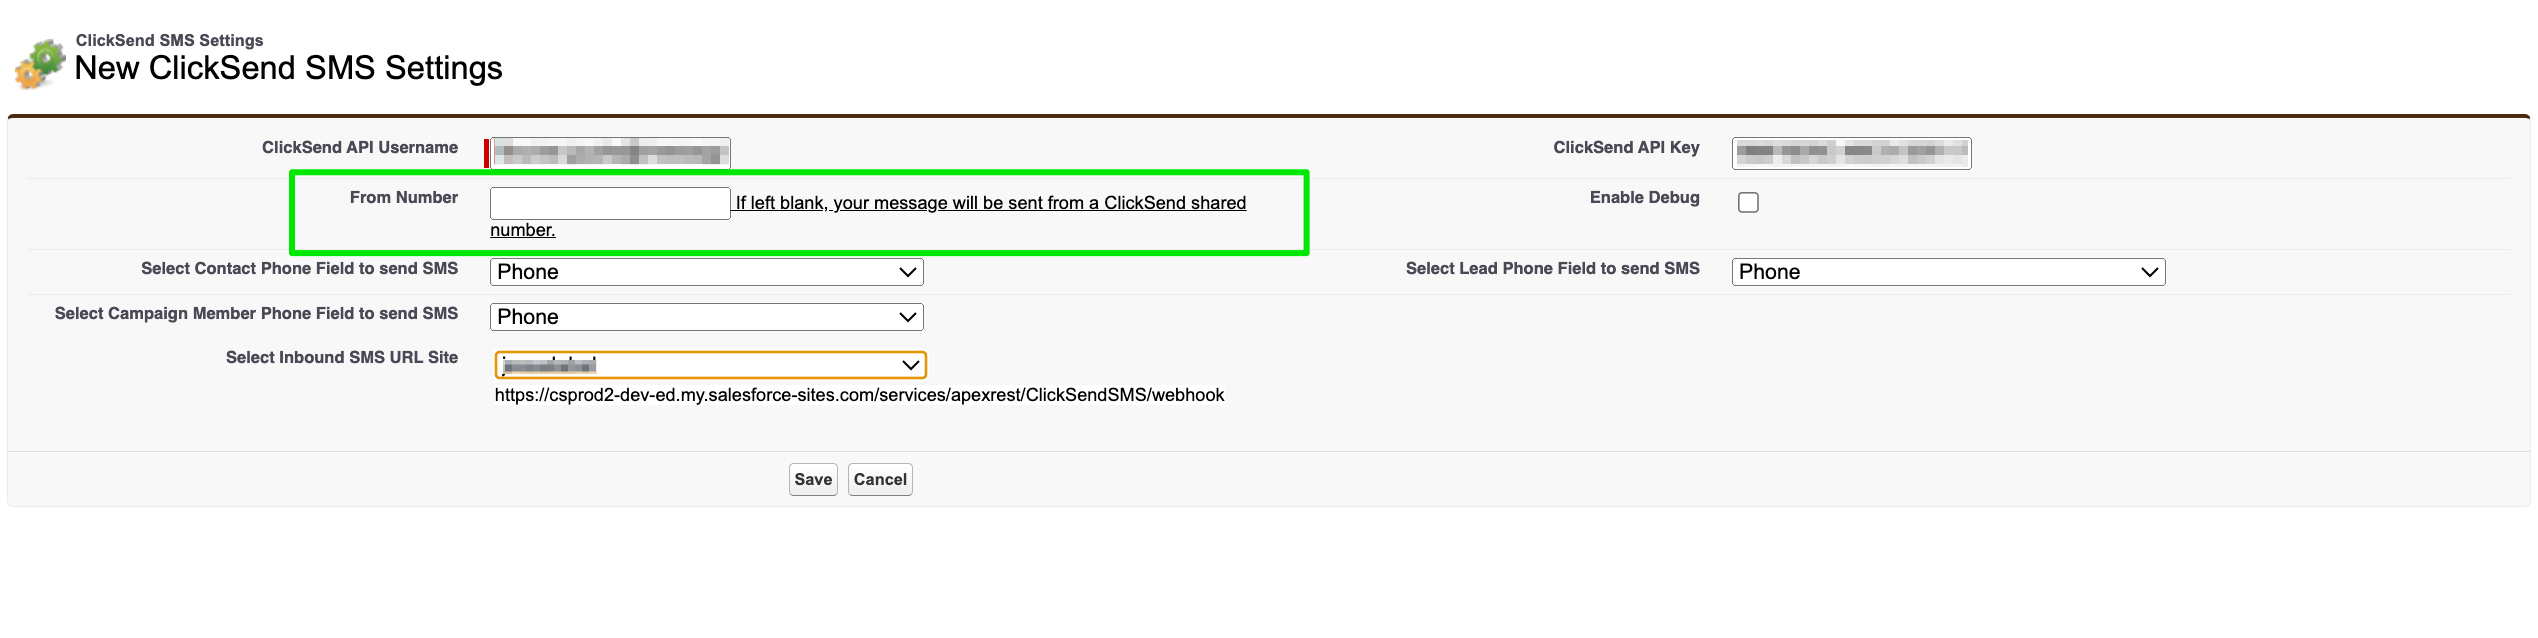
The 'From Number' your messages will be sent from, leave blank to use our shared number option. Using your business name is also supported in this field if your country supports it.
Contacts and Leads Objects
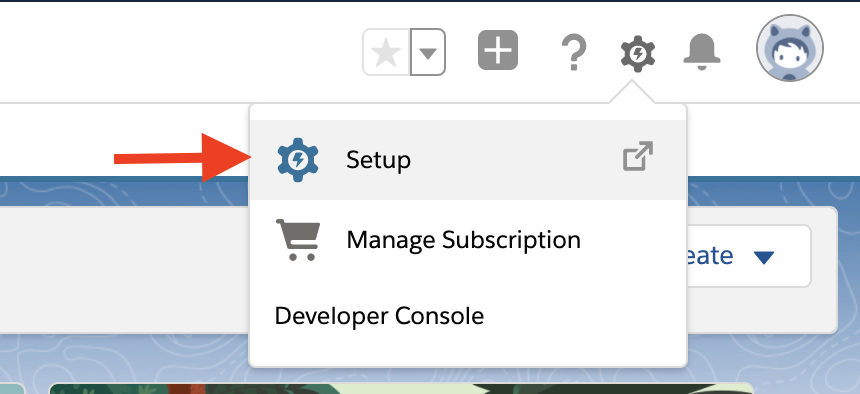
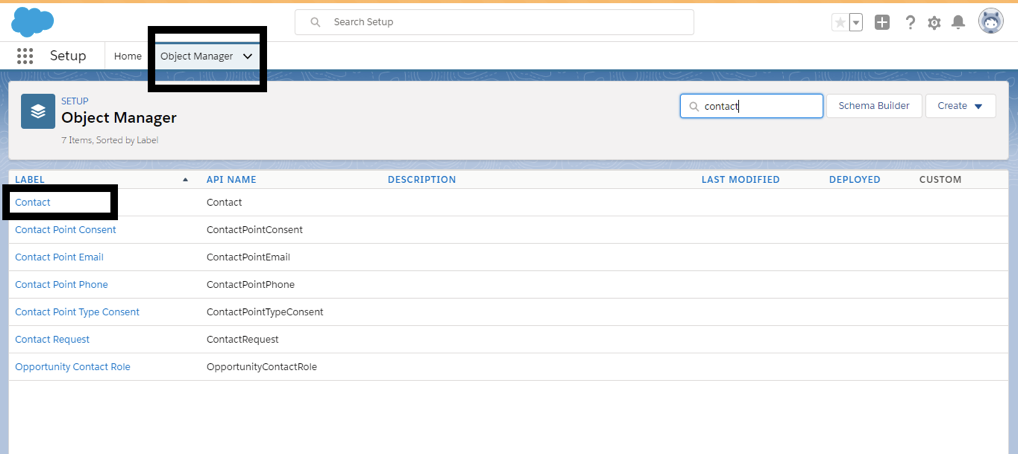
Let us add Send SMS button to Contact Object. First, go to Setup. This can be found on the config at the top right.
Look for Object manager and Contact object, then click.
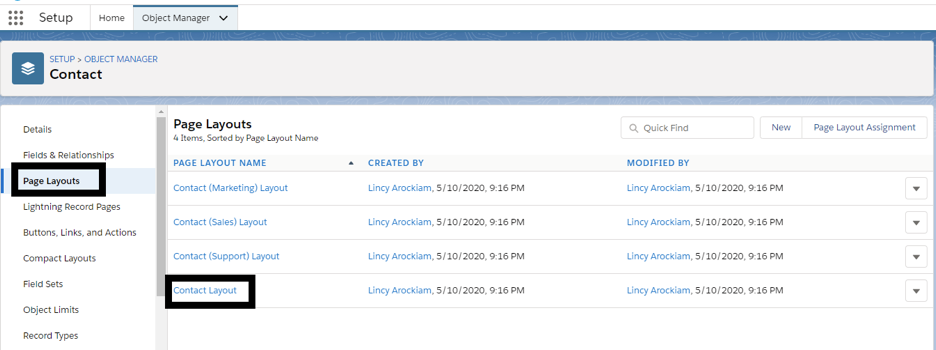
Select 'Page layouts' and then 'Contact layout.'
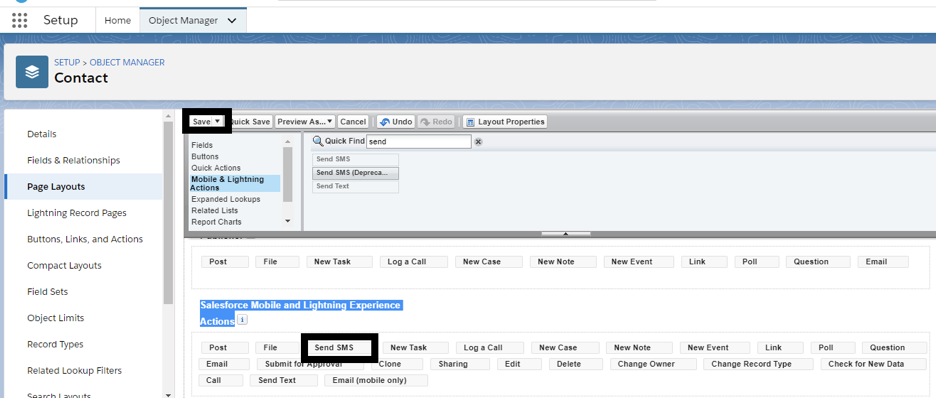
Click 'Mobile & Lightning Actions' and look for the Send SMS button. Drag it into the 'Salesforce Mobile and Lightning Experience Action' Panel and Save. Repeat these steps for the 'Lead' object as well.
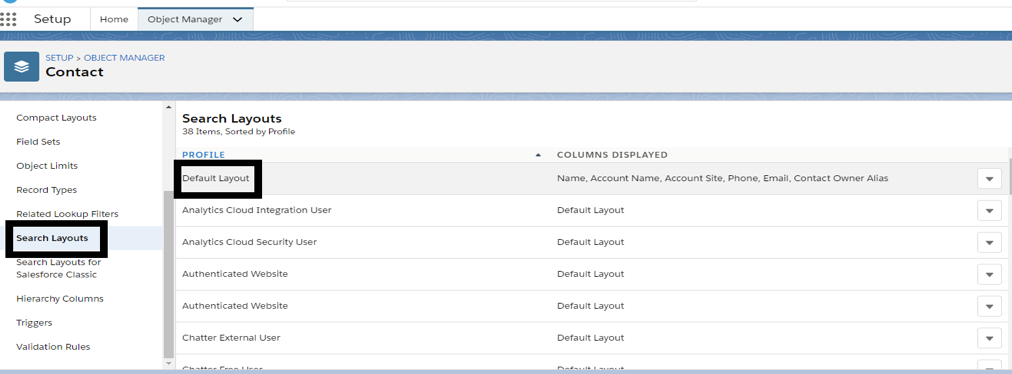
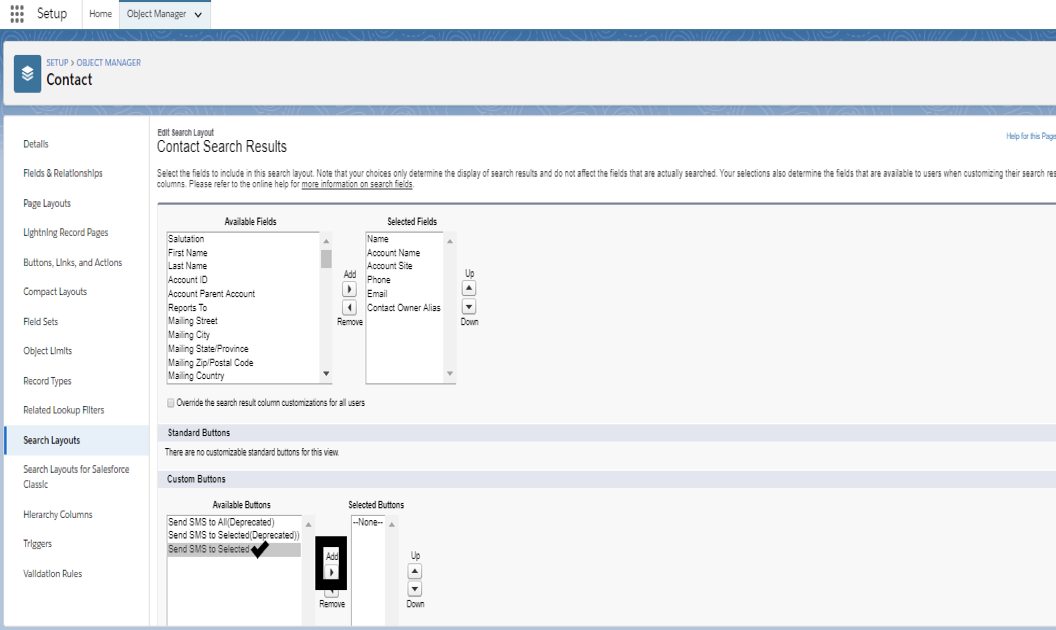
Add the Send SMS button to the ListView. Go to Object Manager -> Contact -> Search Layout -> Default Layout and click the drop-down and select Edit.
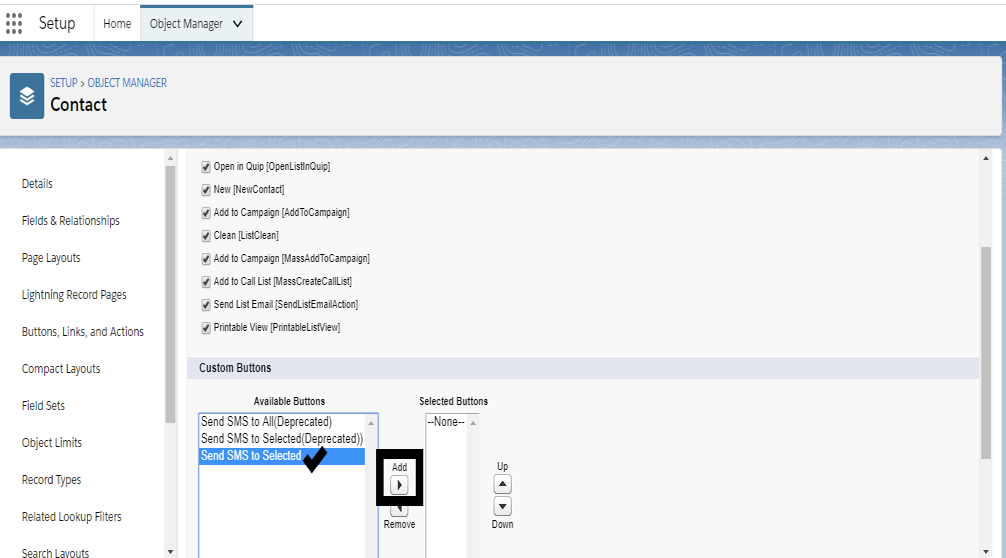
Go to Custom Buttons & Move the “Send SMS to selected” button to the other box and click save.
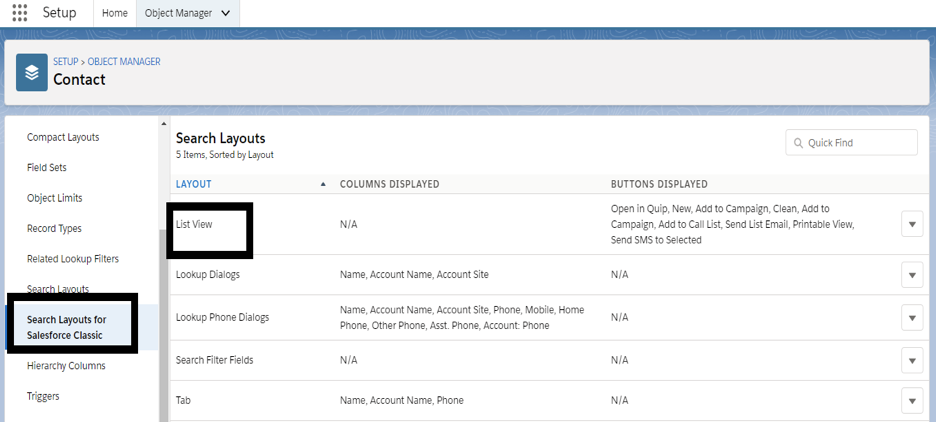
Now let's go to 'Search Layout for Classic' and then 'List View' and click drop-down Edit.
Add the “Send SMS to selected” button to the other box and click Save.
Now click App manager and search for ClickSend. You'll have the Send SMS button under Contacts and Leads.
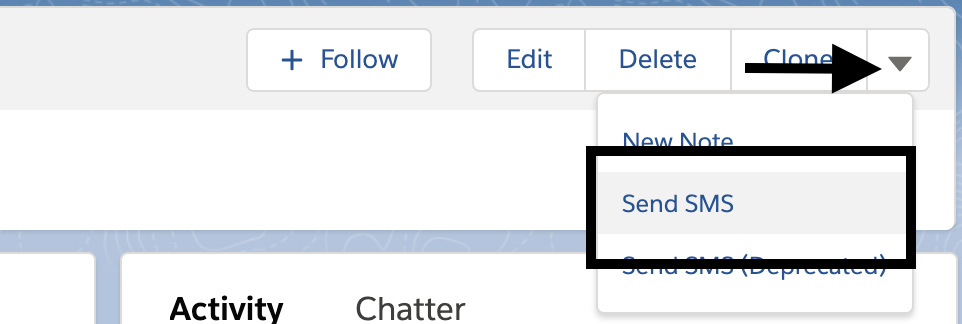
When you open a contact or a lead, look for the drop-down button and you can see the Send SMS option. Now you are ready to compose and send your message.
Campaigns Object
Let's do the same thing we did for Contacts and Leads Object, add the Send SMS button to
Campaigns object.
Open Setup > Object manager > Campaign > Page layout
Look for Send SMS button from Mobile and Lightning Category and drag it to the Mobile and Lightning Experience Action
Save and changes will apply.
ClickSend SMS Logs
Now you can monitor all your outbound messages in one object. If you are wanting to add logs for Contacts, Leads and Campaigns objects, you'd open Setup > Object manager > search for the object (either contact, lead, campaign) > page layout.
Then look for ClickSend SMS Logs under Related list and add it by dragging it to the Related list panels.
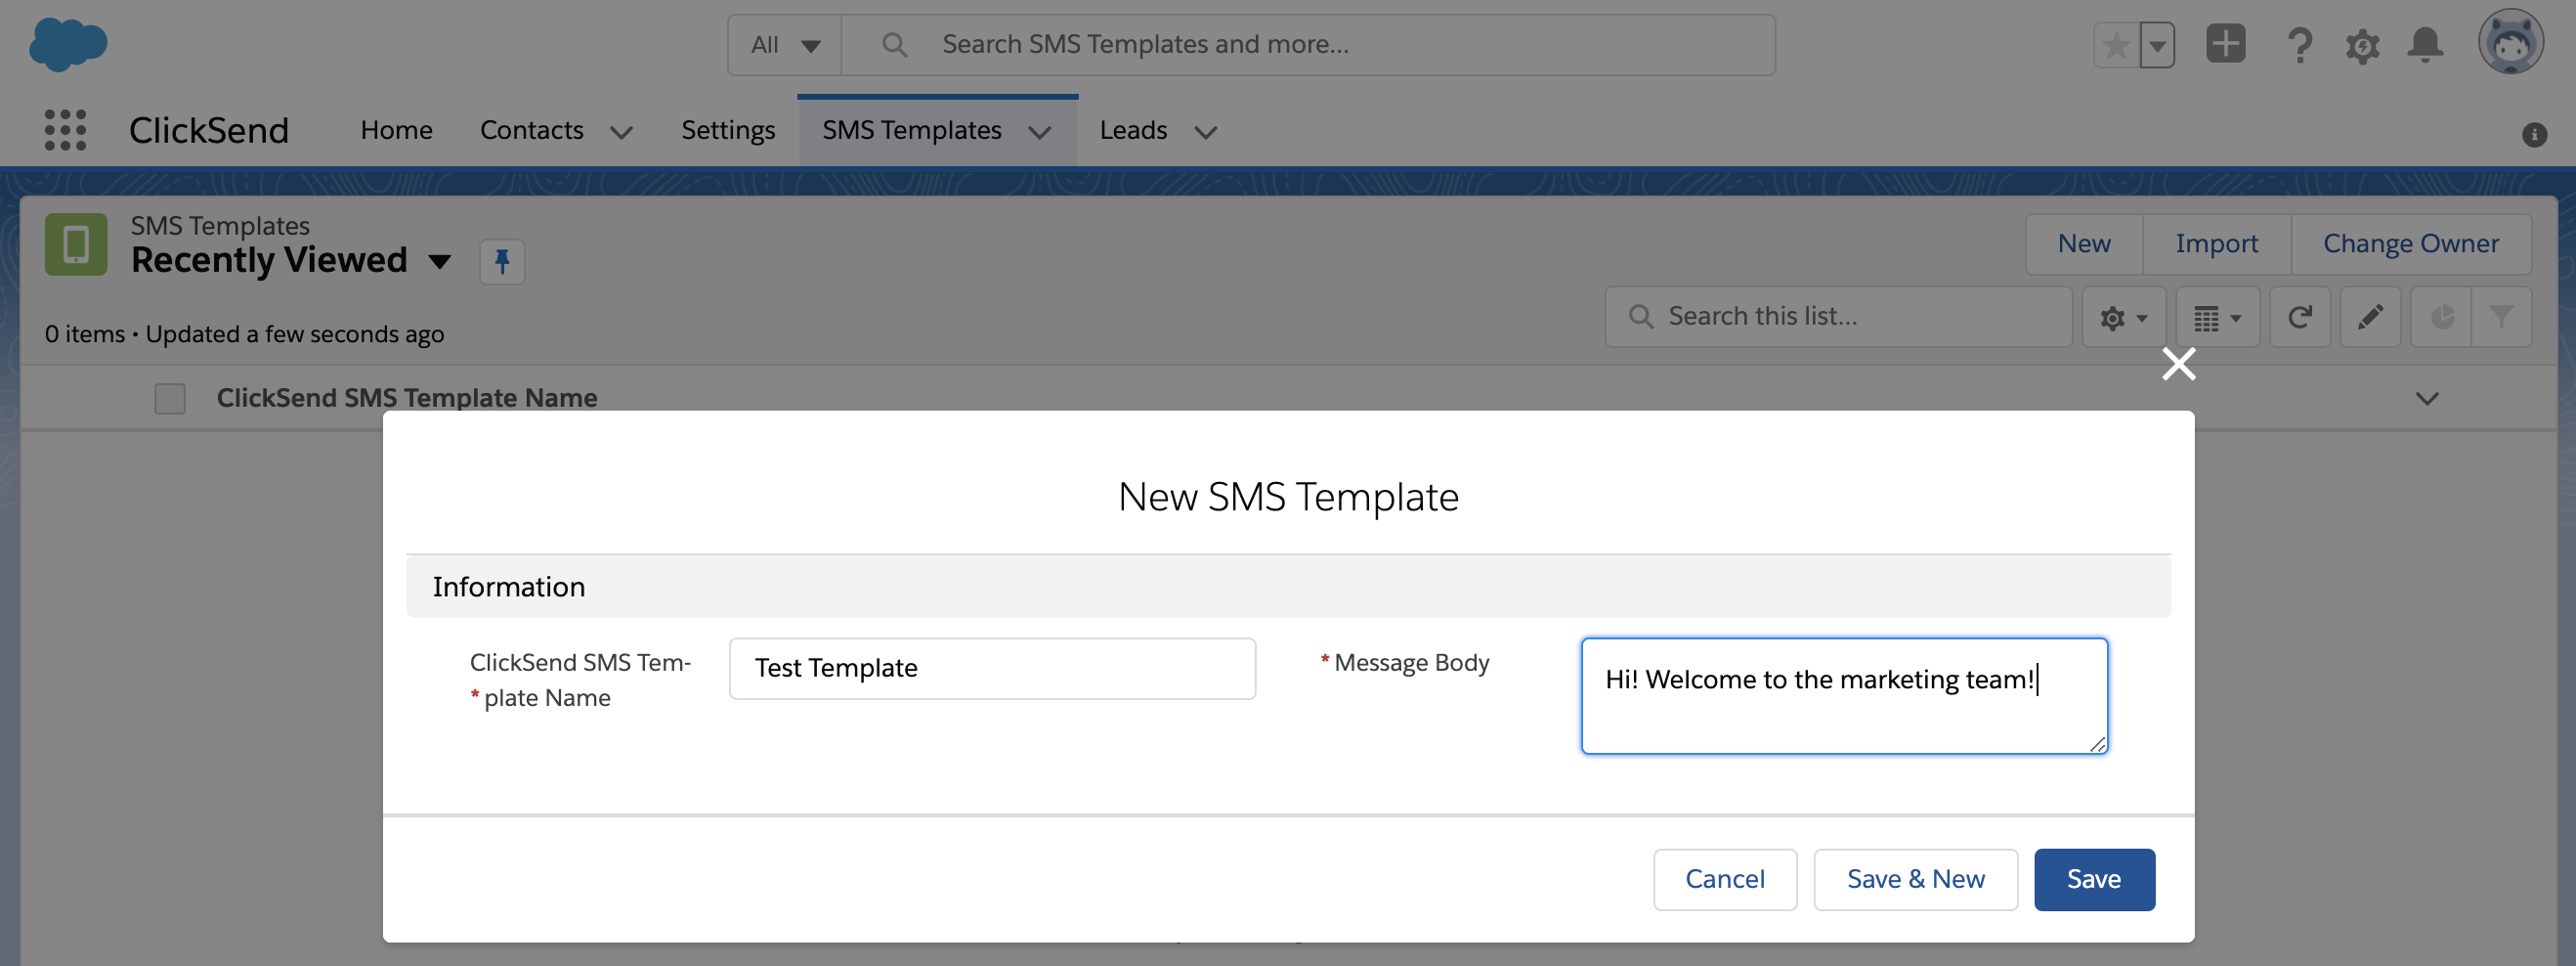
Add SMS Templates
Create SMS templates and send messages without a hassle. You'd go to SMS templates > New.
Inbound SMS / Support 2 way messaging
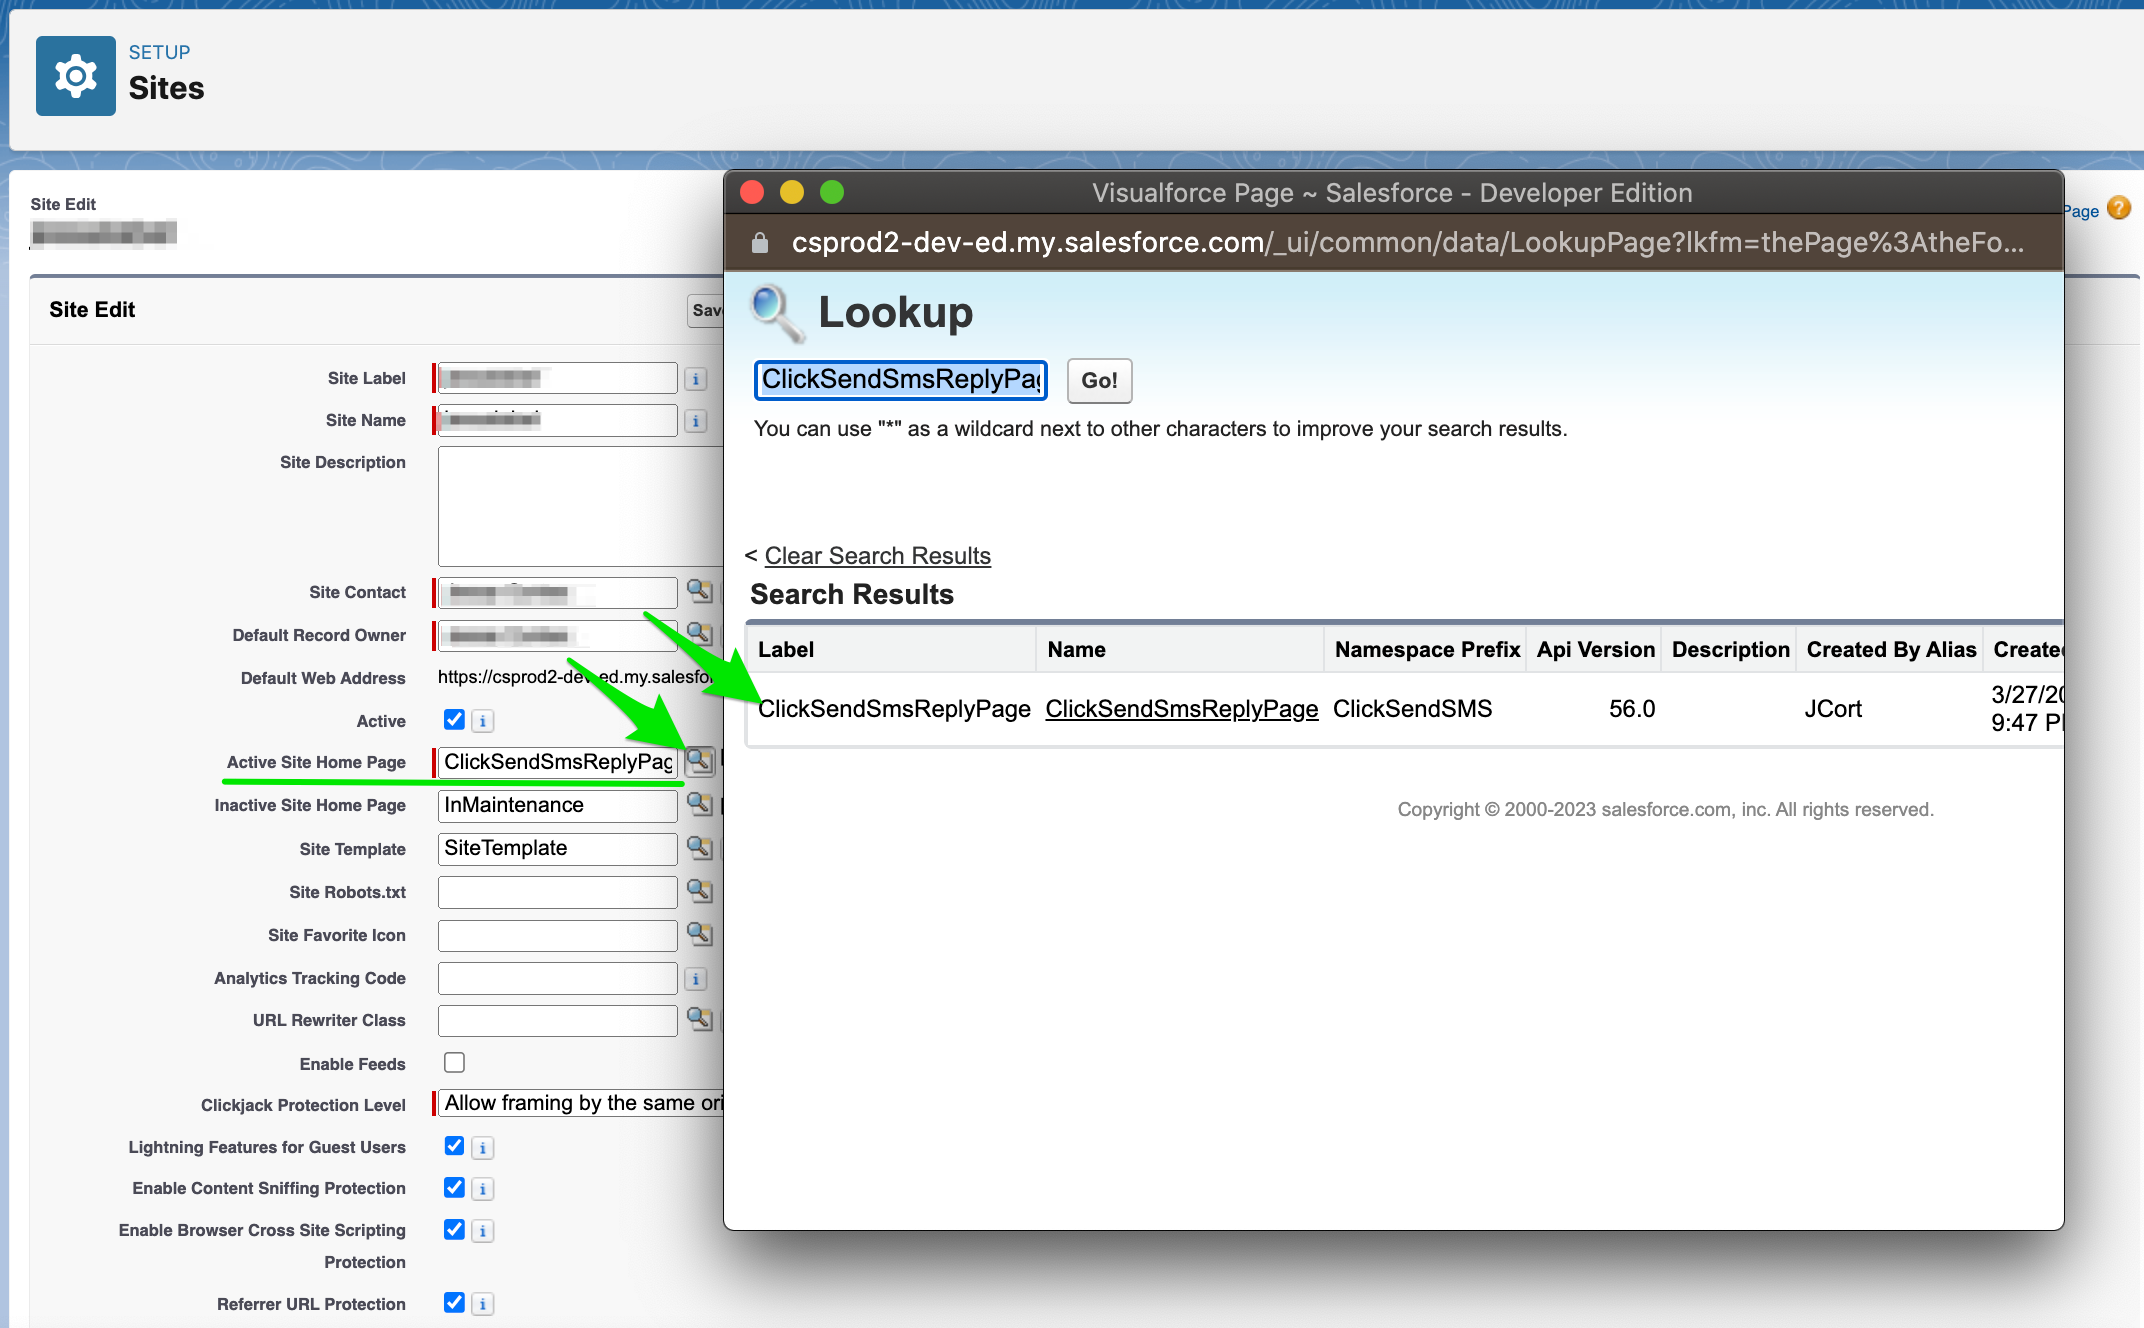
Site is required to enable 2 way messaging. If you haven't created a site yet, you'd go to Setup > User Interface > Sites and Domains > Sites > Enable term of use by ticking the checkbox and create a site.
When filling up the mandatory fields in site, look up for “ClickSendSMS.ClickSendSmsReplyPage” under Active Site Home Page field.
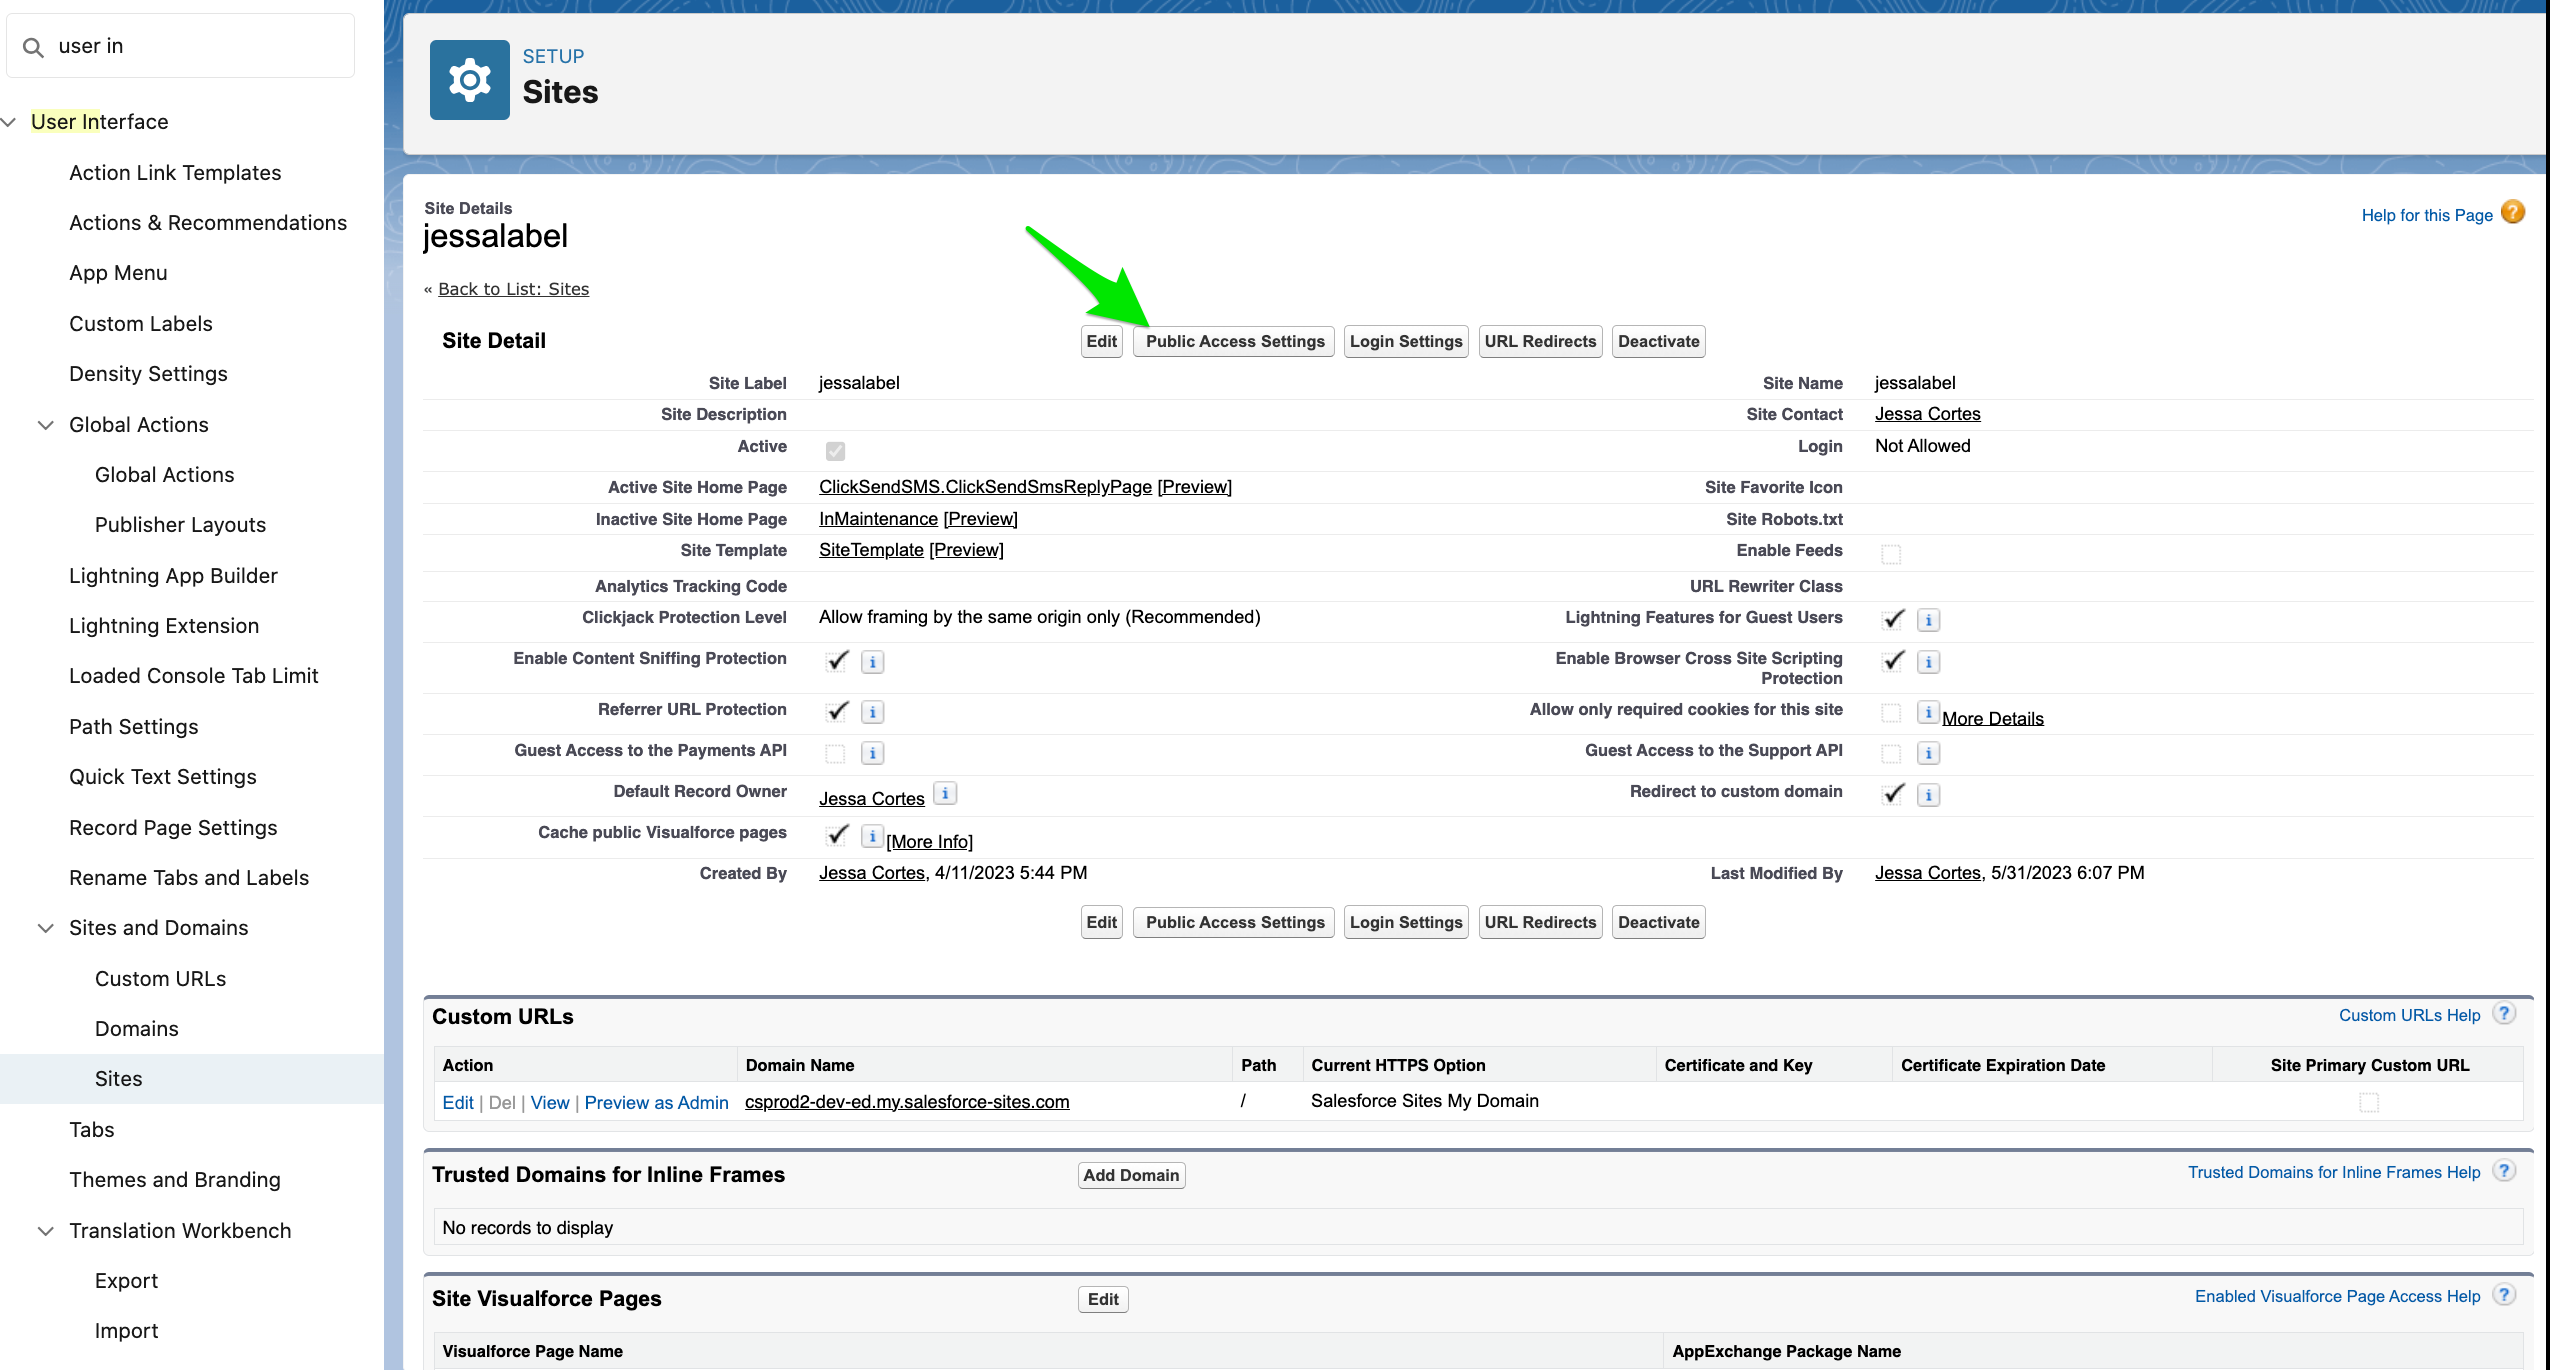
Grant ClickSend Log Custom Object FLS and Apex Class to access to the Site User Profile. Click on “Public Access Setting” button.
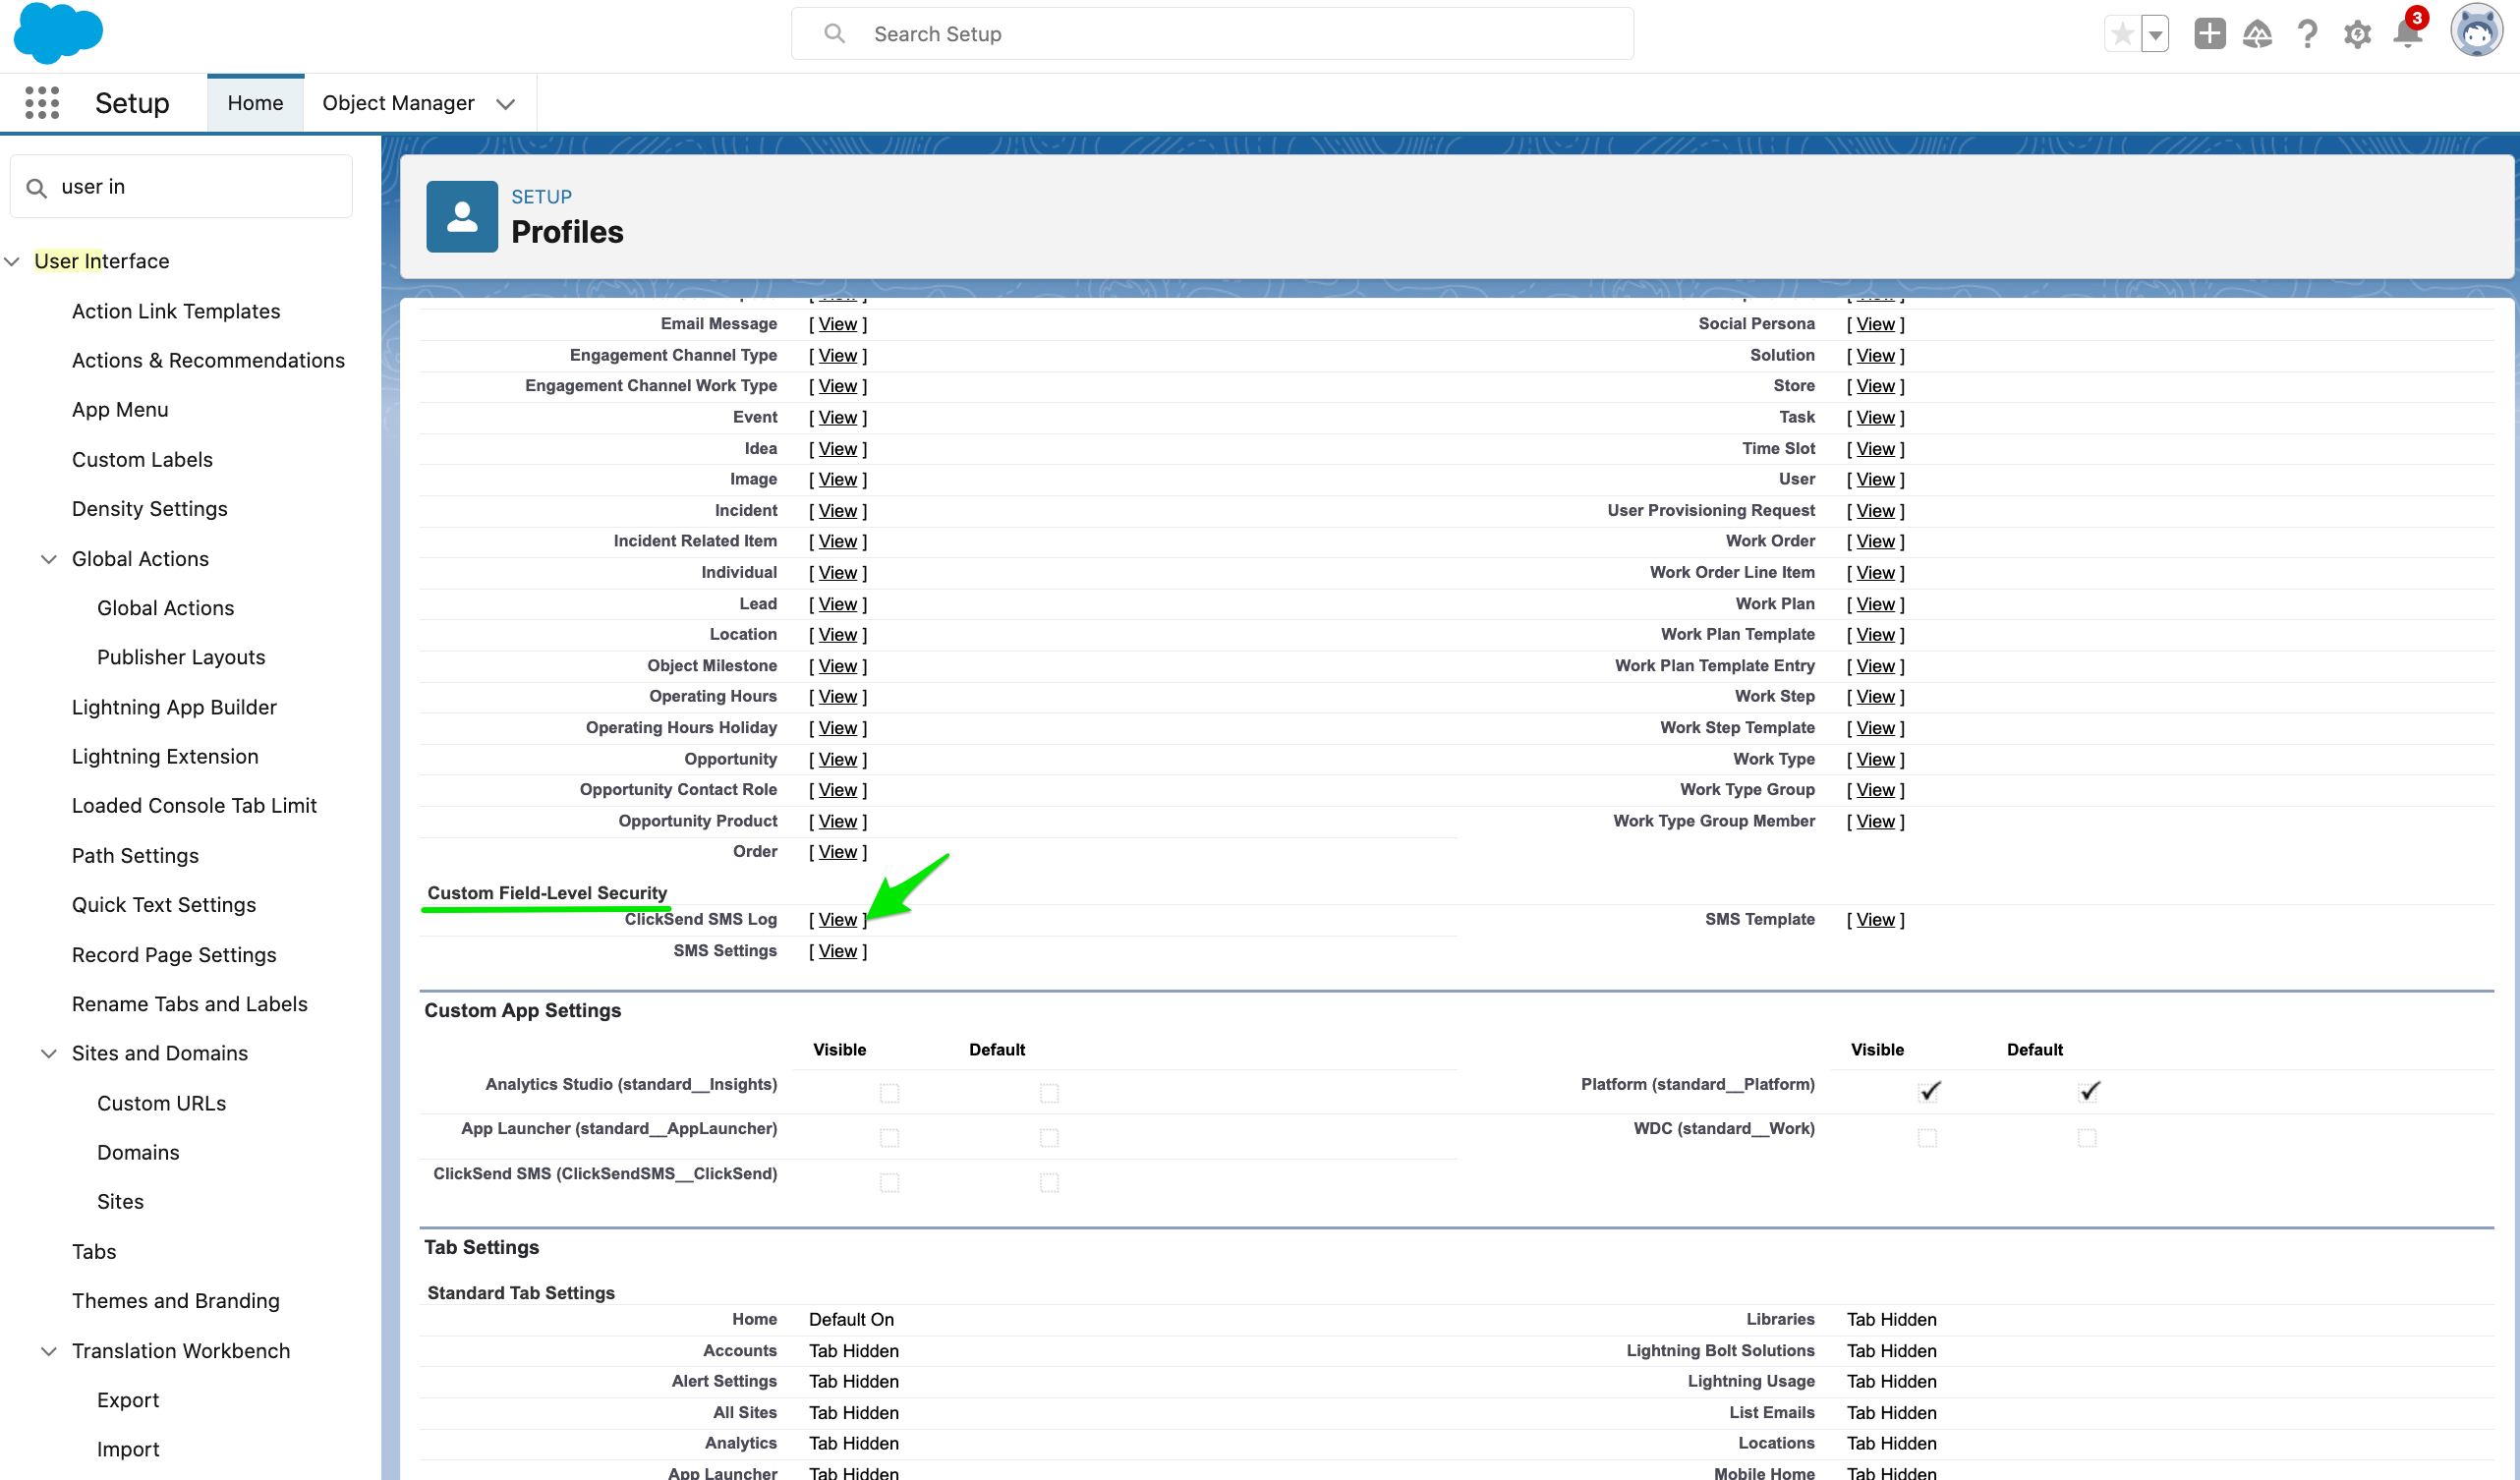
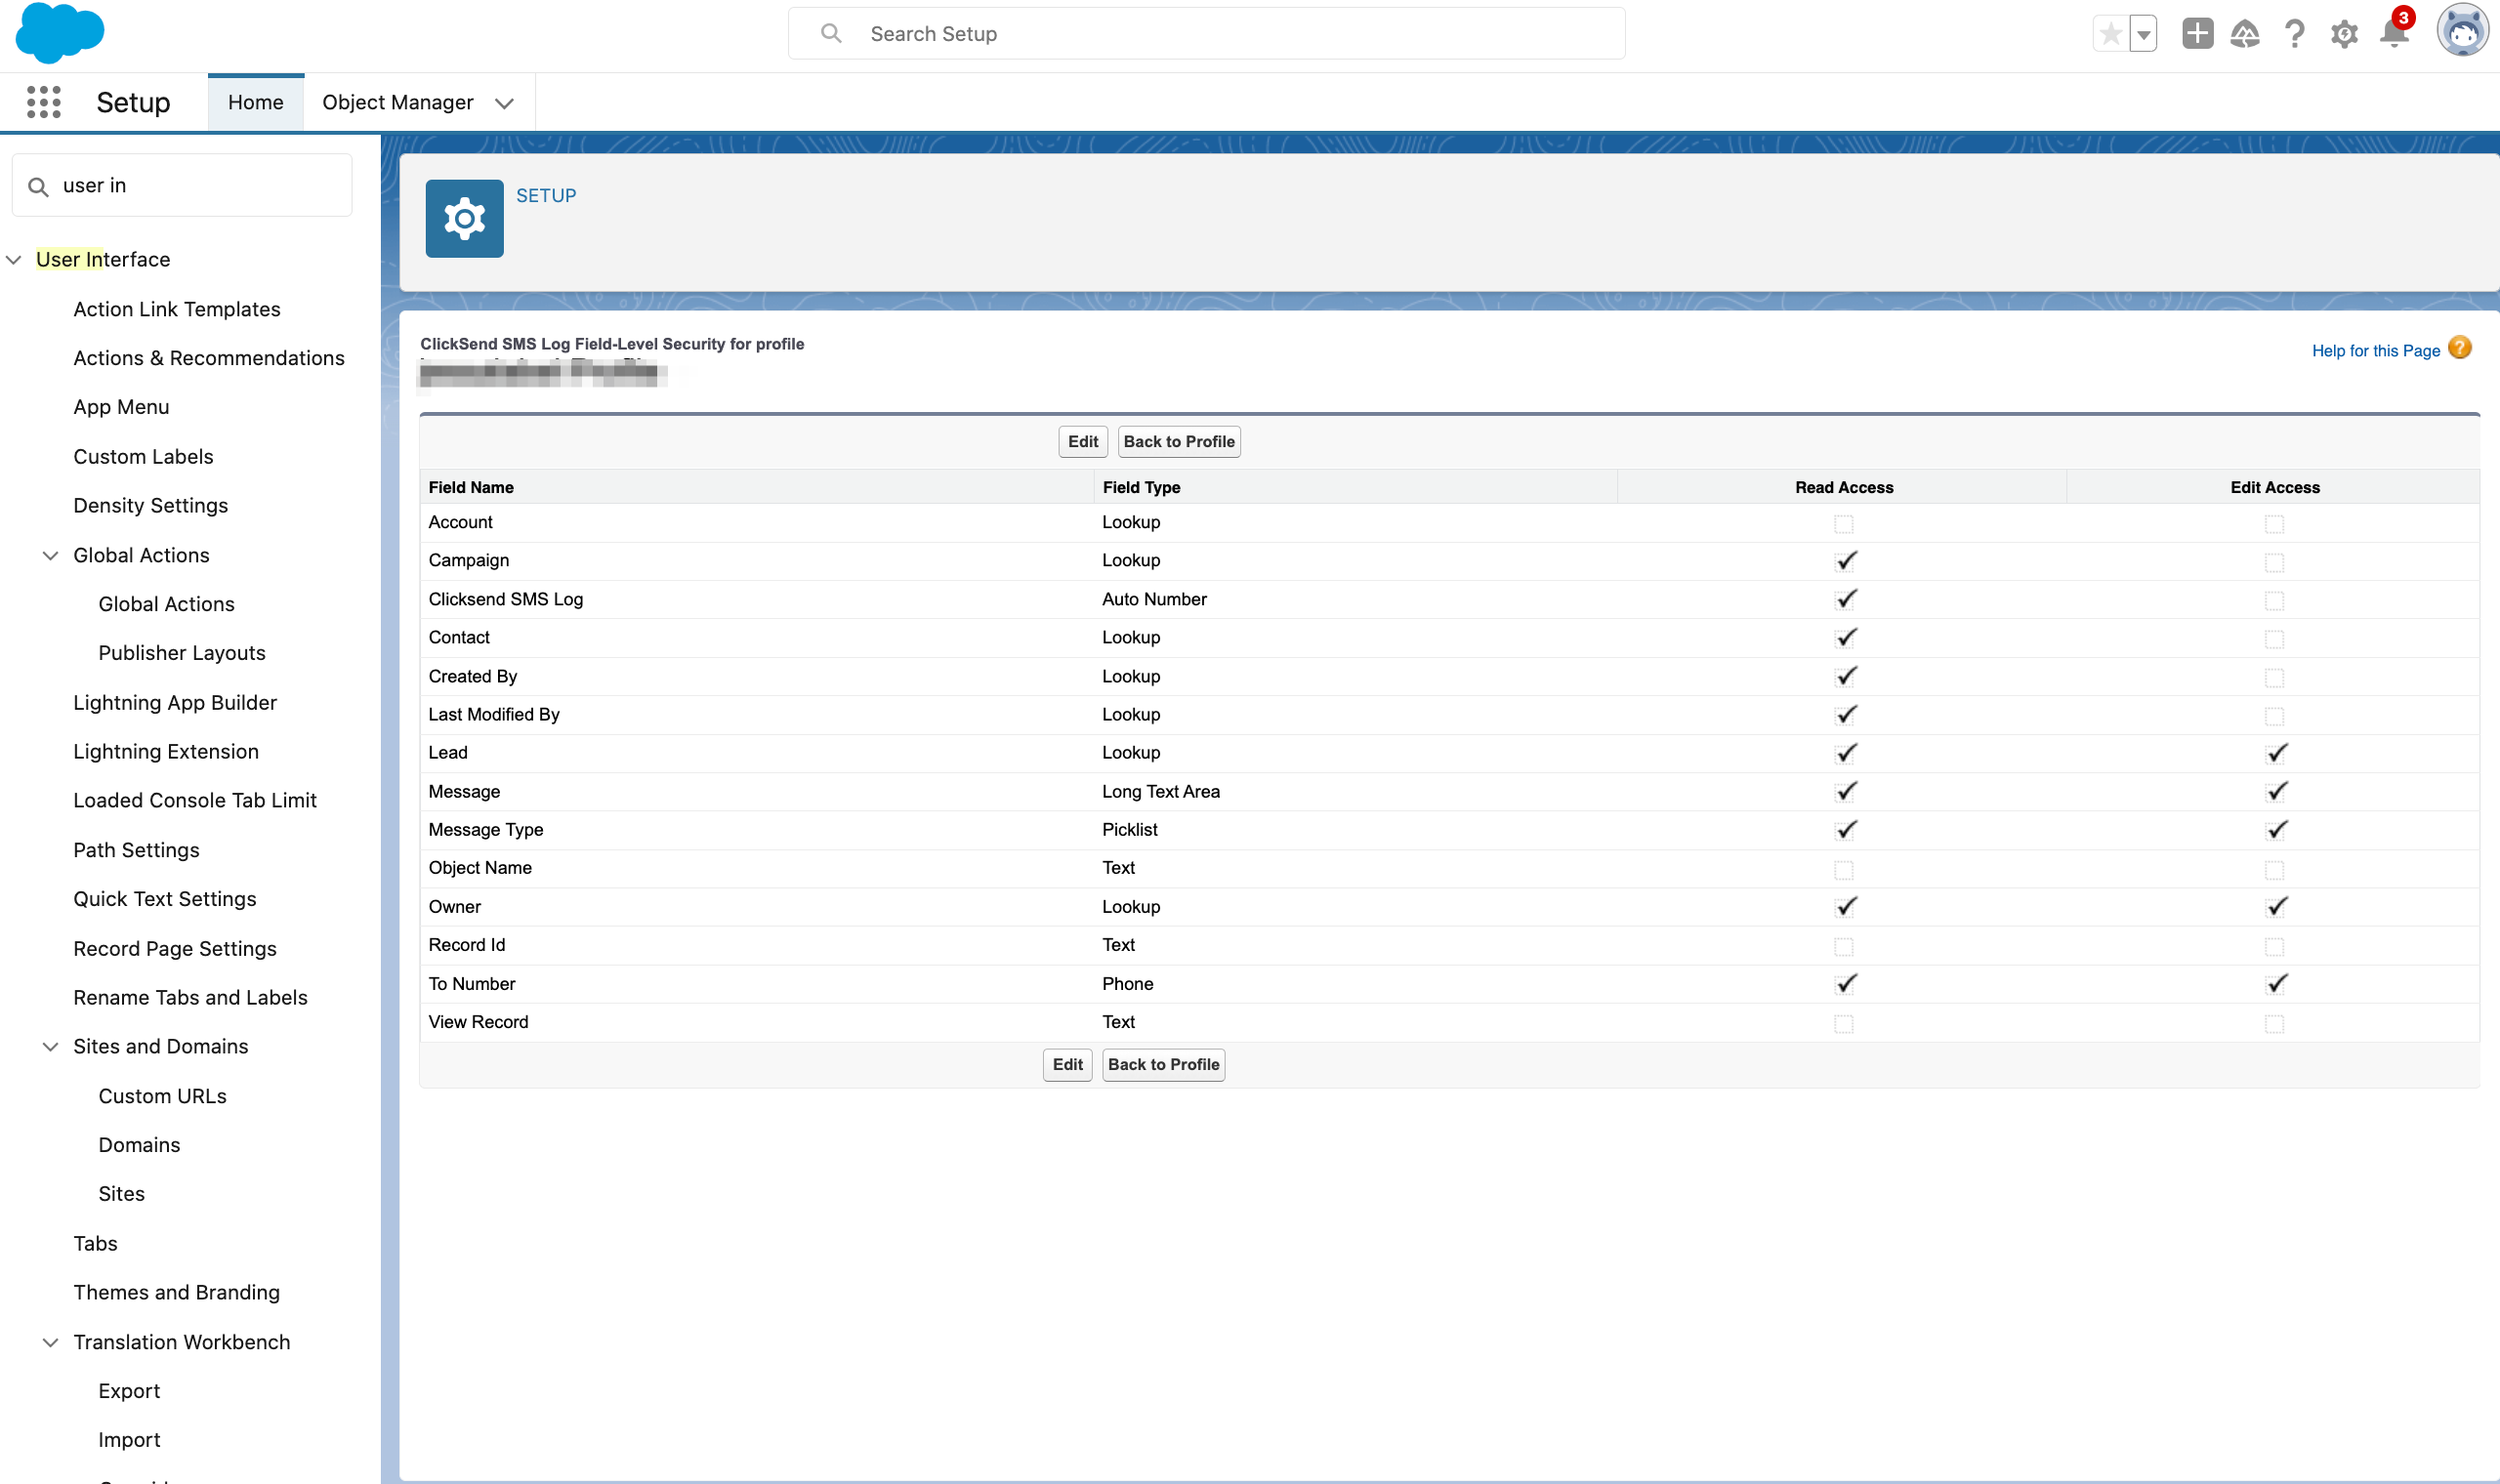
Look for “Custom Field-Level Security” and click view button. Grant Access to ClickSend SMS Log Fields. (Check All the boxed in Read Access and Edit Access Column and then save it.)
Go back the top of the profile page and click the edit button.
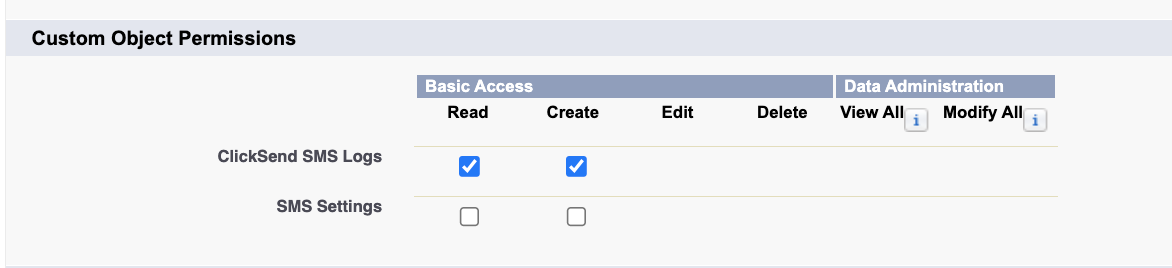
Look for “Custom Object Permissions” and Check the Read and Create access and save it.
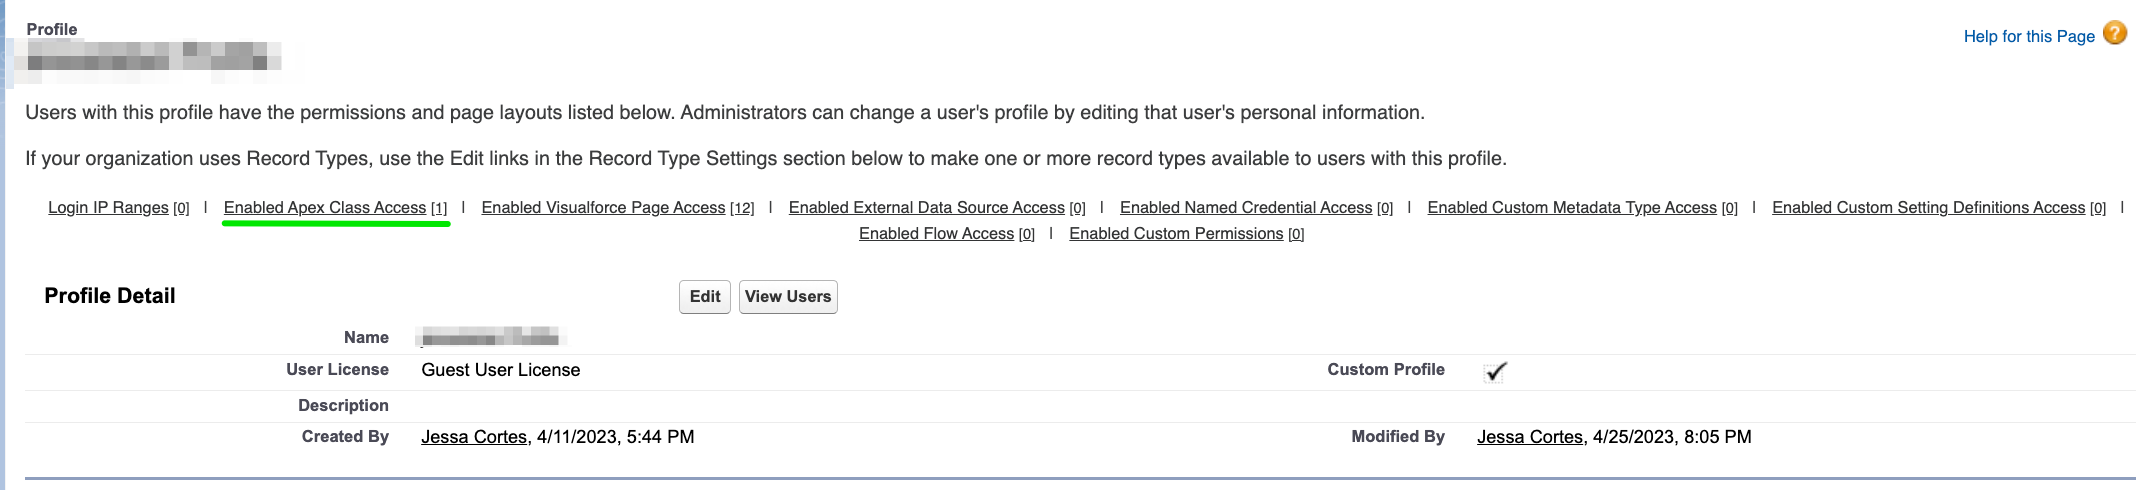
Go back the top of the profile page and click the “Enabled Apex Classes Access” button link and click Edit to add apex class.
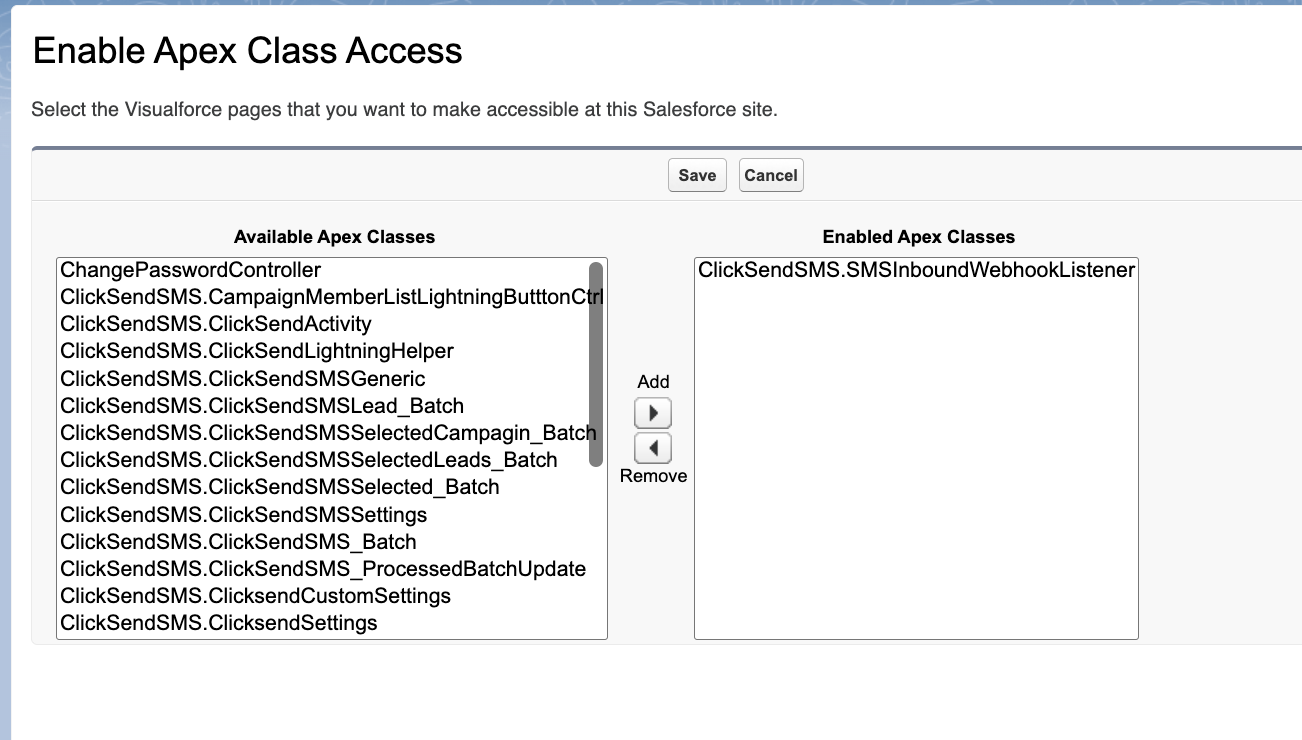
Find the Apex Class Name “ClickSendSMS.SMSInboundWebhookListener” in the “Available Apex Classes” and add to the “Enabled Apex Classes” box and save it.
Go to ClickSend settings and select site to use for inbound. The url will be automatically saved on your inbound rules and all incoming SMS will come to your Salesforce account mapped to each of your contacts.
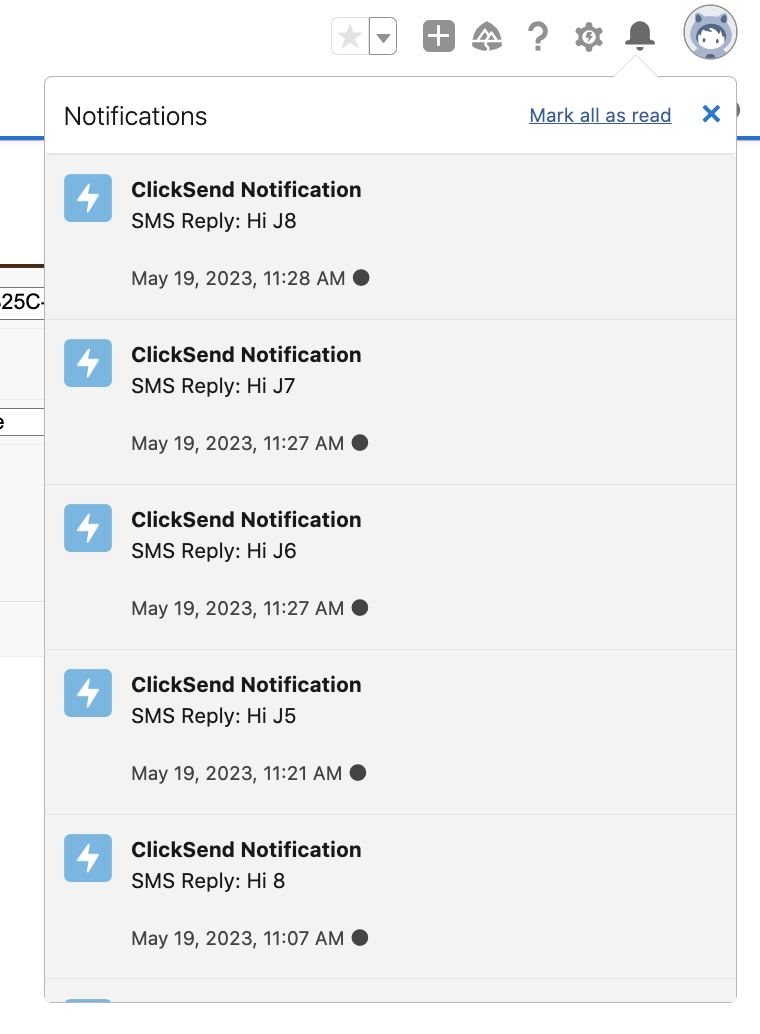
Notifications
The inbound SMS feature includes notification. It will show under notification bell at the top sight side of the platform. Each inbound SMS notification is mapped to the contact.
Troubleshoot
If you’re having problems, please check the following:
Check your Authentication. It should be using your ClickSend's username and API key.
Make sure you have credit in your balance. Check and top up here.
Change the local phone numbers to international format.
Assure that the Settings have selected the fields with phone numbers
FAQS
Can I send messages from a business name? - Yes, however some countries do not support business names. Find out which countries support sending via a business name here. - Note that your business name needs to be 11 characters or less, without spaces. - Note that business name does not support inbound SMS.
How do I add a business name as the sender of my messages? -Type in your 11 character business name under From Number field and Save.
Where can I get replies on my messages? - For every inbound SMS, a record is created under ClickSend SMS Logs added on each contact you have in Salesforce.